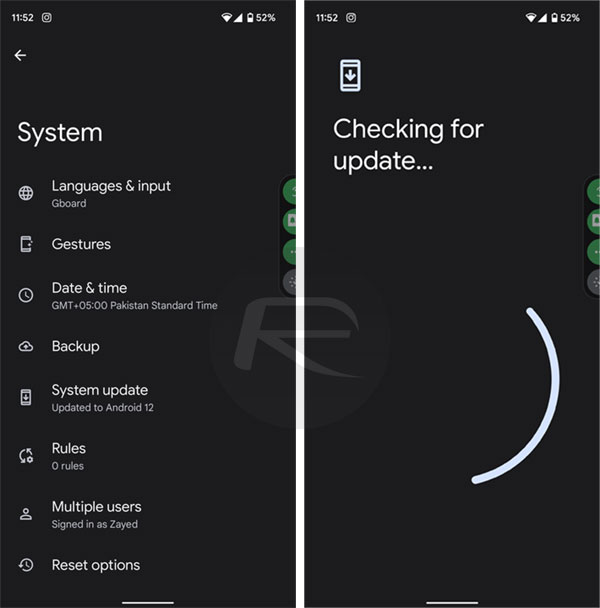
Here’s how to download and install Android 13 final on your Pixel 4/XL, Pixel 4a, Pixel 4a 5G, Pixel 5, Pixel 5a, Pixel 6/Pro and Pixel 6a.
Google has made its latest Android 13 update available to those who own one of a handful of Pixel devices and here’s how you go about installing it.

Android 13 isn’t going to be released for a little while yet but those who are eager to take it for a spin in early release form can do so, as long as they are using a compatible device.
Right now, those devices include:
- Pixel 4/XL
- Pixel 4a
- Pixel 4a 5G
- Pixel 5
- Pixel 5a
- Pixel 6/Pro
- Pixel 6a
If you’re using another device, you’re out of luck for now.
If you’re using one of the Pixel phones above, here’s how to get the update installed.
Step 1: Open the Settings app on your Pixel phone.
Step 2: Tap System followed by System Update. The update process should be pretty simple by following the on-screen steps from here on out.

If you need to install Android 13 manually for whatever reason, you can. But it’s more involved.
Step 1: Download the OTA file that corresponds to your Pixel device.
Step 2: Boot your Pixel into Recover mode by pressing the power button and volume down button. Select ADB sideload using the volume buttons to navigate.
Step 3: Connect your Pixel to a computer with the ADB tools installed.
Step 4: Enter the sideload command “adb sideload” on Windows and “./adb sideload” on a Mac.\
Step 5: Restart your phone once the installation has been completed.
You should now have Android 13 installed. Enjoy!
You may also like to check out:
- Jailbreak iOS 15.6 On iPhone And iPad Status Update
- Download: iOS 15.6 Final IPSW Links OTA Files And iPadOS 15.6 Out Now
- iOS 16 Beta Compatible And Supported iPhone, iPad, iPod touch Devices
- iOS 16 Beta 6 Download, Release Date: When Is Apple Expected To Seed It?
- Download: iOS 16 Beta 6 IPSW Links For iPhone And iPad Now Available
- iOS 16 Beta 6 Profile File Download Of OTA Update Without Dev Account Out, Get It Now
- Download iOS 16 Beta 6 IPSW Links And Install On iPhone 13, Pro, 12, Pro, 11, Pro, XS Max, X, XR, 8, Plus, iPad [Tutorial]
You can follow us on Twitter, or Instagram, and even like our Facebook page to keep yourself updated on all the latest from Microsoft, Google, Apple, and the Web.

