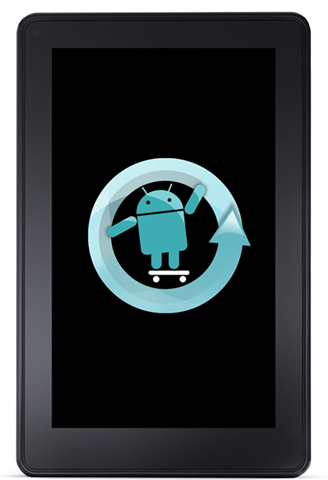
A few days ago, we talked about CyanogenMod 7 port for Kindle Fire. A young developer who goes by the name of JackpotClavin came up with it; he posted two photos which showed a pre-alpha build of CyanogenMod 7 running on the Kindle Fire but did not release the required files, that is until today when he updated the official thread over on XDA. Check out our step-by-step guide on how to flash CyanogenMod 7 on your Kindle Fire after the jump!

DISCLAIMER: Redmond Pie will not be held responsible if you lose data or your device gets damaged in the following of this guide. Proceed at your own risk.
Before you get started, you must understand that CyanogenMod 7 for Kindle Fire isn’t very stable yet. It would be recommended to wait until the ROM is properly tested and confirmed to be working before taking risks. It has been tested only for Kindle Fire Software Version 6.0 and 6.1.
Besides this, currently there is no way to revert back to stock firmware. You will basically lose all of the Kindle Fire’s integration with Amazon’s services. You will, of course, also void your warranty.
With that formality out of the way, let’s get down to business.
Step 1: Root your Kindle Fire.
Step 2: Download CyanogenMod 7 [MediaFire] and place it at the root of your Kindle Fire’s sdcard so that its address is /sdcard/update.zip (this is very important).
Similarly, download ClockworkMod Recovery [MediaFire] and place it to root of sdcard as well.
Step 3: Download log [MediaFire] and last_log [MediaFire] and place these under /cache/recovery as well as root of your sdcard (i.e. under /sdcard)
Use the following adb commands to place log/last_log to /cache/recovery:
adb shell
cd cache
mkdir recovery
cd /
cp /sdcard/log /cache/recovery/
cp /sdcard/last_log /cache/recovery/
Step 4: We will now flash ClockworkMod Recovery. Use the following commands in adb:
adb shell
cd cache
mkdir recovery
cd /
cp /sdcard/log /cache/recovery/
cp /sdcard/last_log /cache/recovery/
To reboot into recovery, type:
idme bootmode 0x5001
If it say “bootmode has written”, type “reboot” to, well, reboot!
Your Kindle Fire will now boot into ClockworkMod Recovery (CWM).
Step 5: Press Power button on your Kindle Fire so you can install update.zip from sdcard. /system, /data and /cache will be wiped automatically. JackpotClavin modified CWM so that it would work with the Kindle Fire’s lack of buttons, so basically you just have to press the Power button a bunch of times.
In one of the menus, it’ll look like you have to scroll down to Yes. Instead, you must press No but it will, as the developer says, “mimic you pressing Yes”.
Step 6: After flashing CyanogenMod 7, the developer suggests reflashing the stock recovery. Download the stock recovery [MediaFire] and use the following adb commands:
adb shell
mount sdcard
exit
Now, you must enter the correct path for where you’ve stored the stockrecovery.img file, so that your next adb command looks like this:
adb push <full path of file> /sbin/
Then,
dd if=/sbin/stockrecovery.img of=/dev/block/platform/mmci-omap-hs.1/by-name/recovery
Step 7: Wait for a minute and then type:
adb reboot
If you followed the steps correctly, your device will reboot into CyanogenMod 7. If you have any queries, check out the official thread over on XDA.
UPDATE: Here’s a video of it in action! (Thanks, Jeff!)
You can follow us on Twitter, add us to your circle on Google+ or like our Facebook page to keep yourself updated on all the latest from Microsoft, Google, Apple and the web.

