Here’s a step by step guide on how to force upgrade Windows 10 April 2018 Update manually on your PC right now without waiting for the rollout to complete.
Windows 10 users, unless you’ve been living under a rock, then you’re probably more than aware that Microsoft is in the process of rolling out the Windows 10 April 2018 Update. Updated version 1803 is making its way to compatible devices via Windows Update, but as you may be aware, depending on the type of device in question, and the location or region of that device, it may actually reach others first, and to you later.

If you aren’t the patient type, and want to manually force that update immediately without waiting, then you can do so right now using our guide below. Microsoft’s Windows 10 is currently accessible on over 500 million machines around the globe, and with the latest April 2018 Update version 1803 packing some major new changes and improvements to the OS, you can avoid being just another number when it comes to those who haven’t received the update as yet. So, without any further delay, here’s how to force upgrade your PC to get Windows 10 April 2018 Update right now without having to wait for Microsoft to roll it out in your region, to your PC .
Force Upgrade Windows 10 April 2018 Update Manually:
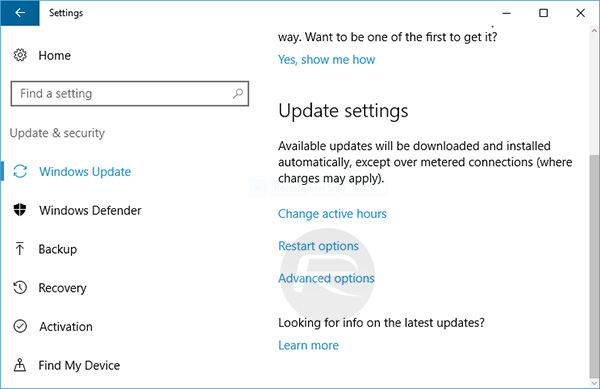
Step 1: On your computer in question, go to Settings > Update & Security > Windows Update and select Advanced options.
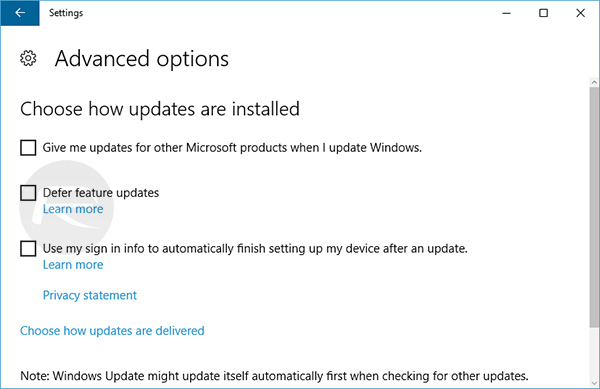
Step 2: Here, uncheck the Defer feature updates option.
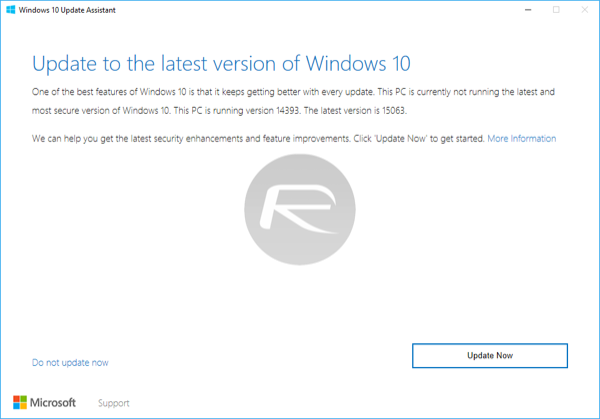
Step 3: Now download the Windows 10 Update Assistant from here.
Step 4: Once downloaded, run the downloaded tool and then click on Update Now.
Step 5: The tool will then run a compatibility check on the installed PC. Let it run through that process before clicking Next to allow it to start downloading the update.

Step 6: The tool should now begin downloading Windows 10 April 2018 Update.
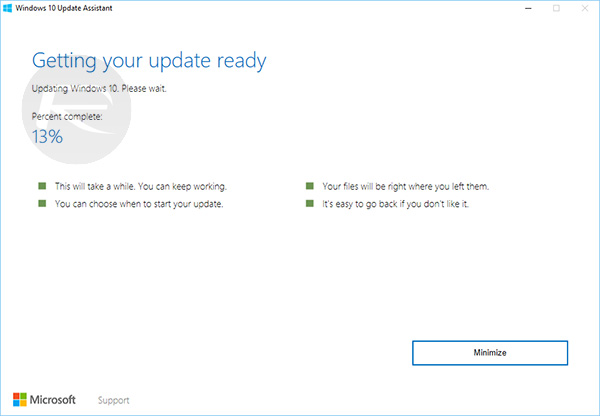
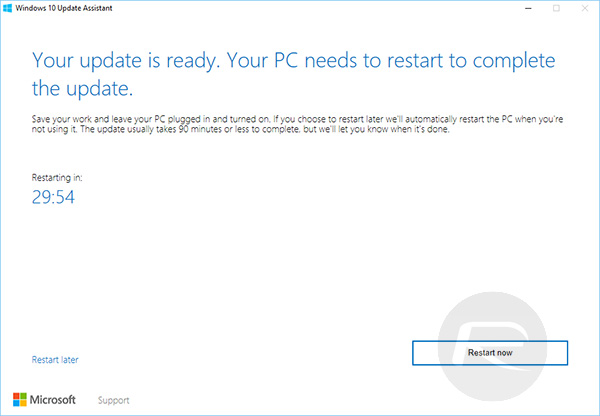
Step 7: When it has finished downloading, it will then automatically begin the updating process as seen in the screenshot below.
Step 8: When it has been finalized, click on the Restart Now button to reboot the computer.
Step 9: The restart will continue the process of installation. This could take a fair bit of time, and may actually result in the computer restarting automatically multiple times.

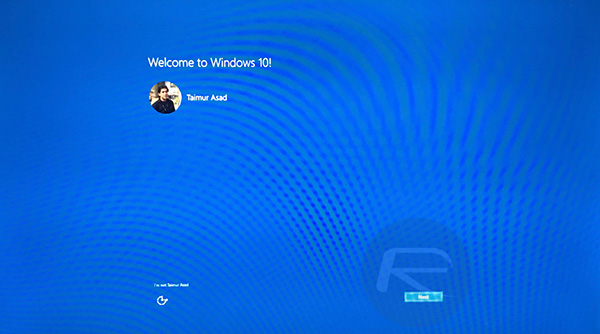
Step 10: Once installation is complete, you will get a screen similar to the one seen in the screenshot below. It’s then a case of following through the on-screen steps and finalizing the required settings that you want on your PC.
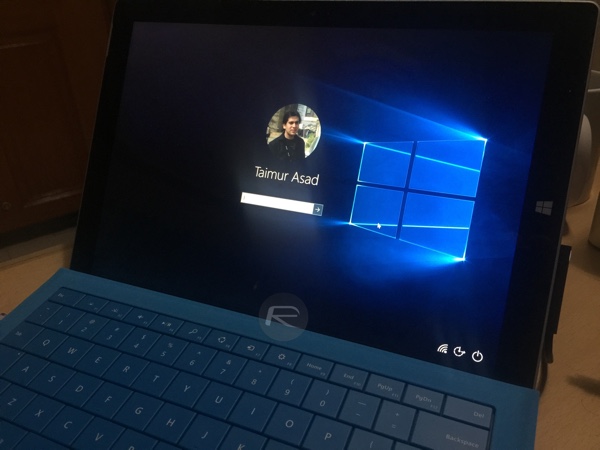
Step 11: Once those settings have been finalized, Windows will then greet you with the familiar looking Windows 10 login screen, meaning that the update has been successful and you can now enjoy everything that the Windows 10 April 2018 Update has to offer.
Of course, if you want to actually extend that excitement, then you can just sit and wait patiently for the Windows 10 April 2018 Update to come flooding through to your computer via Windows Update. But, where’s the fun in that, right? Enjoy the new Windows 10 experience.
You may also like to check out:
- Download Windows 10 April 2018 Update 1803 ISO
- How To Clean Install Windows 10 On Your PC The Right Way [Guide]
- Windows 10 Product Key And Activation: How To Find It And How It Works
- Download Windows 10 Pro ISO File Without Product Key From Microsoft
- How To Create Bootable Windows 10 USB Flash Drive [Guide]
You can follow us on Twitter, add us to your circle on Google+ or like our Facebook page to keep yourself updated on all the latest from Microsoft, Google, Apple and the Web.
