Learn how to safely and effectively downgrade from iOS 17 beta to iOS 16 using three different methods. Explore step-by-step instructions for a smooth transition and discover how to restore your backup afterward.
Apple’s iOS updates often bring exciting new features and improvements, but beta versions can sometimes lead to unexpected issues. If you’re facing challenges with iOS 17 beta and wish to revert to the stable iOS 16, this guide will walk you through the process. In this article, we’ll cover the preparations before downgrading, provide step-by-step instructions for three different methods to downgrade (including EaseUS iOS System Repair), and explain how to restore your backup after the downgrade.
Preparations Before Downgrading from iOS 17
Before you begin the downgrade process, it’s essential to make some preparations to ensure a smooth transition.
Backup Your Data: Ensure that you have a recent backup of your iPhone’s data to prevent data loss during the downgrade process.
Check Compatibility: Verify that your device is compatible with iOS 16, as not all devices that support iOS 17 may support the older version. Only the following iPhone and iPad models are compatible with iOS 16 version:
iPhones
- iPhone 14
- iPhone 13
- iPhone 12
- iPhone 11
- iPhone X
- iPhone 8
iPads
- iPad Pro (5th generation)
- iPad Pro (4th generation)
- iPad Pro (3rd generation)
- iPad Pro (2nd generation)
- iPad Pro (1st generation)
- iPad Air (5th generation)
- iPad Air (4th generation)
- iPad Air (3rd generation)
- iPad (9th generation)
- iPad (8th generation)
- iPad (7th generation)
- iPad (6th generation)
- iPad (5th generation)
- iPad mini (5th generation)
- iPad mini (6th generation)
Download iOS 16 IPSW: Download the iOS 16 IPSW file from a reliable source. This file will be used during the downgrade process. You can download latest iOS 16.6 final version IPSW file from here.
How to Downgrade from iOS 17
In this section, we’ll outline three methods to downgrade from iOS 17 beta to iOS 16.
Method 1: EaseUS iOS System Repair
EaseUS iOS System Repair is a powerful and user-friendly software designed to address a variety of iOS issues, including downgrading from beta versions to stable releases. This innovative tool offers a hassle-free solution to revert to previous iOS versions while preserving your data. With its intuitive interface and step-by-step guidance, EaseUS iOS System Repair makes the downgrading process accessible even to those with limited technical knowledge. Whether you’re facing compatibility issues, stability problems, or simply want to revert to a more reliable iOS version, EaseUS iOS System Repair provides a reliable and efficient way to ensure a smooth transition.
Here’s how you can use this tool to downgrade your iPhone or iPad from iOS 17 beta back to iOS 16 the easy way:
1. Download and install from here the EaseUS iOS System Repair on your computer.
2. Launch the software and connect your iPhone via USB.
3. Choose the “Repair Operating System” option and click “Fix Now.”
4. Select “Download” to get the iOS 16 firmware package.

5. Once downloaded, click “Repair Now” to begin the downgrade process.
6. Your device will reboot after the process is complete, and you’ll have successfully downgraded to iOS 16.
And that’s about it. EaseUS iOS System Repair should have easily let you downgrade your device from iOS 17 beta back to iOS 16.
Method 2: iTunes/Finder
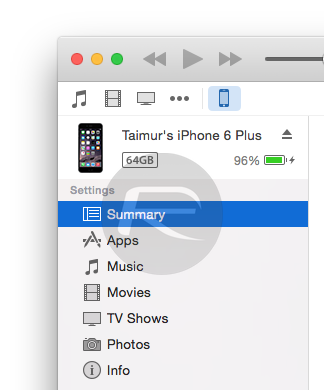
1. Connect your iPhone to your computer and open iTunes on Windows or Finder on Mac.
2. Select your device from side panel and go to the “Summary” tab.
3. Hold the Shift key (Windows) or Option key (Mac) and click “Restore iPhone.”
4. Locate and select the downloaded iOS 16 IPSW file.
5. iTunes/Finder will restore your device to iOS 16, and your device will reboot once the process is complete.
Method 3: Recovery Mode
1. Connect your iPhone to your computer and open iTunes or Finder.
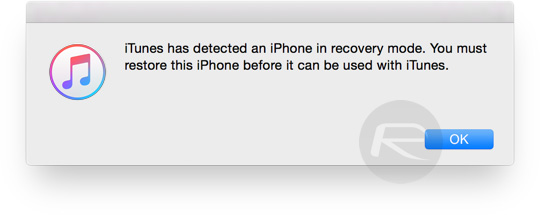
2. Put your device into recovery mode (different methods for different iPhone models).
3. iTunes/Finder will detect that your device is in recovery mode and offer the option to restore.
4. Hold the Shift key (Windows) or Option key (Mac) and click “Restore iPhone.”
5. Choose the downloaded iOS 16 IPSW file to initiate the downgrade process.
How to Restore Backup after Downgrading from iOS 17
After successfully downgrading, you’ll want to restore your data from the backup you made earlier.
1. Connect your iPhone to your computer and open iTunes/Finder.
2. Select your device and go to the “Summary” tab.
3. Click “Restore Backup” and choose the relevant backup file.
4. iTunes/Finder will restore your backup to your device.
Conclusion
Downgrading from iOS 17 beta to iOS 16 might seem daunting, but with the right preparations and methods, it’s entirely manageable. Whether you choose EaseUS iOS System Repair or the traditional iTunes/Finder and recovery mode methods, following the steps carefully will ensure a smooth transition. Remember to back up your data and verify compatibility before beginning the process. After downgrading, restoring your backup will bring back your familiar settings and data, allowing you to continue using your device without any hassles.
You may also like to check out:
- iOS 17 Beta 8 Download And Expected Release Date
- Jailbreak iOS 16.6 On iPhone And iPad Status Update [Latest]
- iOS 17 Beta Compatibility For Compatible iPhone Models
- iOS 17 Public Beta 1 Release Date Set For Later This Month Alongside iPadOS 17, macOS 14, tvOS 17
- Download: iOS 17 Beta 7, iPadOS 17 Beta 7 Released
- Download: iOS 16.6 Final IPSW Links, OTA Update As Well As iPadOS 16.6 Released
You can follow us on Twitter, or Instagram, and even like our Facebook page to keep yourself updated on all the latest from Microsoft, Google, Apple, and the Web.
