Here are tips to fix bad iOS 13 / 13.1 battery life issues and percentage drain problem on your compatible iPhone, iPad or iPod touch device.
Apple’s iOS 13 brings with it a wealth of improvements, and once you’re past the initial stage of playing with all the new hotness, you might find that your battery isn’t behaving as it should. That’s a problem that often crops up whether you’re using iPhone, iPad, or iPod touch.
Even though iOS 13 is the newest update in town, it isn’t without its problems. Battery life issues have befallen all big iOS updates and this one is no different. Thankfully, there are some things you can try if your device isn’t lasting as long as you think it should on a single charge and we’re going to cover them here.
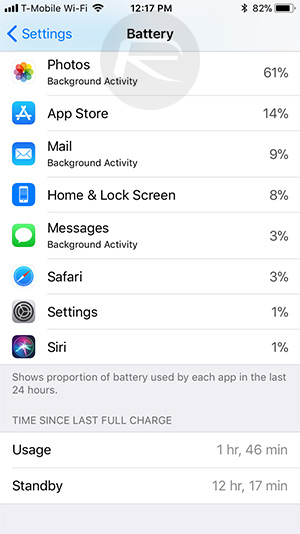
Check Which Apps Are Draining Battery
Some apps are just particularly bad at handling battery. Slack, Facebook, and Instagram are some culprits but you can see exactly what’s using your battery easily enough. Head to Settings > Battery and all of your most power hungry apps will be laid bare.
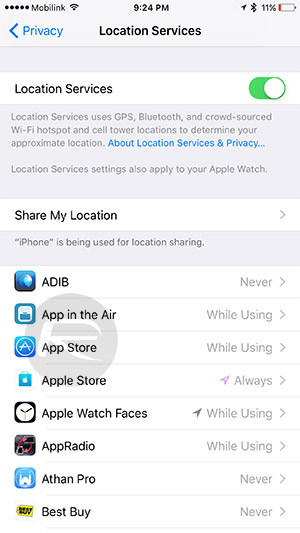
Check Location Services
You might be amazed at how often iOS can get itself into a state when it’s using your location. You can see which apps have access by going to Settings > Privacy > Location Services. If you see apps using your location that don’t need it, disable them. Or just disable them all and see if battery life improves.
Reduce Your Screen Brightness
We all like our screens to look great, but it kills battery. Try lowering your screen’s brightness or disabling Auto-Brightness.
Use Low Power Mode

It isn’t idea, but try enabling Low Power mode to see if that helps matters. You can flick the switch by going to Settings > Battery and then toggling Low Power Mode to on. Remember, though, this will turn off some features like push email and will also turn your display off more quickly.
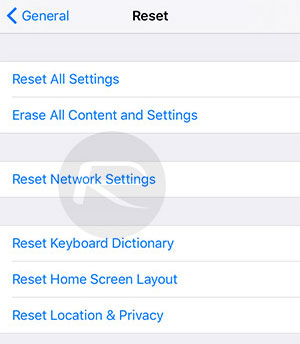
Reset All Settings
This isn’t a great option, but if you’re short on ideas then it’s better than nothing. head to Settings > General > Reset > Reset All Settings. That’s going to leave you with a lot of setting up to do afterwards, but if there’s a gremlin in the system it can often help.
Do A Full Restore
The nuclear option, restoring iOS completely, might be the only way to go. We’ve covered how to do that before so follow our guide. If you can, avoid using a backup when restoring, too. Nobody likes setting a device up from scratch, but if it works, it’s well worth the time.
Visit Apple
Some times, all you can do is ask Apple for help. Either visit an Apple Store or if that isn’t an option, call them. You can also chat online via the website or the Apple Support apps, too.
You may also like to check out:
- Best iPhone 11, 11 Pro Max Case With Slim, Wallet, Ultra-Thin Design? Here Are Our Top Picks [List]
- iPhone 11 / 11 Pro Max Screen Protector With Tempered Glass: Here Are The Best Ones
- Download iOS 13 GM IPSW Links & Install On iPhone XS Max, X, XR, 8, 7, Plus, 6s, iPad, iPod [Tutorial]
- iOS 13 / 13.1 Final Version Release Date Announced By Apple
- Download iOS 13 GM IPSW Links And OTA For iPhone
- iPhone 11 Vs iPhone 11 Pro Vs 11 Pro Max Vs XR / XS / Max [Specs Comparison]
- iOS 13.1 Beta 3 Profile File Download Link Without Dev Account, Here’s How
- Download iOS 13.1 Beta 3, iPadOS 13.1 Beta 3 IPSW Links, OTA Update For iPhone, iPad
- Jailbreak iOS 13 / 13.1 Status Update [Continuously Updated With Latest Info]
- iOS 13 GM Profile File Download Link For OTA Update, Why Is it Not Available?
You can follow us on Twitter, or Instagram, and even like our Facebook page to keep yourself updated on all the latest from Microsoft, Google, Apple, and the Web.
