There are some, albeit rare occasions where you need to connect a wireless device to the Internet but don’t have access to a WiFi access point but for some unfathomable reason do have access to an Ethernet connection. The times we can think of such a thing happening tend to revolve around hotel rooms, but we’re sure there are other situations that may arise. If you do find yourself in such a predicament though, there is a way around it so long as you have a Windows 10 machine handy.
Using Windows 10 – or indeed many versions of Windows, it’s just nice and easy now – you can create an Ad hoc WiFi network from your computer, allowing anything connected to that network to share the computer’s Internet connection. What you’re doing is effectively turning your computer into an expensive WiFi access point. Isn’t technology great?
We’re going to cover the setup method here, and it’s only really a case of a couple of commands followed by some mouse clicking. If you find yourself in need of a quick and dirty WiFi connection and have a Windows 10 machine and an Ethernet connection, then this may just save your day.
Here’s what you need to do.
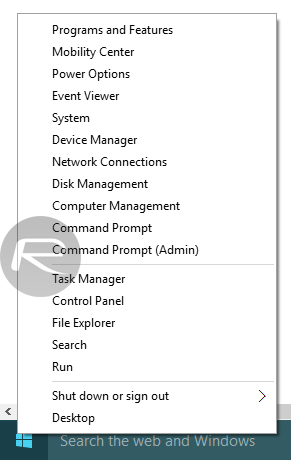
Step 1: Step 1: Right click on Start button or press the Windows + X keys to open the power user settings panel, and launch Command Prompt (Admin) to get started.
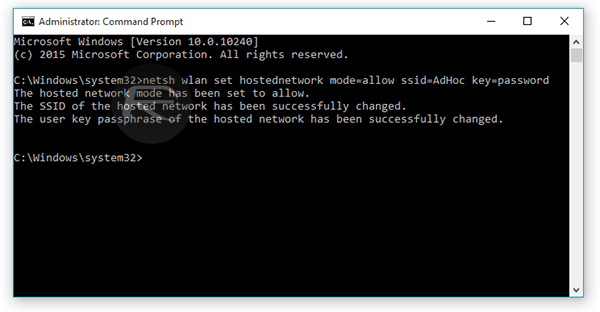
Step 2: Enter the following command, hitting the Enter / Return key at the end. To name your Ad hoc connection, simply replace “adhocname” with a name of your choice, and to change the password, replace “password” with one of your choice::
netsh wlan set hostednetwork mode=allow ssid=adhocname key=password
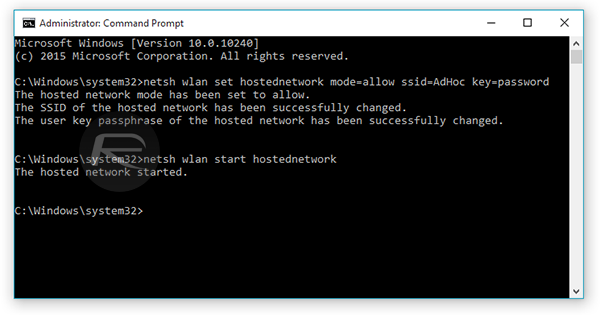
Step 3: Enter this one last command and hit the Enter / Return key:
netsh wlan start hostednetwork
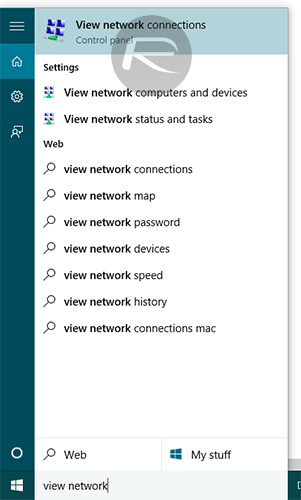
Step 4: Open the “View network connections” window, which can be found easily by searching for it using search bar in the Taskbar.
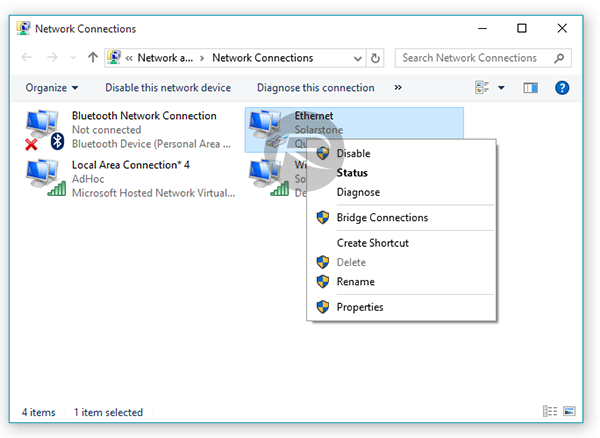
Step 5: Right-click your Ethernet connection and select Properties and switch to the Sharing tab.
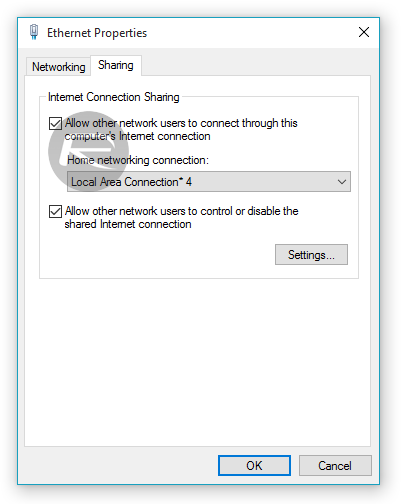
Step 6: Check the “Allow other network users to connect through this computer’s Internet connection” option, and choose the newly created WiFi connection from the drop down list located under “Home networking connection”.
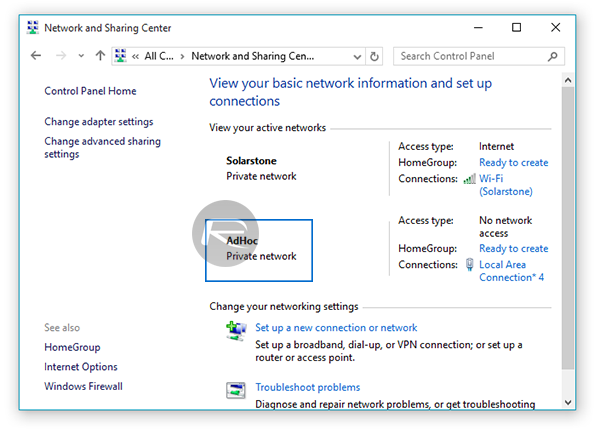
You can now connect to your newly created WiFi access point using whatever smartphone, tablet or computer you had in mind. You will also be able to see the new connection as active in Network and Sharing Center. See, that wasn’t too difficult now, was it?
If you wish to disable the hotspot at any given time, simply enter the following command in Command Prompt with Administrator privileges and hit Enter:
netsh wlan stop hostednetwork
You may also like to check out:
- Fix No Wi-Fi Available After Windows 10 Upgrade Issue, Here’s How
- Disable Wi-Fi Sense Password Sharing In Windows 10, Here’s How
You can follow us on Twitter, add us to your circle on Google+ or like our Facebook page to keep yourself updated on all the latest from Microsoft, Google, Apple and the web.
