So, now that Cydia Eraser has been updated to work with the latest jailbroken devices running iOS 9.3.3, we guess everyone is wanting to know how it works. In the event that a jailbreak needs to be quickly and efficiently removed from a device, but the user would still like to jailbreak in the future, and therefore remain on a compatible firmware, Cydia Eraser is an absolute god send.
Seasoned jailbreakers would be well aware of the purpose that Cydia Eraser – formerly known as Cydia Impactor – serves, but if you’re new to the jailbreaking scene, this handy little app allows you to revert back to the stock version of iOS that you were originally jailbroken on. We will be walking you through the simple steps to help you to get up and running with the latest version of Cydia Eraser.
Following through with these steps would means that the iOS 9.3.3 jailbreak will be entirely removed from the device. All files, folders and internal modifications will be reverted back to how Apple intended, and Cydia will be entirely removed. The good part of the whole experience is that it’s entirely simple and quick to do, but Cydia Eraser’s main purpose is to get you out of a sticky spot many of us of have often found ourselves in.
With Apple having released iOS 9.3.4, it’s only a matter of time before the company stops signing iOS 9.3.3, which would mean in case your iPhone or iPad runs into some severe software-related problem where you are in need of a restore from iTunes, you’re staring down the barrel of being forced to restore to iOS 9.3.4, losing the jailbreak in the process. Well, unless you use the latest Cydia Eraser which will enable you to bring the same firmware on the device back to stock-like state so that you can start from scratch again, and also have a firmware which is jailbreak friendly.
So without further ado, here’s what you need to do.
Step 1: Common sense dictates that in order to use a specific tool, you’re going to need to actually have that tool installed. With that in mind, Launch the Cydia app from your jailbroken device and navigate to the Search section.
Step 2: Search for Cydia Eraser and tap on it when it appears in the search results. No additional repositories will need to be added in order to access the package.
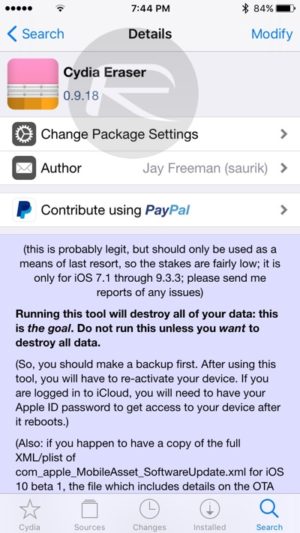
Step 3: Install Cydia Eraser like you would install any other Cydia tweak or package.
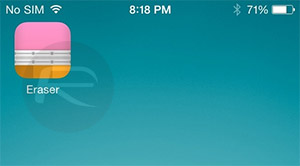
Step 4: Once done, you will now find a new app on the Home screen called “Eraser.” Launch it.
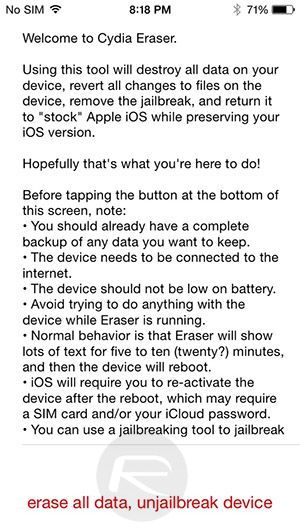
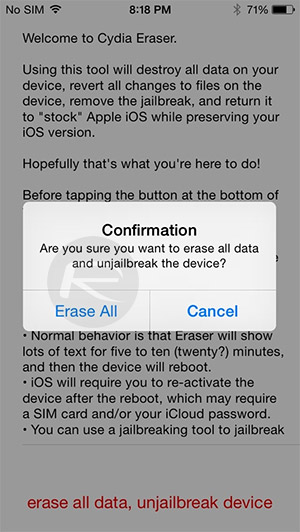
Step 5: The Cydia Eraser app will provide additional information about the functionality provided, such as informing users that it will “destroy all data on your device, revert all changes to files on the device, remove the jailbreak, and return it to stock Apple iOS while preserving your iOS version.” Of course, that is exactly what you want to do, so read the rest of the information and then tap on the “erase all data, unjailbreak device” button located at the bottom.
Step 6: When the confirmation prompt appears, tap on the Erase All option to continue.
Step 7: As part of the process, the jailbroken device will be forced to automatically reboot several times as Cydia Eraser goes about its business. Do not interrupt the process and make sure that you don’t manually reboot or restart the device.
When Cydia Eraser has finished working its magic, the device will boot back to the familiar looking Hello welcome screen that will allow you to run through the steps of setting up your iPhone or iPad from scratch, and even restore from a previous backup if necessary.
You may also like to check out:
- Jailbreak iOS 9.3.4 For iPhone And iPad [Status Update]
- Jailbreak iOS 9.3.3, 9.3.2, More With Pangu On iPhone And iPad [Updated]
- Fix For “provision.cpp” Cydia Impactor Error When Jailbreaking iOS 9.3.3
- Downgrade iOS 9.3.4 To iOS 9.3.3 And Jailbreak While Apple Is Still Signing The Firmware
- How To Remove / Uninstall iOS 9.3.3 Jailbreak From Your iPhone Or iPad The Right Way
You can follow us on Twitter, add us to your circle on Google+ or like our Facebook page to keep yourself updated on all the latest from Microsoft, Google, Apple and the Web.
