In Part 1, we learned how to use Resource Dictionary (WPF) in order to apply styles to UI element dynamically. Resource Dictionary uses XAML code which still is an unknown territory for most developers. So why not use only C# to create such animations? In this Part of the series we are going to learn how to create animations by using C# code. Today we are going to learn 3 simple animations:
a. Changing the width of the button dynamically using animations.
b. Changing button to different colors dynamically using animations.
c. Animating a button to fade in and out.
a. Changing the width of the button dynamically using animations.
Create a new project, name it anything you want. For this demo, I named my project as AnimateUsingCsharpDemo2. And named the root grid as MasterGrid and then added a Loaded event for our window.
Now open Window1.xaml.cs in code view.
1- First we’ll need to add a namespace in our C# code file.
using System.Windows.Media.Animation;
2- Now we will define three global instances of Storyboard since we are creating three different animations.
1: Storyboard myWidthAnimatedButtonStoryboard = new Storyboard();
2: Storyboard myColorAnimatedButtonStoryboard = new Storyboard();
3: Storyboard myFadingAnimatedRectangleStoryboard = new Storyboard();
3- Now we need to define our Window_Loaded() event. Here I have defined some parameters for our window.
1: this.Width = 320;
2: this.Title = "Dynamic Controls Creation (Part 2)";
Width is setting the width of our application window and title will set name to be displayed in the title bar of our window.
4- For scaling animation, I am creating a button instance below.
Button myWidthAnimatedButton = new Button();
5- Register the name with the page to which the button belongs.
1: myWidthAnimatedButton.Name = "myWidthAnimationButton";
2: this.RegisterName(myWidthAnimatedButton.Name, myWidthAnimatedButton);
7- Now set some properties of this button
1: myWidthAnimatedButton.Height = 30;
2: myWidthAnimatedButton.Width = 200;
3: myWidthAnimatedButton.HorizontalAlignment = HorizontalAlignment.Left;
4: myWidthAnimatedButton.Margin = new Thickness(0, -200, 0, 0);
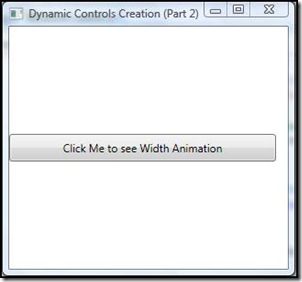
5: myWidthAnimatedButton.Content = "Click Me to see Width Animation";
8- Now we need to create double animation instance and then set its properties for our desired animation.
DoubleAnimation myDoubleAnimation = new DoubleAnimation();
[initializing animation object]
myDoubleAnimation.From = 200;
[initial width]
myDoubleAnimation.To = 300;
[final width]
myDoubleAnimation.Duration = new Duration(TimeSpan.FromMilliseconds(3000));
[setting duration for this animation]
myDoubleAnimation.AutoReverse = true;
[Auto Reverse property will simply creat mirroring animation]
9- We need a story board for above defined animation. Here we are using one of our globally declared storyboards.
1: myWidthAnimatedButtonStoryboard precisely).
2: myWidthAnimatedButtonStoryboard.Children.Add(myDoubleAnimation);
10- Configure the animation to target the button’s Width property.
1: Storyboard.SetTargetName(myDoubleAnimation, myWidthAnimatedButton.Name);
2: Storyboard.SetTargetProperty(myDoubleAnimation,
new PropertyPath(Button.WidthProperty));
11- Animate the button width when it’s clicked.
1: myWidthAnimatedButton.Click += new RoutedEventHandler(WidthAnimatedButton);
12- Now we will add our button to our MasterGrid.
1: MasterGrid.Children.Add(myWidthAnimatedButton);
13- Finally we need to define WidthAnimatedButton
1: void WidthAnimatedButton(object sender, RoutedEventArgs args)
2: {
3: myWidthAnimatedButtonStoryboard.Begin(this);
4: }
This one line will only initiate our story board for width animation when my Width Animation button will be clicked. With this step we are done with our first animation you can debug and execute the application to see the results. This button when clicked will scale itself from width=200 to width=300 and then back to width=200.
Ok, lets now quickly proceed to the other two animations:
b. Changing button to different colors dynamically using animations.
1- We need to repeat certain step like create a button and define its properties
1: Button myColorAnimatedButton = new Button();
2: this.RegisterName("myAnimatedBrush", myBackgroundBrush);
3: myColorAnimatedButton.Height = 30;
4: myColorAnimatedButton.Width = 200;
5: myColorAnimatedButton.Margin = new Thickness(0, -100, 0, 0);
6: myColorAnimatedButton.HorizontalAlignment = HorizontalAlignment.Left;
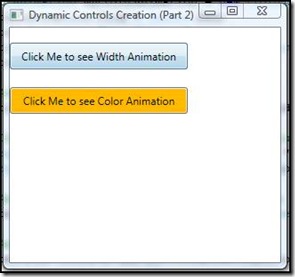
7: myColorAnimatedButton.Content = "Click Me to see Color Animation";
2- Here we have created an instance of SolidColorBrush and set its color to Red.
1: SolidColorBrush myBackgroundBrush = new SolidColorBrush();
2: myBackgroundBrush.Color = Colors.Red;
3- Now creating color Animation…
ColorAnimation myColorAnimation = new ColorAnimation();
[instance initialization]
myColorAnimation.From = Colors.Red;
[setting initial color]
myColorAnimation.To = Colors.Yellow;
[setting final color]
myColorAnimation.Duration = new Duration(TimeSpan.FromMilliseconds(7000));
[setting duration for this animation]
myColorAnimation.AutoReverse = true;
[Auto Reverse property will simply create mirroring animation]
4- Add animation to storyboard.
1: myColorAnimatedButtonStoryboard.Children.Add(myColorAnimation);
5- Configure the animation to target the brush’s Color property.
1: Storyboard.SetTargetName(myColorAnimation, "myAnimatedBrush");
2: Storyboard.SetTargetProperty(myColorAnimation, new
PropertyPath(SolidColorBrush.ColorProperty));
6- Animate the button’s background color when it’s clicked.
1: myColorAnimatedButton.Click += new RoutedEventHandler(ColorAnimatedButton);
7- Now simply add the button to the MasterGrid
1: MasterGrid.Children.Add(myColorAnimatedButton);
8- Finally we need to define ColorAnimatedButton
1: void ColorAnimatedButton(object sender, RoutedEventArgs args)
2: {
3: myColorAnimatedButtonStoryboard.Begin(this);
4: }
We are done with our second animation :). Debug and execute the application to see the results. This button when clicked will transform its background color from Red to Yellow and then back to Red.
c. Animating a button to fade in and out.
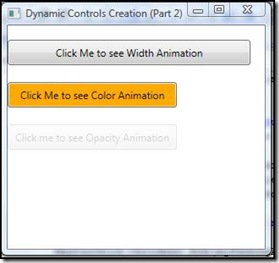
Finally lets take a look at the last part of this series which is the opacity animation or we can also call it the fading animation. This one is quite similar to scaling animation. The only difference between this one and the animation which we did in part "a" is that here we will define OpacityProperty in place of WidthProperty. So, lets just go through with this one quickly.
1- The code for creation, properties initialization, animation creation and storyboard allocation is as follows:
1: Button myFadingAnimatedButton = new Button();
2: myFadingAnimatedButton.Name = "myFadingAnimatedButton";
3:
4: this.RegisterName(myFadingAnimatedButton.Name, myFadingAnimatedButton);
5: myFadingAnimatedButton.Width = 200;
6: myFadingAnimatedButton.Height = 30;
7: myFadingAnimatedButton.Margin = new Thickness(0, 0, 0, 0);
8: myFadingAnimatedButton.HorizontalAlignment = HorizontalAlignment.Left;
9: myFadingAnimatedButton.Content = "Click me to see Opacity Animation";
10:
11: DoubleAnimation myDoubleAnimation1 = new DoubleAnimation();
12: myDoubleAnimation1.From = 1.0;
13: myDoubleAnimation1.To = 0.0;
14: myDoubleAnimation1.Duration = new Duration(TimeSpan.FromSeconds(1));
15: myDoubleAnimation1.AutoReverse = true;
16:
17: myFadingAnimatedStoryboard.Children.Add(myDoubleAnimation1);
18:
19: Storyboard.SetTargetName(myDoubleAnimation1, myFadingAnimatedButton.Name);
20: Storyboard.SetTargetProperty(myDoubleAnimation1, new
PropertyPath(Button.OpacityProperty));
[Here is the change, Instead of using Button.WidthProperty we are now using Button.OpacityProperty]
2- Event Initialization and adding button to the MasterGrid
1: myFadingAnimatedButton.Click += new RoutedEventHandler(FadingAnimatedButton);
2: MasterGrid.Children.Add(myFadingAnimatedButton);
3- Finally define FadingAnimatedButton
1: void FadingAnimatedButton(object sender, RoutedEventArgs args)
2: {
3: myFadingAnimatedStoryboard.Begin(this);
4: }
And we are done… Debug and execute the application to see the results.
Conclusion: Compare the size of the executable file which we made in Part 1 to the executable file which we have made in Part 2. Interestingly, you will notice that the size of Part 2 application with more animation is still less then the one in Part 1. So what we have learned today is that animations done using XAML code always increases the size of our application in comparison with animations done with the C# code.
Download Source Code: Enjoy working with WPF applications and stay connected for Part 3. Happy coding!! ![]()
