Here’s how to download and install iCleaner Pro for iOS 10 on iPhone or iPad. No jailbreak is required for this to work.
The number of tweaks once made popular for being accessible via Cydia for jailbroken iOS devices, but that can now be loaded onto an iPhone or iPad running a stock version of iOS outside of the App Store, is rapidly growing. This time around we’re going to take a look at how to download and sideload the fantastic iCleaner Pro package onto a non-jailbroken iOS device running iOS 10.
For those that may not be familiar with this tweak from the world of jailbreaking, iCleaner Pro is essentially an app that is built to rip through temporary caches and directories on the device’s file structure and cleanup any data or files that are stored by the system, but that aren’t actually needed.
Believe it or not, Apple’s devices actually cling onto a ton of files in various locations that aren’t necessarily needed, making it a must-have tool, especially for those with 16GB iPhones. Follow the steps below on how to not only download and install iCleaner Pro on iOS 10.0.x-10.2 devices, but also on how to use it to free up tons of space on your iPhone or iPad.
Step 1: First and foremost, you’re going to need to download the necessary iCleaner Pro IPA file for iOS 10. You can get it from here.
Step 2: Now that the file has downloaded to your machine, you can follow one of our previous, highly detailed, guides on how to get that IPA file onto your device using either Xcode or Impactor.
- Install iCleaner Pro using Xcode: How To Sideload iOS Apps Without Jailbreak Using Xcode 7
- Install iCleaner Pro using Cydia Impactor: Sideload iOS Apps On Windows, Mac With Cydia Impactor Without Jailbreak, Here’s How
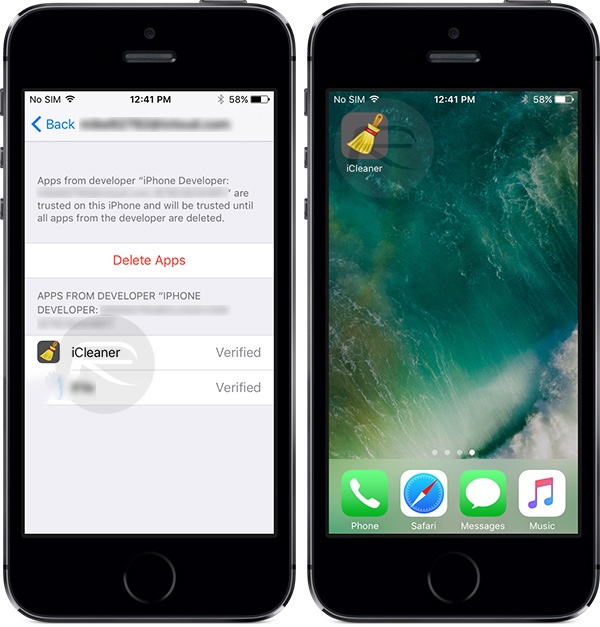
Step 3: Once installed. Simply launch Settings.app on your device, and navigate to General > Profile & Device Management > [name of the developer]. On some iOS versions, this would be General > Profile(s) & Device Management or General > Device Management. When the profile is presented, tap on Trust and then Trust again to ensure that the system trusts the certificate used to sign the app and allows it to run.
Step 4: Now that iCleaner Pro is installed, you can actually launch it and put it to good use and free up tons of space on the device. To get started, from the main screen, tick the Allow temporary files cleanup option. This will prompt a “Notice” message as shown in the screenshot below, tap on Confirm to continue.
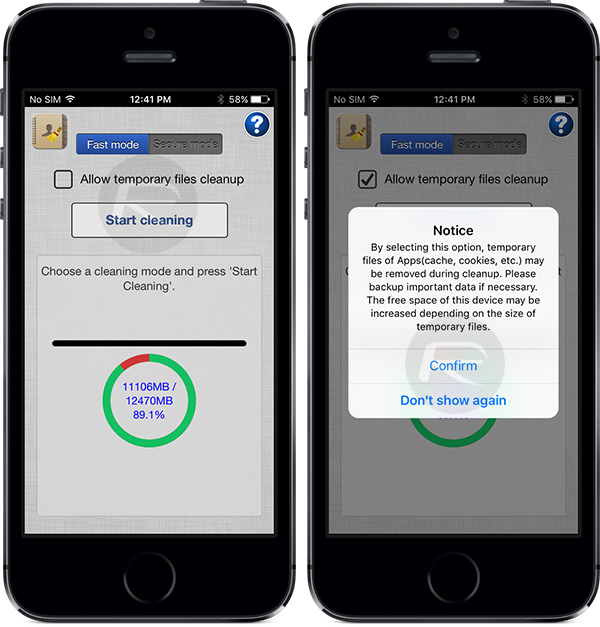
Step 5: Now tap on Start cleaning button to begin the actual cleanup process. An alert will popup on the display titled “Fast mode”. Tap Continue to proceed.
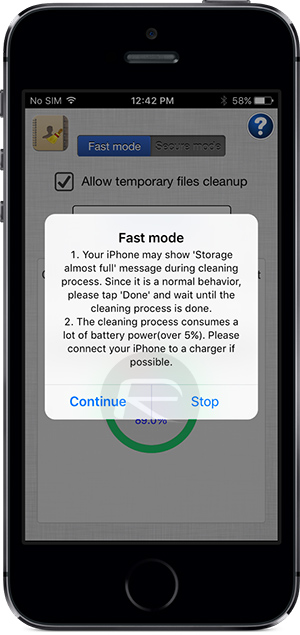
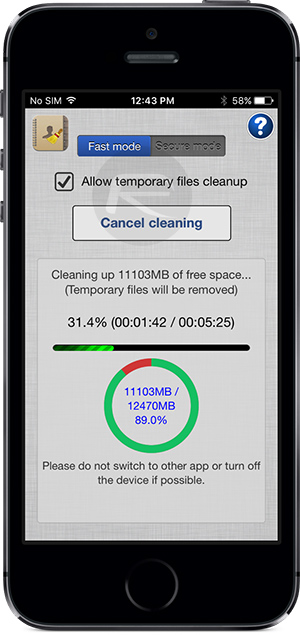
Step 6: The iCleaner Pro app will then begin the cleanup process. It will show an interface with a progress bar on the process. The cleanup process is actually very heavy on the device’s battery, so if possible, have it attached to power.
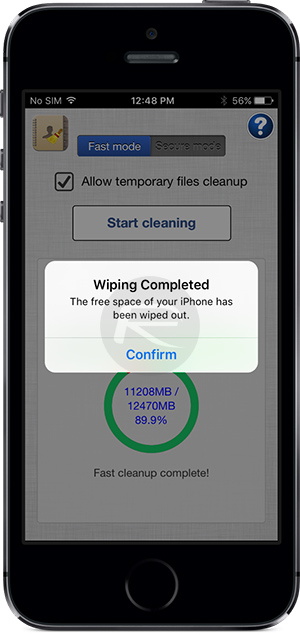
Step 7: After around 5 minutes or so, when the process is complete, you’ll get a Wiping Completed alert. Tap Confirm to dismiss and continue.
Once done, you should now find that a significant amount of free space has been generated on the device. Head over to the storage section in the Settings.app to see just how much space has been generated, and you may be surprised.
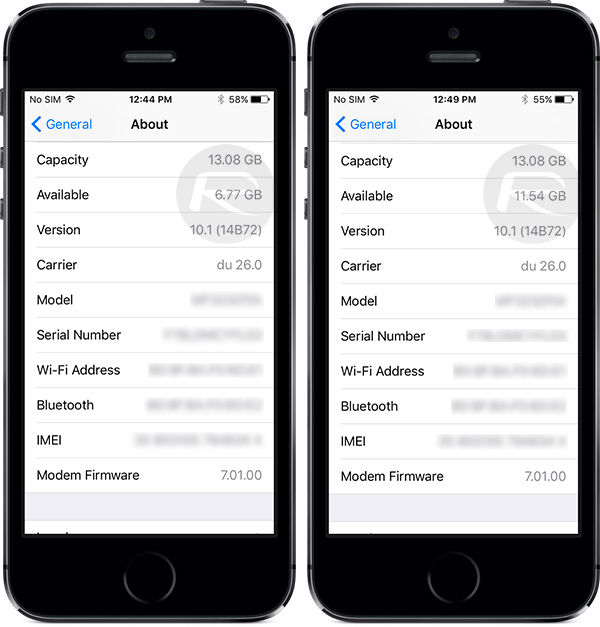
Before and after running iCleaner Pro on an iPhone running iOS 10.1
As can be seen in the screenshot above, on a 16GB iPhone running iOS 10.1, iCleaner Pro helped free up around 5GB of space. That is HUGE.
Tried iCleaner Pro? Let us know how much it helped free up storage space on your device in the comments below!
You may also like to check out:
- Get NDS4iOS Nintendo Emulator On iOS 10 [No Jailbreak Required]
- iOS 10 Storage Full? Free Up GBs Of Space With This Trick Without Jailbreak
- Jailbreak iOS 10 / 10.1.1 / 10.0.2 / 10.2 For iPhone, iPad, iPod touch [Latest Status Update]
- Download iOS 10, 10.1.1, 10.2, 10.0.2 Links & Install On iPhone 7, 6s, 6, Plus, SE, 5s, 5c, 5, iPad, iPod [Tutorial]
You can follow us on Twitter, add us to your circle on Google+ or like our Facebook page to keep yourself updated on all the latest from Microsoft, Google, Apple and the Web.
