WiFi issues on iOS seem like they’ve been a part of the iOS cycle forever now. As more and more people hop onto the iOS 9 bandwagon, news is dropping in that adopters are experiencing deteriorated WiFi performance on their devices since the update. There’s no official fix for this yet, but there are some tips that could help alleviate these issues.
So without wasting anymore time, lets jump to business!
Reboot your iOS device, modem and router
One of the foremost procedure when experiencing WiFi issues on your iPhone or iPad, is to reboot the device, and if that doesn’t work out, you should try and reboot your modem and connected routers. This may sound like a simplistic approach, but it does fix the issue in most cases.
Forget WiFi Network
If rebooting your iDevice and modem/router does not fix the issue(s), you can try forcing the device to forget the connected WiFi network. To do this, simply launch the Settings app and navigate to Wi-Fi and tap on the ‘i’ button located next to the connected network. Hit the Forget This Network button, and you’re good to go.
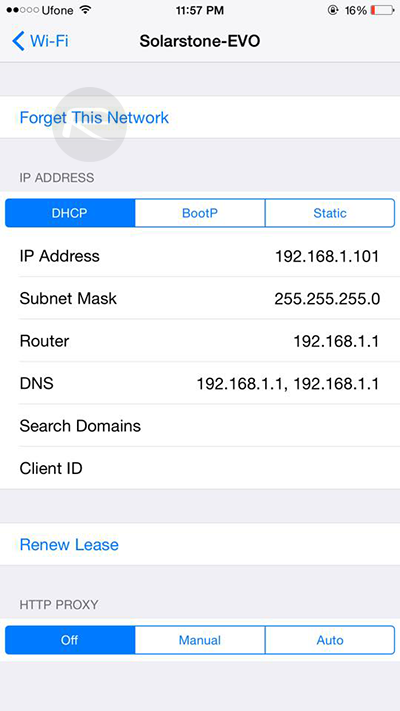
Now try and reconnect to the network once again to see if this fixes your problem.
Reset Network Settings
If the above mentioned steps are not leading to much success, you can try and reset the full network settings on your device. However you should know that doing so, “will clear your current cellular and Wi-Fi network settings, including saved networks, Wi-Fi passwords, and VPN settings”. If that is OK with you, launch the Settings app and navigate to General > Reset > Reset Network Settings.

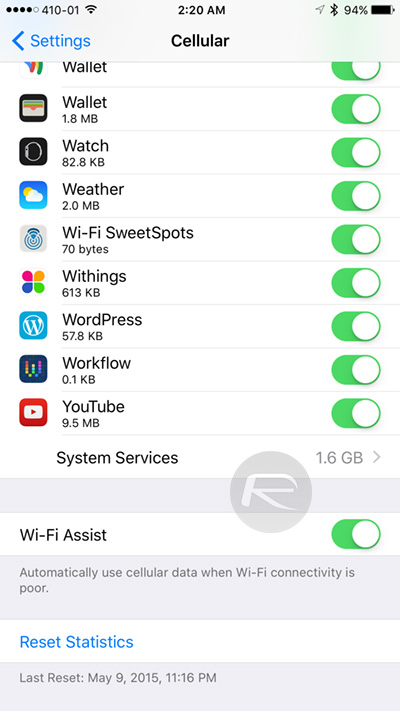
Toggle Wi-Fi Assist
iOS 9 features a new Wi-Fi Assist option that basically switches to your Cellular connection automatically whenever it detects problematic WiFi connection. Toggle this option to on and then off from Settings > Cellular > Wi-Fi Assist to see if this fixes the problem. Your mileage may vary with this. You can learn more about this feature here: Why And How To Enable iOS 9 WiFi Assist Feature On iPhone.
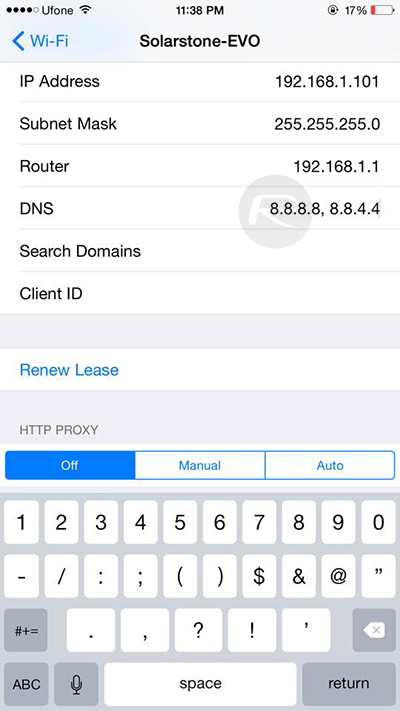
Use OpenDNS or Google DNS
In certain situation when your Internet is too slow, changing your ISP fetched DNS server to an OpenDNS or Google DNS can fix that issue, just like on a computer. To do this, simply tap the ‘i’ button next to your connected WiFi network, and tap the number appearing next to DNS. Here, you can enter a Primary DNS and Secondary DNS, both separated by a comma. Once entered, simply exit settings and take Safari for a spin.
Google DNS: 8.8.8.8, 8.8.4.4
OpenDNS: 208.67.222.123, 208.67.220.123
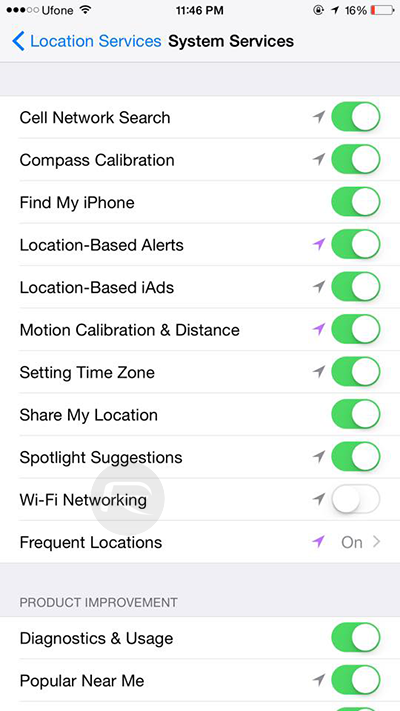
Disable Location Services For Wi-Fi Networking
Some users have reported that disabling Wi-Fi Networking in Location Services has done the trick for them. To do this, launch the Settings app and navigate to Privacy > Location Services > System Services, and disable Wi-Fi Networking. Reboot your iPhone.
Clean install iOS 9 using iTunes
If you updated to iOS 9 via OTA update, chances are that doing a clean install of iOS 9 using iTunes will fix WiFi and any other issue that you maybe having on your device. You can follow the instructions on it here: Download iOS 9 Final And Install On iPhone 6, 6 Plus, 5s, 5c, 5, 4S, iPad, iPod touch [Tutorial].
Downgrade to iOS 8.4.1
Luckily you can still downgrade back to the trusty iOS 8.4.1 while Apple is still signing it. If you wish to do just that, we have a comprehensive guide on how to do it here: Downgrade iOS 9 To iOS 8.4.1, Here’s How [Guide].
You may also like to check out:
- Tips To Fix iOS 9 Battery Life Issues On iPhone And iPad
- Tips To Fix iOS 9 Lag And Slow Performance On Your iPhone Or iPad
- iOS 9 Jailbreak Status Update For iPhone And iPad
You can follow us on Twitter, add us to your circle on Google+ or like our Facebook page to keep yourself updated on all the latest from Microsoft, Google, Apple and the Web.
