Here’s how to transfer iPhone photos to computer the ways way using iMobie AnyTrans software, complete with tutorial.
Have you looked at your iPhone Photos app recently and taken stock at just how many photographs you have on there? It’s so incredibly easy to take photographs with your iPhone that you end up amassing tons and tons of images in a relatively short period of time. That’s why you need to take stock every now and then and take them from your iPhone and move them across to your PC or Mac.

What good reasons are there for taking the photographs from your iPhone to a computer, you may ask? Well, first of all, you may want to free up some space!
If you were to investigate the storage on your device then you may be shocked to learn that your photographs take up a whole load of space. If you don’t push your photographs to cloud-based storage, then clearing them up from your device makes perfect sense.
If you take your photography seriously, then you may also want to edit and annotate those photographs to get the very best out of then. It is possible to do that on the device itself but it’s also easier to do it on a PC or Mac using a professional editing tool designed for desktop. All very good reasons to move from the iPhone to the computer. So, with that in mind, what is AnyTrans and why should you care?
The Why: Why Should You Use AnyTrans?
A single tool: iPhone users are typically used to have multiple tools in order to achieve different things. With AnyTrans, you should find that you have one tool that allows you to connect your device to your PC or Mac and have access to a slew of capabilities. They even have a online tool for converting HEIC photos to JPG should you need that!
No account credentials needed: This isn’t one of those tools that are going to put a wall up in front of your face unless you give it your Apple ID and password, or other account credentials. Download and use it. Simple as that.
Excellent organization: One of the great things about this tool is that it will let you get access to your photos extremely quickly and efficiently but will also organize them correctly by categories in a way that makes sense.
The How: How to Efficiently Transfer Photographs From iPhone to Mac/PC Using AnyTrans
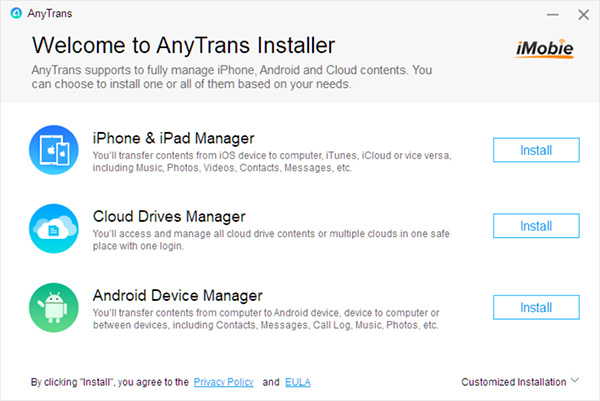
Step 1: This likely goes without saying but first and foremost you are going to need to grab and download AnyTrans for your PC or Mac. This is an entirely free-of-charge download, so fill your boots on any PC or Mac.

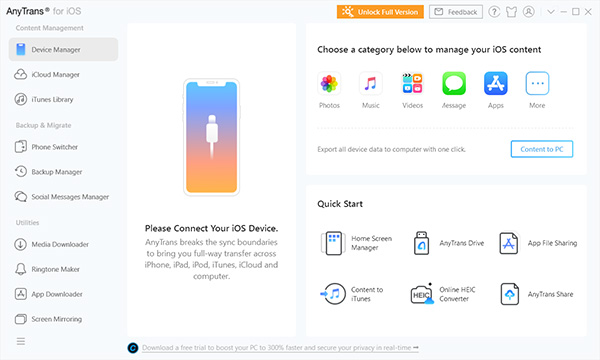
Step 2: With AnyTrans installed, connect the iPhone in question to your PC or Mac using the necessary USB cable. Once done, launch the AnyTrans software.
Step 3: You will see a section titled “Choose a category below to manage your iOS content.” Make sure that Photos is selected and then go through and select all of the photographs that you want to send from the connected iPhone to the PC or Mac.

Step 4: Once they have been selected, choose the ‘Transfer to PC‘ or ‘Send to Mac‘ option. As a secondary method, you could also select the ‘Content to PC‘ option and then select all of the photographs that you want to send before selecting the ‘Next‘ option.
Step 5: Sit back and enjoy the photos on your device on choice!
Alternatively, you can also check out the official guide by iMobie itself on how to go about transferring photos from your iPhone to computer here.
Disclosure: This is a sponsored post but we don’t get any commission from sales made on iMobie AnyTrans.
You may also like to check out:
- Best Cydia Repos And Sources For iOS 13.5 Jailbreak Unc0ver
- iOS 13.5 Jailbreak Tweaks Compatible With Unc0ver 5.0.x [List]
- Jailbreak iOS 13.5 On iPhone 11, Pro Max, SE, iPad Pro, More Using Unc0ver 5.0.0 [Tutorial]
- iPhone SE 2 2020 Screen Protector: Here Are The Best You Can Buy Today [List]
- iPhone SE 2 2020 Case: Here Are The Best Ones You Can Get Today [List]
- Kodi 18.7 IPA APK Download For iOS 13 / iPadOS 13, Android Released
- Run Multiple 2 WhatsApp Accounts Number On 1 iPhone The Right Way, Here’s How
- Download: iOS 13.5 Final IPSW Links, OTA Update Released Along With iPadOS 13.5
- iOS 13.5 Jailbreak Unc0ver 5.0.0 IPA Download Is Out
- Jailbreak: Downgrade iOS 13.5 To iOS 13.4.1 For Checkra1n Jailbreak, Here’s How
- Apple Watch ECG App Hack: Enable Outside US In Unsupported Country On Series 5 & 4 Without Jailbreak
You can follow us on Twitter, or Instagram, and even like our Facebook page to keep yourself updated on all the latest from Microsoft, Google, Apple, and the Web.

