Is No – Name Kodi addon or repo not working for you? Here’s how you can install it to your Kodi installations running the latest version of the open-source media player software correctly.
This process should work across all modern versions of Kodi regardless of the hardware or platform it is installed on.

If you are a Kodi user who loves nothing more than being able to consume movies and TV shows with minimal fuss and absolute ease, then the No – Name Kodi add-on is something that you are going to want to add to your arsenal. Let’s dive right in and take a look at the installation process.
Enable Unknown Sources
Step 1: In order to get a new source on the Kodi installation, we need to make sure that it’s primed and ready for this. Launch Kodi to the Home screen and select the Settings icon to get into System settings. Select Add-ons.
Step 2: Within Add-ons, look for the option titled Unknown sources. This has a toggle switch next to it. Make sure that the toggle is switched into the On position.
Install No-Name Kodi Add-on
Step 1: Get yourself onto the Kodi Home screen and select the ‘System Settings’ cog icon. You will then need to select the File manager option and then Add Source.
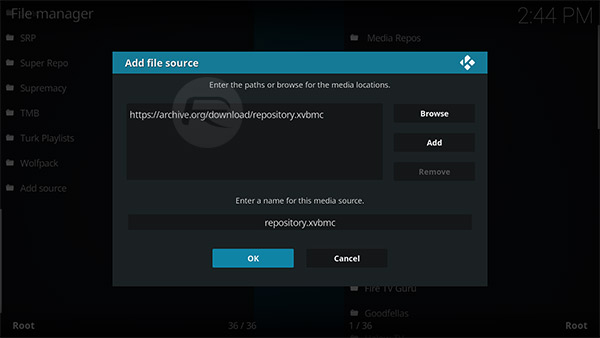
Step 2: Click into the text field which already has the <None> placeholder text in it. Enter the following URL exactly as it appears here: https://archive.org/download/repository.xvbmc
Select a name for the source in the text field underneath. We are going to give this the name repository.xvbmc. Select OK to exit.
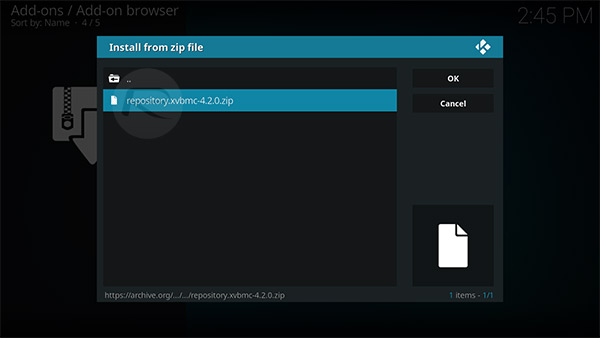
Step 3: Now, Head back to the Kodi Home screen and select the Add-ons option. Choose the icon which looks like a small box and then choose the Install from zip file option. Select repository.xvbmc, then repository.xvbmc-4.2.0.zip to install it.
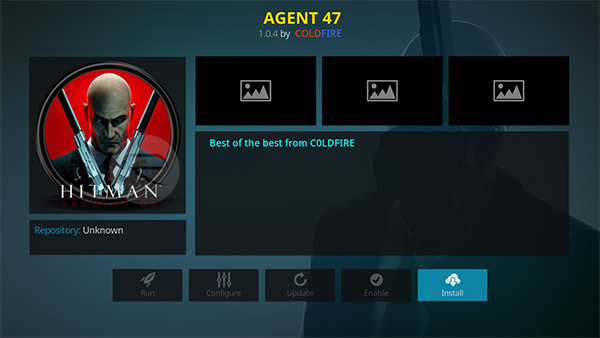
Step 4: Now take a step back, select Install from repository, locate the XvBMC (Add-ons) REPOsitory that we added earlier and then select Add-on repository > AGENT 47 and hit the Install button.
Step 5: Wait for Kodi to give you a successful installation notice. Now once again choose the Install from repository option. Select AGENT 47 > Video Add-ons.
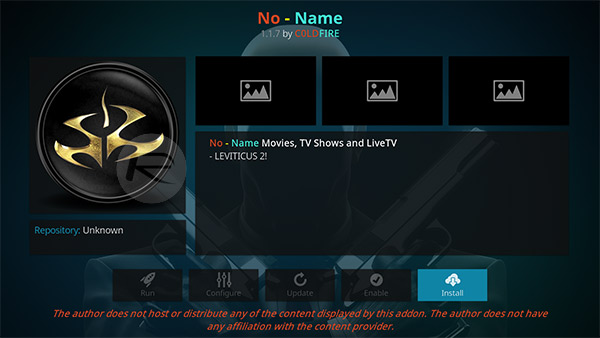
Step 6: Locate and select the No – Name add-on. This will give you a dedicated page about the add-on. Once you are happy, select the Install option to let Kodi go to work. You will, once again, be given a notification about it being successfully installed.
Reap the benefits and enjoy your viewing!
You may also like to check out:
- Jailbreak iOS 11.2.5 Update: SEP On Latest Firmware Compatible With 11.1.2 For Downgrade Purposes
- Enable iPhone FaceTime App In UAE / Dubai Without Jailbreak, Here’s How
- Kodi Web Interface Not Working? Here’s How To Enable It The Right Way
- Download iOS 11.3 Beta 1 IPSW Links, OTA Update Featuring New Animoji, iMessage Business, More
- Download iOS 11.2.5 Final IPSW Links, OTA Update For Your iPhone, iPad, iPod touch
- Downgrade iOS 11.2.5 To 11.1.2 For Jailbreak Purposes, Is It Possible?
- Jailbreak iOS 11.2.5 / 11.2.2 / 11.2.1 On iPhone And iPad [Status Update]
- Jailbreak iOS 11 / 11.1.2 On iPhone X, 8, 7, iPad Using LiberiOS [Updated]
You can follow us on Twitter, add us to your circle on Google+ or like our Facebook page to keep yourself updated on all the latest from Microsoft, Google, Apple and the Web.
