Here’s how to install PlayStation and Nintendo 64 (N64) emulator on iOS 11 iPhone or iPad without computer. No jailbreak is required for this to work.
This is one of those step-by-step processes that we just need to dive into without wasting any time. So, with that in mind, let’s jump right in and take a look at the installation steps.
Step 1: First up, head into iOS App Store on your device and search for ZipApp Free. This is an unarchiving app, and can be found on the App Store for free.
Step 2: You will also need the stock iOS 11 Files app. If this is on your device already, then great. If you have deleted it as part of a first-party app cleanse, then use the App Store to re-download it.
Step 3: Next up, launch Safari on your iOS device and head to appvalley.vip/app and search for Provenance in the search bar. Install Provenance to your device.
Step 4: Launch Provenance on your device, wait for it to load and then close it to the Home screen with Provenance still running in the background.
Step 5: You now need to download the correct BIOS for PlayStation. A quick search should do the trick for this! You will need the BIOS for following models: SCPH-5500, SCPH-5501, and SCPH-5502.
Step 6: When downloading the BIOS on device itself, make sure you select the Copy to ZipApp Free app option in Mobile Safari. Also make sure that you select No when asked to unarchive the file.
Step 7: Once downloaded, select the “i” icon next to each one and select the Rename option. Make sure that each file is renamed to all lowercase letters. So, as an example, SCPH-5500.BIN should be renamed to scph5500.bin. Do this for all three files.
Step 8: Now, in the same interface, hold down on each file individually until the contextual menu appears. Select “Open In…” and then select the Copy to Provenance option. Do this for each of the three files on a one-by-one basis.
Step 9: Close the Provenance once again, ensuring that it’s still running, and open the Files app. Select the On my iPhone option and then the Provenance folder. You should notice that you have an array of files and folders in here. Swipe down on the interface until you see the “+” icon in top-left and use this to create a new folder. Call this folder com.provenance.psx.
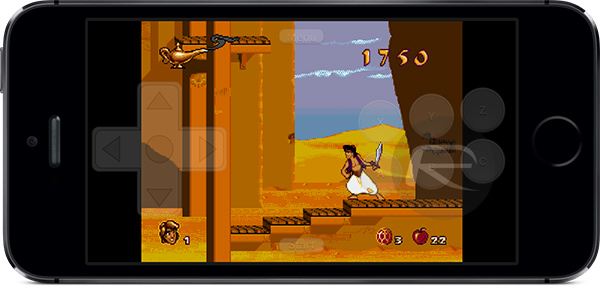
Where games and ROMs are concerned, we aren’t going to go through the process of getting these installed to your device, but suffice to say that it shouldn’t be hard to find a ROMs site that caters to PlayStation and N64. When installing an N64 ROM, make sure that you select Open in Provenance and the emulator will automatically create the necessary folder, just like the one we created above, which is where all PS ROMs will need to live. Also, when retrieving PlayStation ROMs, make sure that you get the ones with “U” in its naming, so NTSC-U, for example.
And there you have it, you should be up and running with an emulation experience on the device, free-of-charge, to play N64 and PlayStation games.
(source: DinoZambas2 [YouTube]
You may also like to check out:
- PUBG Mobile 0.6.3 APK Beta Update Rolls Out Featuring FPS Mode And More In China
- PUBG Mobile 0.5.0 Patch Notes Released In Full For English Global Version
- PUBG Mobile 0.5.0 APK Download, iOS Update Out As Season 2 Begins [English Version]
- iOS 11.4 Beta 5 Release Notes And Changes: What’s New In This Release?
- Download iOS 11.4 Beta 5 IPSW Links And OTA Update [Testers Only]
- Jailbreak iOS 11.3.1 Update: Details On Exploiting iBoot Released Which Could Lead To Untether On Older Firmwares
- Jailbreak iOS 11.3 / 11.3.1 / 11.2.6 On iPhone And iPad [Status Update]
- Download iOS 11.3.1 IPSW Links, OTA Update With Fix For Third-Party Screen Repair Issue
You can follow us on Twitter, add us to your circle on Google+ or like our Facebook page to keep yourself updated on all the latest from Microsoft, Google, Apple and the Web.
