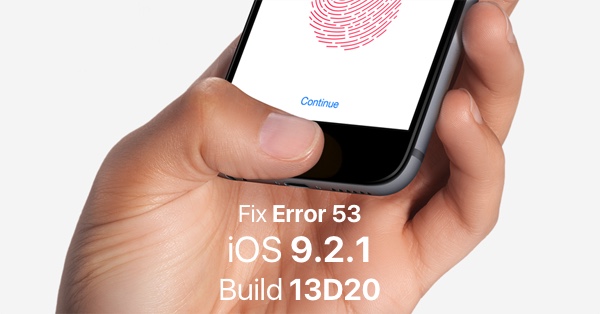
You may or may not be aware that a number of iOS device owners around the world have been taking to social media and Apple forums to complain of the infamous “Error 53” essentially bricking their devices after a third-party Touch ID replacement. After some investigation, it was determined that this occurs due to iOS checking if the Touch ID sensor on the device has been replaced by “non-official” methods. After initially stating that this was by design, Apple has subsequently issued a new build 13D20 of iOS 9.2.1 that rectifies the problem via an iTunes restore on affected devices.
The patched version of iOS 9.2.1 has been released for a handful of iPhone and iPad models only, precisely the ones that are affected by error 53. Before we begin with fixing the issue, check out the list of build 13D20 compatible devices below, and check if your device qualifies for this fix.
Compatible devices:
- iPhone 6/6 Plus
- iPhone 6s/6s Plus
- iPad Pro
- iPad Air 2
- iPad mini 3 & 4
How to fix error 53 on bricked iPhones and iPads:
Step 1: If you have an affected iPhone or iPad, then you’re going to need to grab the latest firmware version for that specific device that rectifies the problem. Thankfully, we can point you in the right direction to download iOS 9.2.1, build number 13D20. Get it from here: Download iOS 9.2.1 Final Links For iPhone, iPad, iPod Touch.
Step 2: Next, you’ll need to make sure that you’re on the latest version of iTunes. You can download the latest version from apple.com/itunes.
Step 3: Perform a force restart/hard reboot. If you know how to do this, then great, if not, you can follow our handy guide that will take you through the process in a few simple steps: How To Hard Reboot / Restart Your iPhone, iPad, Or iPad touch.
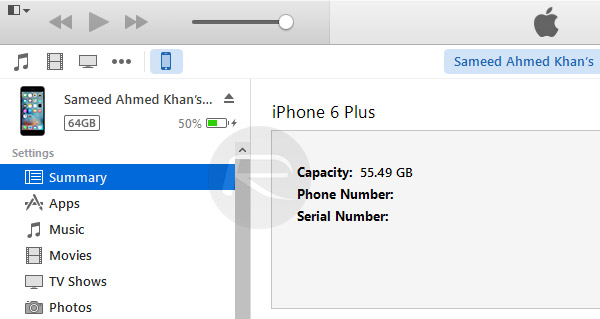
Step 4: Connect the iPhone or iPad to the computer via Lightning cable and launch iTunes.
Step 5: Click on the Summary tab on the left side of iTunes.
Step 6: Now hold down the Shift key on Windows or Option/Alt key if you’re on Mac and click on the Restore iPhone button.
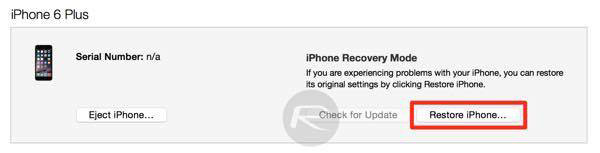
Step 7: Allow iTunes the time to process through its standard restore procedure. This will ensure that the affected device is loaded with 13D20 version of iOS 9.2.1 containing Apple’s fix.
When the restore process is complete, the bricked iOS device should come back to life and in working condition. However, anyone running through this process does need to be aware that Touch ID will still be disabled in order to protect the sensitive fingerprint data stored on the Secure Enclave.
You may also like to check out:
You can follow us on Twitter, add us to your circle on Google+ or like our Facebook page to keep yourself updated on all the latest from Microsoft, Google, Apple and the Web.
