It’s definitely a positive that Microsoft is continuing to push out update after update for Windows 10, but with the latest version, some users may have realized that a commonly used feature is now missing for one reason or another.
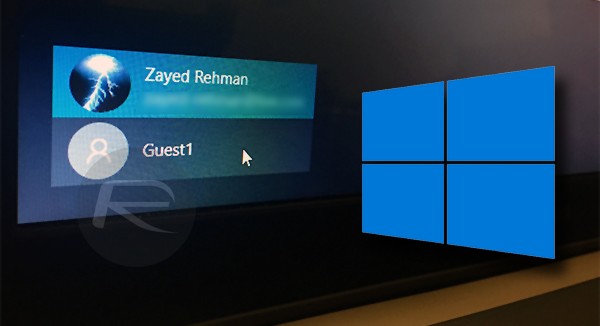
For reasons that are currently unknown, Microsoft has removed the usual mechanism that has been afforded to Windows users for adding and removing guest accounts within the system. If you miss the option in Control Panel to easily add or remove new guest accounts, then as you might expect, there is a workaround in place that involves the command line.
We’re going to walk you through the relatively simple steps of adding a new guest account, assigning a password to it, and then adding and removing the account from different grouping levels. Ready to dig into some command lines? Let’s go!
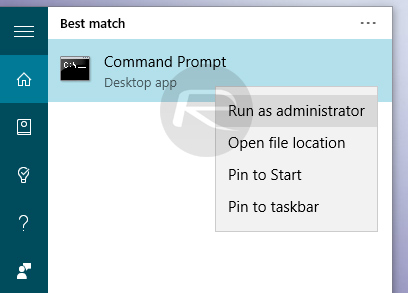
Step 1: Launch Command Prompt with administrator access. This will give you access to the command line utility with extended permissions beyond a standard user. You can do this by typing “cmd” in the search field in the taskbar, followed by right-clicking on Command Prompt and selecting Run as administrator.
Step 2: In the Command Prompt, enter the following command:
net user Guest1 /add /active:yes
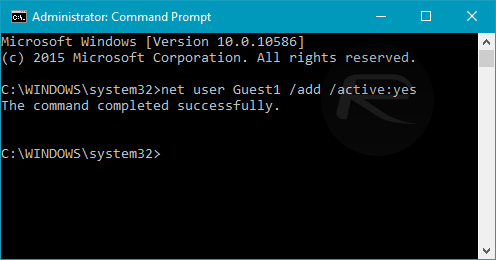
Note: You can change the keyword “Guest 1” above to any name that you wish, but you can’t use “Guest” only as that name is reserved by the system.
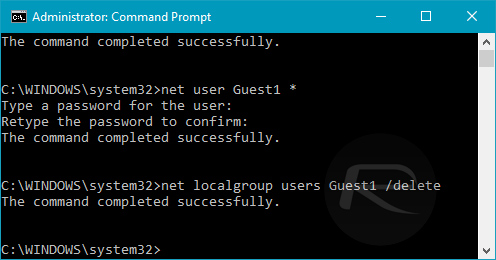
Step 3: While still in Command Prompt interface, enter the following command to set a password for the new user:
net user Guest1 *
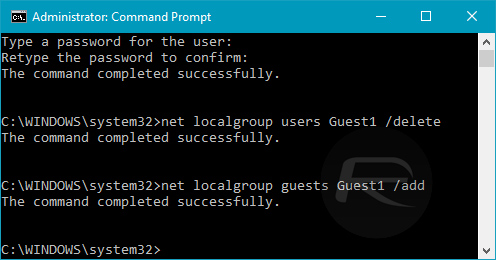
Step 4: Press the Enter button twice on the keyboard twice to create a blank password. Of course, you can also add a matching password if you want it password protected.
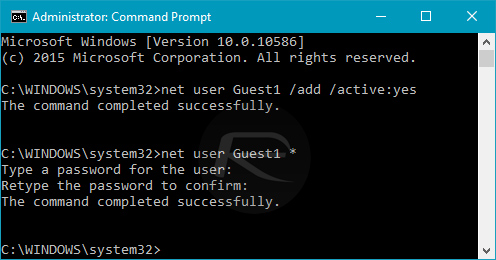
Note: When typing a password the cursor will not shift forward and you wont feel any indication that you have typed something.
Step 5: Now enter the following command to remove the new user from the regular users group:
net localgroup users Guest1 /delete
Step 6: Lastly, enter the following command to add the new user to the guests user group:
net localgroup guests Guest1 /add
And there you have it, a brand new “guest” user added to your Windows 10 installation.
You can follow us on Twitter, add us to your circle on Google+ or like our Facebook page to keep yourself updated on all the latest from Microsoft, Google, Apple and the Web.
