Here’s a comprehensive guide on how to bypass iPhone Activation Lock using Unlockit iCloud Remover the right way.
In today’s digital age, our lives are closely intertwined with smartphones and the data they hold. The iCloud feature provided by Apple offers a convenient way to store and access our personal information across devices. However, there may be instances when you find yourself locked out of your iCloud account due to forgotten passwords or other reasons. This is where tools like Unlockit iCloud Remover come into play.
In the post below, we will explore the functionality of Unlockit iCloud Remover and provide you with a step-by-step guide on how to use it effectively.
Understanding Unlockit iCloud Remover
Unlockit iCloud Remover is a third-party software designed to help users bypass iCloud activation lock on their Apple devices. It is important to note that iCloud activation lock is a security feature implemented by Apple to prevent unauthorized access to a device in case it is lost or stolen. However, there may be situations when you legitimately need to bypass the activation lock, such as when purchasing a used device without the original owner’s account information.
Step-by-Step Guide on Using Unlockit iCloud Remover
Before we proceed, it is crucial to emphasize that using third-party software to bypass iCloud activation lock may violate Apple’s terms of service and could have legal implications. Additionally, it is always recommended to exhaust all possible avenues for retrieving access to your iCloud account before resorting to such tools. With that said, here is a step-by-step guide on using Unlockit iCloud Remover:
Step 1: Download and install Unlockit iCloud Remover
On the website here, locate the download link for Unlockit iCloud Remover and click on it to initiate the download. Once the download is complete, follow the on-screen instructions to install the software on your computer.
Step 2: Connect your device to the computer
Using a USB cable, connect your Apple device (iPhone, iPad, or iPod Touch) to the computer on which you have installed Unlockit iCloud Remover.
Step 3: Launch the software
Once your device is connected, launch the Unlockit iCloud Remover software. It should detect your device automatically. If not, make sure the necessary drivers are installed and try reconnecting the device.
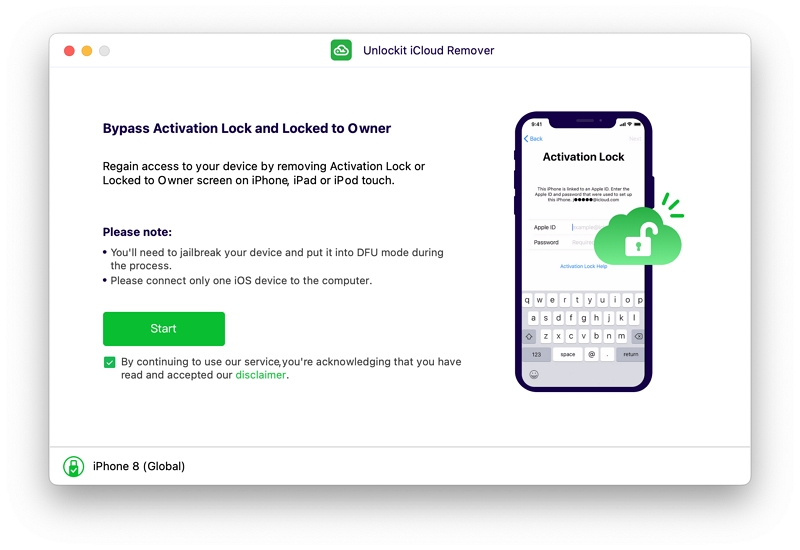
Step 4: Start the iCloud removal process
Within the Unlockit iCloud Remover software, look for Start button to begin iCloud removal process.
Step 5: Follow the on-screen instructions
Carefully follow the on-screen instructions provided by the software. It will involve entering your device into DFU mode and jailbreak on the compatible firmware version, to initiate the iCloud removal process.
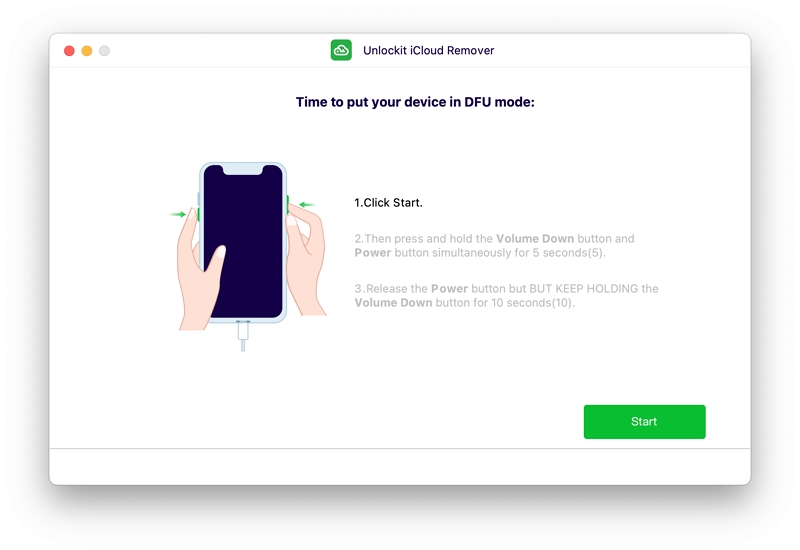
Once device has successfully entered the DFU mode, click on Start to Remove button to begin the actual unlocking process.
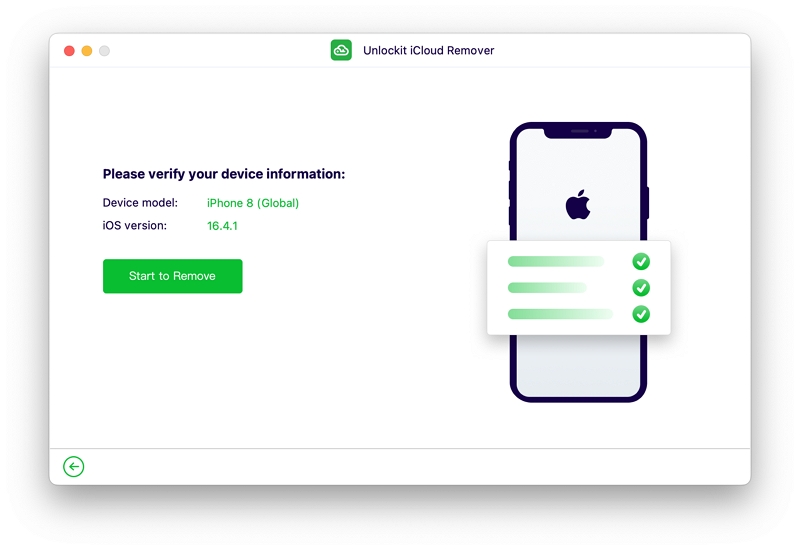
Step 6: Wait for the process to complete
The time taken to complete the iCloud removal process may vary depending on several factors. Be patient and allow the software to perform the necessary tasks.
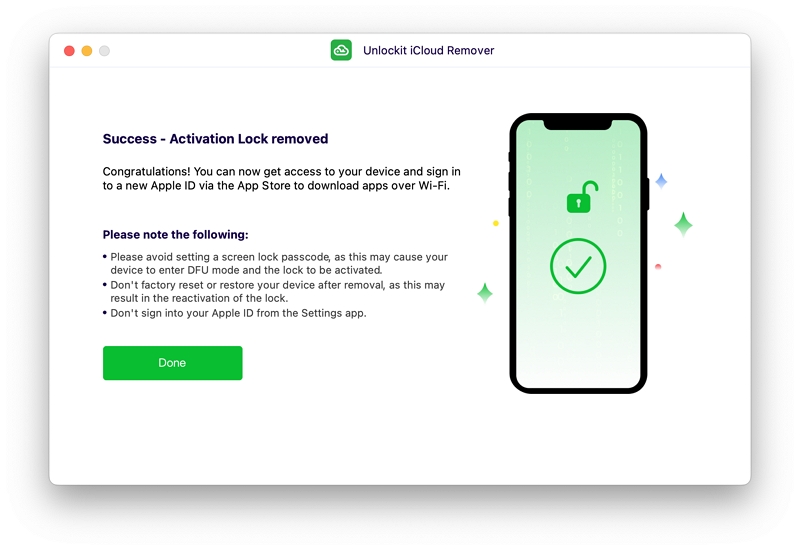
Step 7: Verify the iCloud removal
After the process is complete, disconnect your device from the computer and restart it. Upon reboot, verify whether the iCloud activation lock has been successfully removed.
Conclusion
Unlockit iCloud Remover offers a potential solution for individuals who find themselves locked out of their iCloud accounts due to various reasons. However, it is crucial to exercise caution when using such tools, as they may violate Apple’s terms of service and local laws. Additionally, exploring other avenues for account recovery should always be prioritized before resorting to third-party software. If you choose to proceed with Unlockit iCloud Remover, it is recommended to carefully follow. To learn more about Unlockit iCloud Remover, please follow the link here.
You may also like to check out:
- iOS 17 Beta 3 Download And Expected Release Date
- Jailbreak iOS 16.5.1 On iPhone And iPad Status Update [Latest]
- iOS 17 Beta Compatibility For Compatible iPhone Models
- iOS 17 Public Beta 1 Release Date Set For Later This Month Alongside iPadOS 17, macOS 14, tvOS 17
- Download iOS 17 Beta 2 IPSW Links, OTA Update Now
- Download: iOS 16.5.1 OTA Update, IPSW Links Released
You can follow us on Twitter, or Instagram, and even like our Facebook page to keep yourself updated on all the latest from Microsoft, Google, Apple, and the Web.
