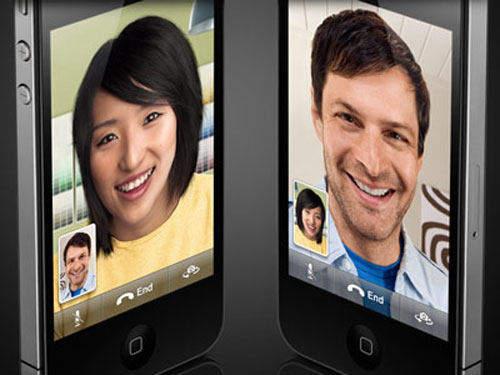
FaceTime for iPad is probably one of the most missed features by the iPhone/iPod users. It certainly would have been a better experience if the iPad offered a front-facing camera and FaceTime. That because of the user-experience that the 10" screen provides over the the iPhone’s 3.5".
You can now solve this problem with a hack named "Intell". This, of course, is a partial fix because of the hardware limitations of the iPad (no front-facing camera) but the other party will still be able to hear you.
I personally loved the hack because it doesn’t just enable FaceTime on iPad but makes it iPad optimized. Hence the video quality is very good.
Disclaimer: This guide is for testing & educational purposes only. I’m not responsible for any loss of important data or malfunctioning of your iPad.
Things Needed: You will need to copy the following folders from your iPhone 4 or iPod Touch 4 firmware to your Jailbroken iPad running 4.2.1 (either untethered or tethered)
Conference.framework, IMCore.framework MobilePhone.app, ConferenceRegistrationSettings.bundle, AVFoundation.framework, Celestial.framework, UISounds
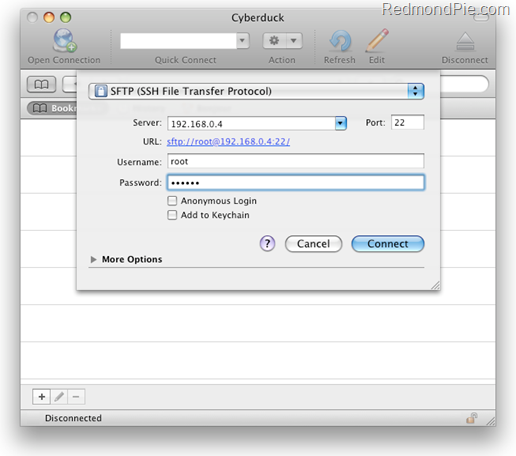
Step 1: SSH to your iPad. Login instructions for SSH can be found below.
Cyberduck
- Server: The IP address of your iPad. Settings –> WiFi –> <Your Network Name>
- Username: root
- Password: alpine
- Protocol: SFTP (SSH File Transfer Protocol)
WinSCP
- Hostname: The IP address of your iPad. Setting –> WiFi –> <Your Network Name>
- User name: root
- Password: alpine
- Protocol: SCP
Step 2: Rename Conference.framework to ConferenceiPad.framework and IMCore.framework to IMCoreiPad.framework
Step 3: Upload the Conference.framework and IMCore.frameworks from the iPod Touch 4 or iPhone 4 to /System/Library/PrivateFrameworks/
Step 4: Navigate to /System/Library/CoreServices/SpringBoard.app/ and download the K48AP.plist for editing.
Step 5: Add the following code under the capabilities array and upload the modified version to SpringBoard.app on the iPad replacing the unmodified version
<key>venice</key> <true/>
Step 6: Upload the ConferenceRegistrationSettings.bundle from the iDevice 4 to /System/Library/PreferenceBundles/
Step 7: Navigate to System/Library/Frameworks/AVFoundation.framework/K48/ and rename AVCaptureSession.plist to AVCaptureSession.bak2
Step 8: Upload the AVCaptureSession.plist from the iPod Touch 4 /System/Library/Frameworks/AVFoundation.framework/N81/ or /System/Library/Frameworks/AVFoundation.framework/N90/ from the iPhone 4
Step 9: Navigate to /System/Library/PrivateFrameworks/Celestial.framework/K48/ and rename AVCapture.plist to AVCapture.bak2
Step 10: Upload the AVCapture.plist from the iPod Touch 4 /System/Library/PrivateFrameworks/Celestial.framework/N81/ or /System/Library/PrivateFrameworks/Celestial.framework/N90/ from the iPhone 4
Step 11: To get the sounds woking navigate to /System/Library/Audio/UISounds/ and put vc~ended.caf, vc~invitation-accepted.caf, and vc~ringing.caf from the iDevice 4 into the iPad’s UISounds folder.
Step 12: Navigate to /Applications/Preferences.app/ and download the Settings.plist
Step 13: Remove the requieredCapabilites key from item number 26, save, then replace the version on the iPad with modified version.
Step 14: Edit the info.plist in the MobilePhone.app that is from the iDevice 4. Change CFBundleDisplayName~ipod to CFBundleDisplayName~ipad, CFBundleIconFiles~ipod to CFBundleIconFiles~ipad, CFBundleURLTypes~ipod to CFBundleURLTypes~ipad, UILaunchImageFile~ipod to UILaunchImageFile~ipad, and add a 2 to the UIDeivceFamily array
Step 15: Replace the Default~ipod.png with this.
Step 16: Navigate to /System/Library/PrivateFrameworks/TelephonyUI.Framework/ and rename bottombarknobgreen.png to bottombarknobgreenT.png
Step 17: Reboot and enjoy FaceTime
[via 9to5Mac, Instructions via iFans]
You can follow us on Twitter or join our Facebook fanpage to keep yourself updated on all the latest iPhone jailbreaking and unlocking releases.
