In order to get our hands on the latest iPhone model when it launches, sometimes we have to sacrifice our hopes and desires and just go with the entry-level 16GB model. Sure, it would be great to grab the 64GB or 128GB model on an annual basis, but given the fact that a new device comes around every twelve months some consumers simply cannot expend that type of money each year. One problem with the 16GB model is that once the OS is installed, you are generally left with about 11.5GB of usable space, which as we all know, doesn’t last very long at all. Thankfully, if you have a Lightning cable and an iTunes installation on a Windows PC or a Mac, there’s a little trick to claim back some vital free space.
Before we run on to cleaning up some vital sotage space, there are a couple of requirements we need to look at first.
Here are they.
- An iPhone with limited storage space. This will be the device that you’re going to free up some storage on.
- A Mac or Windows PC running iTunes.
- A Lightning cable that allows you to connect your device to the computer.
Step 1: Plug the Lightning cable into your Mac or PC and connect your iOS device to it. Launch iTunes.
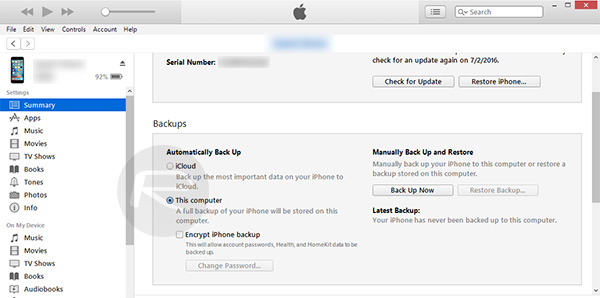
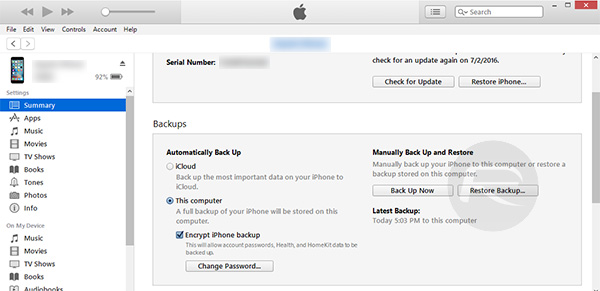
Step 2: Make sure you have the device selected in iTunes. Under Summary > Backups section, select This computer.
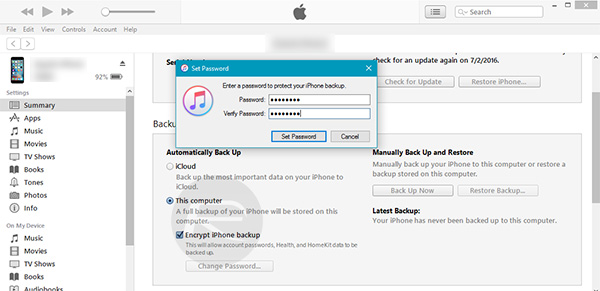
Step 3: Click on the Encrypt iPhone backup to highlight that option. You will be asked to set a password for the encrypted backups, once you’ve entered that, hit the Set Password button on the dialogue box.
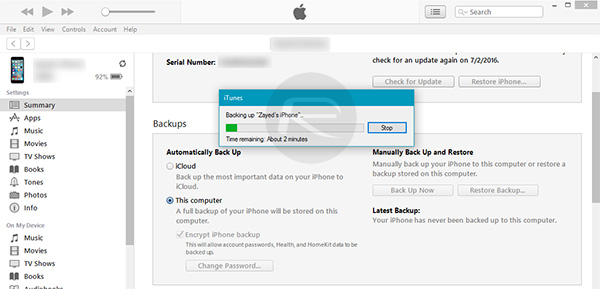
iTunes will now start backing up your data automatically, as seen in the image below. If the back up process doesn’t start automatically, simply click on Back Up Now button for it to begin,
After a while, depending on how much data you had on the device, the backup will be completed successfully.
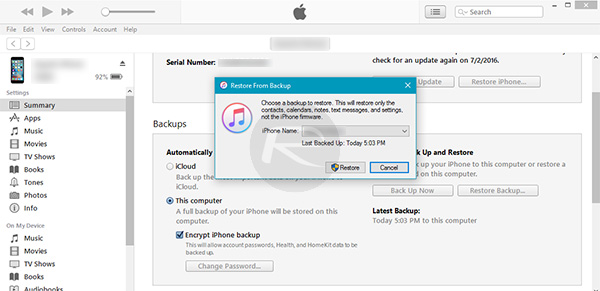
Step 4: You will now need to restore your backed up data back to iPhone, to do this, click on the Restore Backup button right next to the Back Up Now button.
iTunes may ask you to turn off the Find My iPhone feature on the device. If it does, navigate to Settings > iCloud > Find My iPhone on the device and toggle it to Off. You will be required to enter your iCloud password to turn off Find My iPhone.
Once done, click OK on the iTunes information alert and click Restore Backup again.
Step 5: You will now be asked to select the backup that you want your iPhone to restore to. Make sure you select the backup you had just created. Click Restore and then enter the password for the encrypted backup.
Step 6: iTunes will now run through the process of restoring the encrypted backup to the connected device. Once it is done, and the device reboots, you’ll have an exact copy of the setup you had previously, but now with more free storage space available on device than there was before because iTunes backup/restore process involves a lot less clutter which ultimately results in freeing up a significant portion of storage space on the device.
It’s worth remembering that the amount of space that you can reclaim using the trick works in a similar fashion to a previous method that involved pretending to rent a movie from the iTunes app on the device. Both processes essentially delete files from temporary caches and data from parts of the system that aren’t critical to everyday usage. The amount of data stored will depict how much free space you get in return.
You can follow us on Twitter, add us to your circle on Google+ or like our Facebook page to keep yourself updated on all the latest from Microsoft, Google, Apple and the Web.
