The following step by step tutorial will help you install Windows 10 on Mac using Boot Camp Assistant software by Apple.
Before you begin, make a full backup of your Mac using Time Machine that you can restore to in case anything goes wrong.
All set? Lets begin!
Requirements:
- Up to date version of OS X running on a Mac with at least 2GB RAM.
- A minimum of 30GB of free hard drive space on Mac.
- Genuine Windows 10 product key.
- A minimum of 16GB USB flash drive to install Windows 10 with all the required Boot Camp drivers.
- Windows 10 ISO file. Get it from here: Download Windows 10 Pro ISO File Without Product Key From Microsoft.
How to install Windows 10 on Mac:
Step 1: Launch Boot Camp Assistant. Do a Spotlight Search for it.
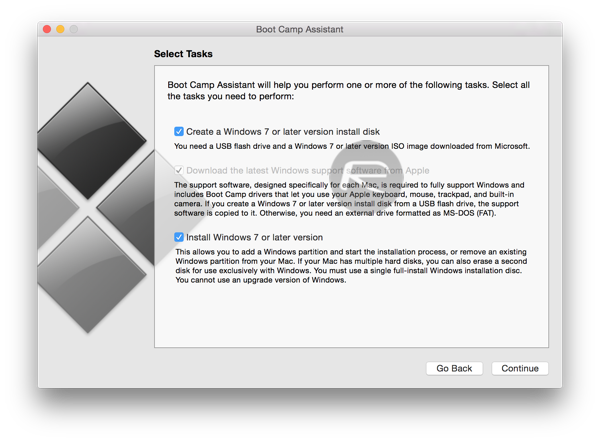
Step 2: Check both options under this ‘Select Tasks’ window as shown in the screenshot below.
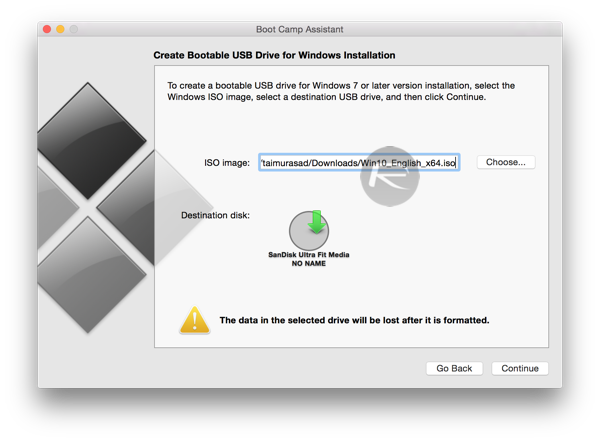
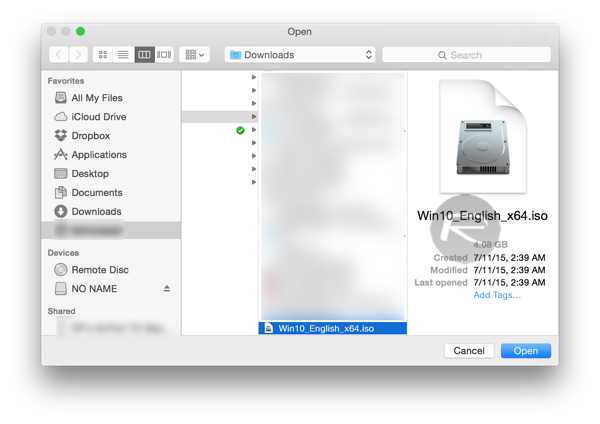
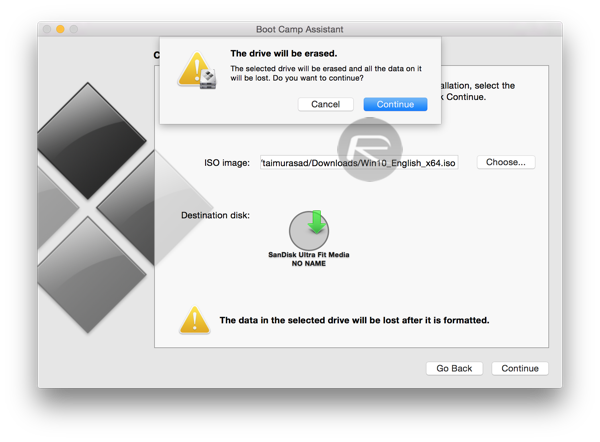
Step 3: Insert your USB flash drive and select your Windows 10 .iso file, as shown again in the screenshots.
Step 4: Click Continue, you will get a warning saying your flash drive will be formatted. Click on Continue again.
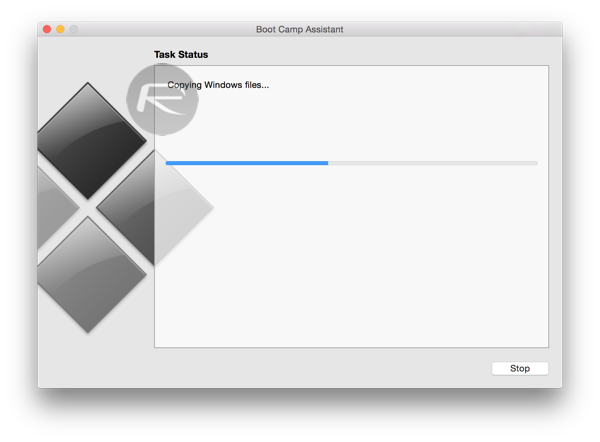
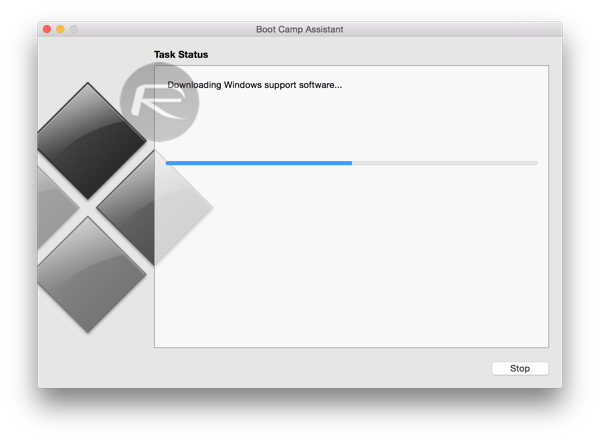
Step 5: Now sit back and wait for Boot Camp Assistant to copy all the required Windows files and Boot Camp drivers to your USB drive. This could take a while depending on the speed of your Internet connection and your computer.
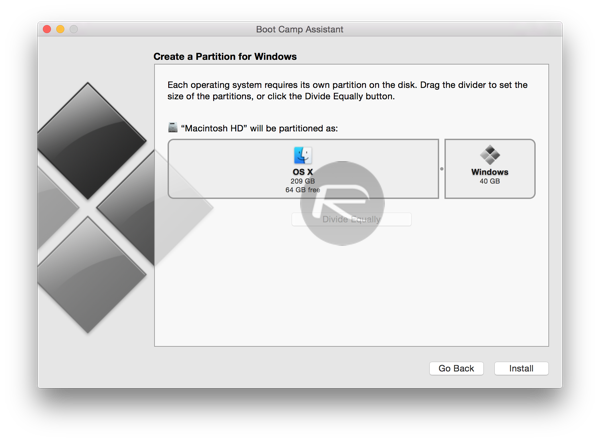
Step 6: Once the USB drive is ready, it will ask you to create a Windows partition. Select at least 30GB for Windows 10 and then click on Install button.
Step 7: Boot Camp will now create the required partition and then it will reboot your Mac.
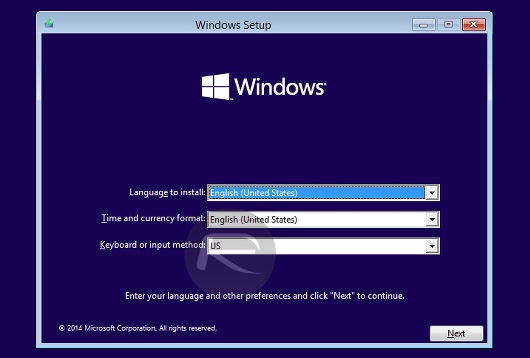
Step 8. On restart, you will be booted into Windows Setup screen.
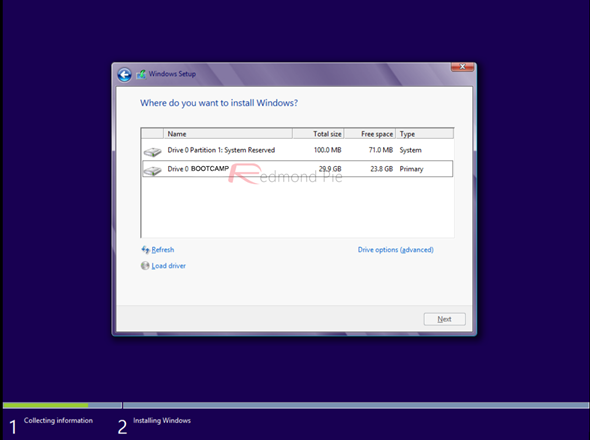
Step 9: From here, enter your product key when asked, select your Boot Camp created partition when prompted on where to install Windows. Basically just follow the on-screen prompts to start Windows installation process.
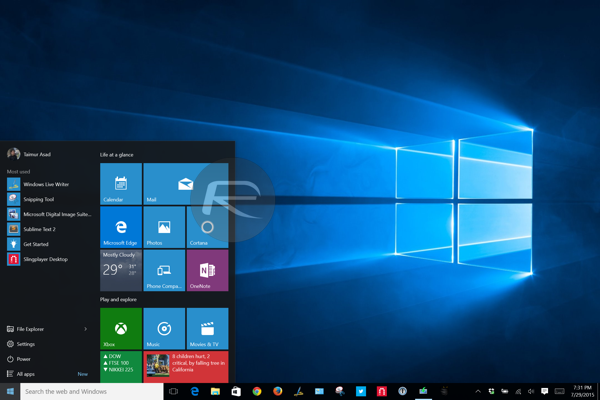
Step 10: Once Windows is installed, your Mac will automatically reboot right into Windows 10.
Step 11: Once you have set up your login account stuff and are in desktop, you will need to install Boot Camp drivers for your Mac. These are the same drivers which were copied by Boot Camp Assistant software to your USB in Step 5 above. Simply navigate to contents of USB flash drive from File Explorer and run setup.exe to install the required drivers for your Mac.
Step: 12: After the drivers are installed and your computer is rebooted, you should now have fully functional Windows 10 running on your Mac.
Dual-boot Windows 10 with OS X:
Now to dual-boot between the two operating systems, that is Windows 10 and OS X Yosemite, during Mac’s startup boot chime, press and hold option/alt key until you are presented with a menu to choose between Windows and Mac partitions, select your desired OS to boot into it.
You may also like to check out:
- Boot Camp 6 For Mac OS X With Windows 10 Support Released
- How To Clean Install Windows 10 On Your PC The Right Way [Guide]
You can follow us on Twitter, add us to your circle on Google+ or like our Facebook page to keep yourself updated on all the latest from Microsoft, Google, Apple and the web.
