Are you eager to try out everything that the recently announced macOS Sierra has to offer but don’t want to interfere with your existing OS X El Capitan setup on your main iMac or MacBook? Luckily a dual-boot setup always saves the day.
It’s only natural to want to interact with and experience all of the new features and additions that Apple has integrated into the Mac operating system, but not many of us just have a spare Mac lying around to install beta OS on. To that end, we’re going to walk you through the steps required to install macOS Sierra beta on a separate partition on your Mac so you can boot freely between macOS Sierra 10.12 beta and OS X El Capitan 10.11.
Before we get started with the process, you need to meet some requirement before proceeding with the installation and dual-boot arrangement.
Prerequisites:
- You’ll need to have a Mac model that supports the installation of macOS Sierra. Check out our compatibility list here: List Of macOS Sierra 10.12 Compatible Macs.
- 15GB or more free space free the hard drive.
- An active Apple Developer Program-registered account so that you can download macOS Sierra 10.12 beta installer.
Once you are sure that you meet all of the above mentioned requirements for installing macOS Sierra beta on your Mac, you can proceed with the downloading and installation process by following the instructions below.
Step 1: Downloading macOS Sierra 10.12 beta
If you have an active Apple Developer account, then you should be familiar with how this process works. Simply login with your Apple ID on the developer’s portal and head to the Downloads section: developer.apple.com/download.
Scroll down to find macOS 10.12 Beta, and then click on Download. When you hit Download, the website will invoke the Mac App Store to begin the download.

Step 2: Creating partition for macOS Sierra
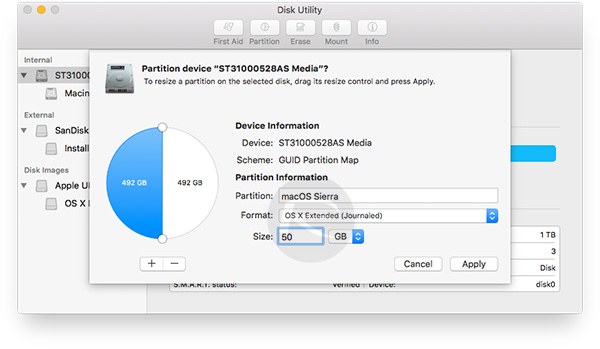
To install macOS Sierra 10.12 beta onto a Mac with an existing OS installed, you will of course need to create a separate partition for that installation. To do this, launch the Disk Utility app on your Mac and select your hard drive from the left-hand panel, then click the Partition button up-top is to create a new partition.

Give the partition a name of your choice – something like “macOS Sierra HD” – and assign it a size. 15GB is the minimum required but we recommend something along the lines of 40-50GB as this can’t be changed later. Make sure the Format of the new partition is set to OS X Extended (Journaled) and hit the Apply button.
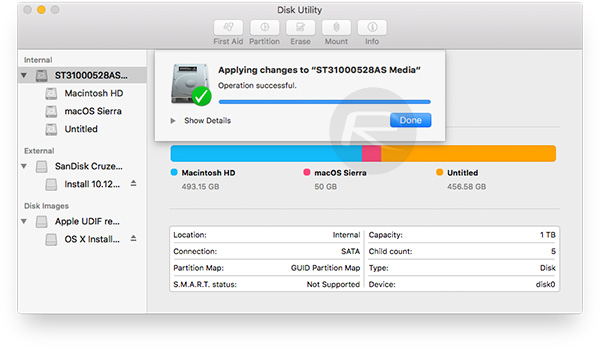
Disk Utility will now begin creating new partition for you. This could take some time depending on the size of the disk. Once that new partition has been created, you will be prompted that the process has been completed successfully, as can be seen in the screenshot below.
Step 3: Installing macOS Sierra 10.12 beta
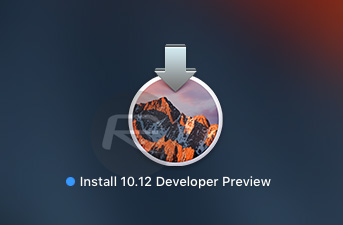
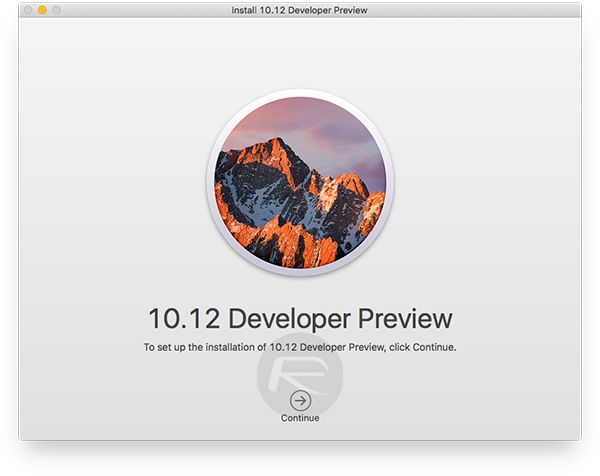
This is where you’ll need the installer for macOS Sierra 10.12 that you download earlier thanks to your Apple Developer account and the magic of the Mac App Store. It will be called “Install 10.12 Developer Preview.app”, and can be found in the /Applications folder or the Launchpad.
Launch the installer, then Click Continue and follow the displayed instructions that come as part of the installation process.
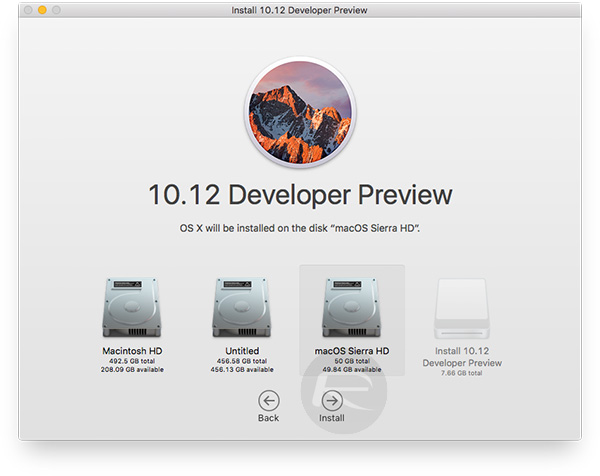
When asked to select an install location for macOS Sierra, make sure that you select the partition that you created earlier, “macOS Sierra HD” in this case, before clicking Install.
That’s really all there is to the actual installation process. The installer software is intelligent enough to run through the process and get macOS Sierra 10.12 beta installed on the desired partition. Depending on the age and speed of your Mac, this may take a little bit of time and a couple of restarts to complete so be patient.
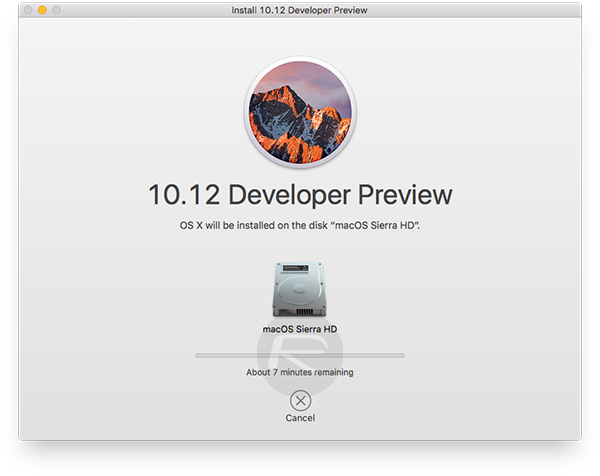
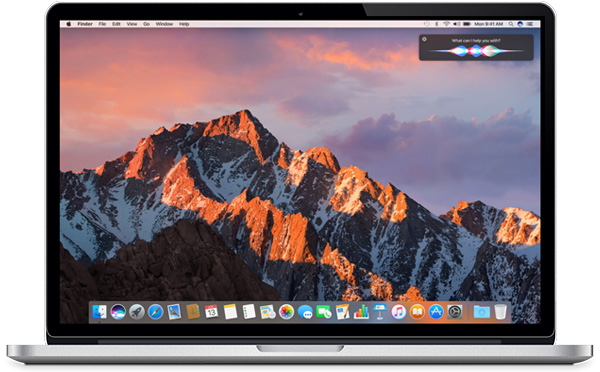
When the installation completes, your Mac should boot right into macOS Sierra.
Step 4: Dual-booting macOS Sierra with OS X El Capitan
It’s no good having macOS Sierra installed on its own partition if you have no way of accessing it and launching it. Power down or restart the Mac following the normal processes. When you hear the standard Mac start-up Chime, hold down the Option/Alt key to enter the boot menu. You will then be able to select whatever partition you want to actually boot from as seen in the image below.
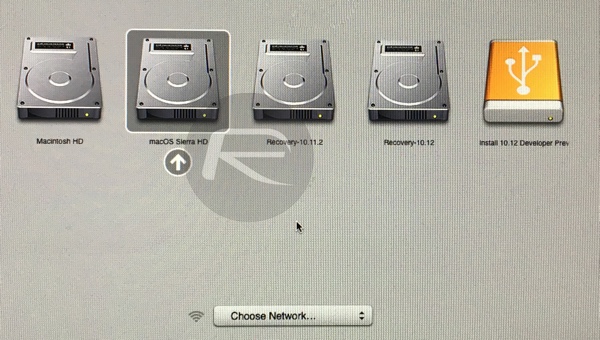
You should have the option of something like “Macintosh HD“, which will be your standard El Capitan, or “macOS Sierra HD“, which is of course, the new Sierra partition.
Deleting macOS Sierra 10.12 beta Partition:
It’s all well and good testing macOS Sierra beta, but it’s reasonable to expect that there may be a time when you want to delete that partition from your machine and return everything back to normal. That could be to either free up some much need hard drive space, or simply because you no longer want to interact with the beta version of macOS Sierra.
To delete the partition, once again launch the Disk Utility app and simply delete the macOS Sierra partition before resizing the main partition back to full capacity.
You may also like to check out:
You can follow us on Twitter, add us to your circle on Google+ or like our Facebook page to keep yourself updated on all the latest from Microsoft, Google, Apple and the Web.
