Google Lens has long been seen as an Android feature, but the iPhone can take advantage of what Google’s artificial intelligence has to offer, too. That means that you can point your iPhone at something and either have Google Lens identify it, provide information about it, or translate it.
It’s also capable of identifying over a billion items, which is a huge number.

Google Lens has long been part of Google Photos on iOS, but that only worked on photos that had been taken. However, it’s now part of the Google search app as well, so if you have that on your device, you’re good to go.
Here’s how to get started.
Step 1: Download the Google app from the App Store. You probably already have it, but if not, it’s a free download.
Step 2: Once the app is downloaded, sign in with your Google account. If by some miracle you don’t have one, create one. You can’t proceed otherwise.
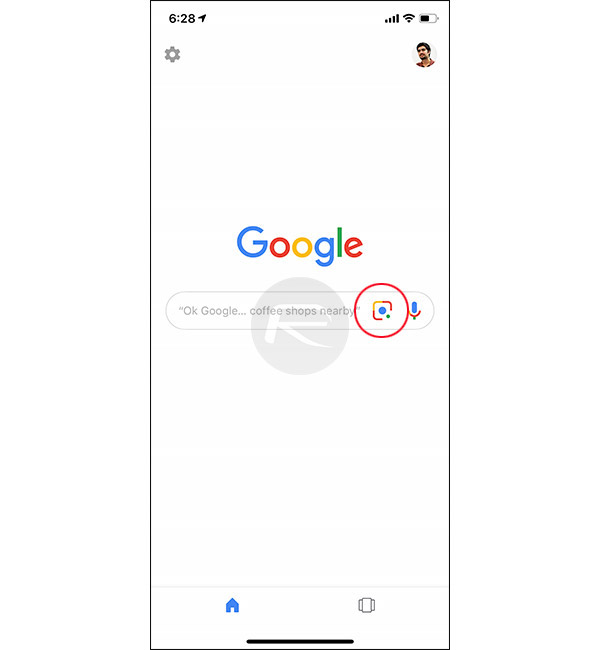
Step 3: Once signed in, tap the lens icon within the search bar. It’s over on the right, next to the microphone.
Step 4: The first time you use Google Lens, you’ll need to tap a button to activate the camera and then another to tell iOS to allow it.
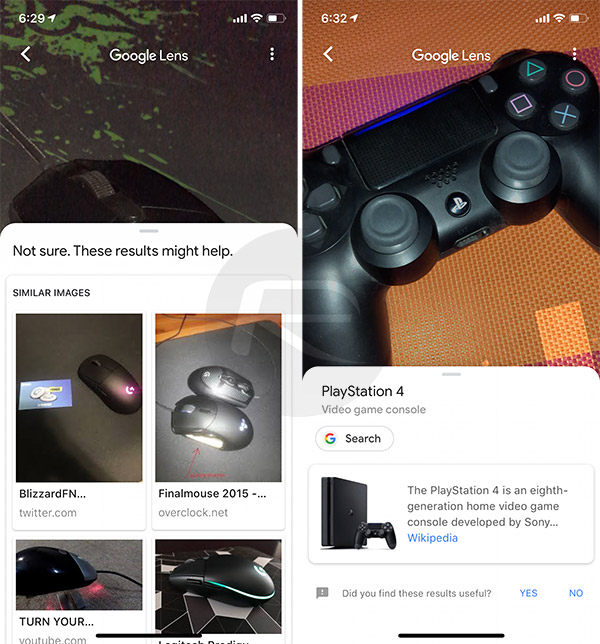
Step 5: Once all that is taken care of, point your camera at something that you want information about, or text that you want to be translated. You can turn your camera’s flash on if you’re in a situation with poor light, too.
Just pointing your phone at an object with Google Lens enabled should produce some pretty amazing magic, and we can’t wait to test this out while traveling. Imagine having Google Lens provide information about that landmark you’re looking at!
You may also like to check out:
- Download iOS 12.1.2 16C104 IPSW Links, OTA For iPhone XS, Max, XR, X And More
- How To Downgrade iOS 12.1.2 To iOS 12.1 / iOS 12.1.1
- iOS 12.1.2 Release Notes, Changelog And Other Changes As Highlighted By Apple
- Download iOS 12.1.2 Final IPSW Links, OTA Update For iPhone XS, XS Max, XR, X, And More
- Jailbreak iOS 12.1.1 / iOS 12.1: Project Zero Team Publishes Privilege Escalation Bug That Could Lead To First Public iOS 12 Jailbreak
- Call Of Duty Legends Of War Android APK Beta Download Of 1.0.0 Version Released
You can follow us on Twitter, add us to your circle on Google+ or like our Facebook page to keep yourself updated on all the latest from Microsoft, Google, Apple, and the Web.
