Here’s how to clean install iOS 17 final release via Finder and iTunes the correct way on your compatible iPhone and iPad.
Now that Apple has released iOS 17 it’s time for people around the world to check out the software that developers and public beta testers have been enjoying for a few months now.

Updating to the new software is a simple affair if you do it via the Settings app, but sometimes you might want to go for a clean installation. And here’s how to do it.
The process for a clean iOS 17 install will differ slightly depending on whether you’re using a Mac or PC, but it’s still a fairly simple process to follow.
Step 1: First up, you’re going to need to download the correct IPSW file that corresponds to the iPhone that you are installing iOS 17 onto. You can grab the required IPSW file from here.
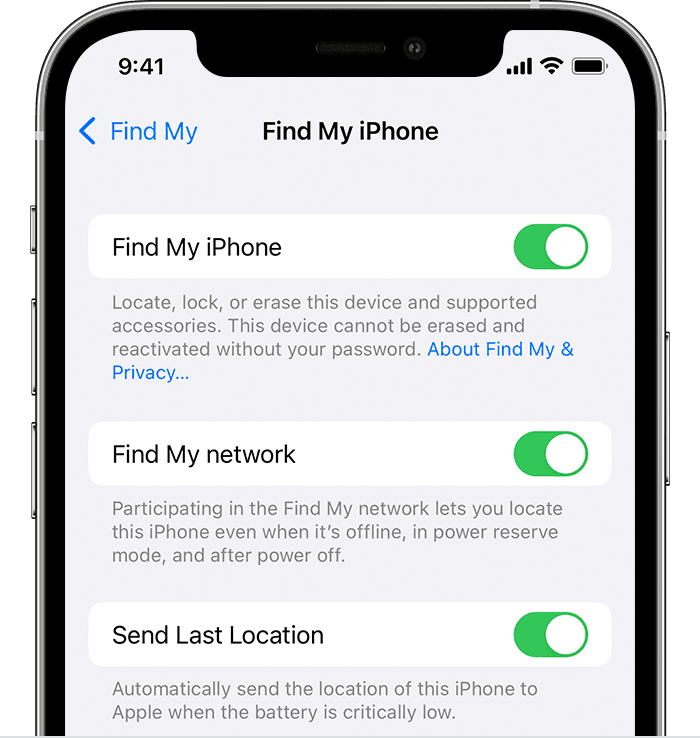
Step 3: On your iPhone, head to Settings > iCloud > Find My. Make sure you toggle the switch into the off position.

Step 4: Connect your device to your PC or Mac. If iTunes wasn’t open then it will likely launch. If not, launch it manually if it isn’t already running.
Step 5: Select your connected device from the interface. This will take you to that particular device in the iTunes software and give you access to new features. Mac users should click the Finder icon and select the iPhone in the sidebar.
Step 6: You need to do a manual restore rather than a standard restore. This involves holding down the ALT key on a Mac, or the SHIFT key on a Windows PC, followed by clicking the Restore iPhone… button. Browse and select the required IPSW file when prompted.
When your iPhone completes the installation process and restarts, you’ll be up and running with iOS 17.
You may also like to check out:
- Jailbreak iOS 17 On iPhone Status Update
- Download: iOS 17 Final IPSW Links, OTA Update For iPhone Out Now
- Download: iOS 16.6.1 Final IPSW Links, OTA Update As Well As iPadOS 16.6.1 Out Now
You can follow us on Twitter, or Instagram, and even like our Facebook page to keep yourself updated on all the latest from Microsoft, Google, Apple, and the Web.

