Here’s a guide on how you can enable the hidden Share settings in Windows 10 for configuring sharing options.
You would be forgiven for thinking that if it was possible to configure a particular setting in Windows 10, that Microsoft would expose that setting to enthusiastic users by default. Unfortunately, as we have learned time and time again, that isn’t always the case, leaving users to have to resort to a little bit of manipulation to get access to settings and preferences that wouldn’t otherwise be granted. That appears to be the case with a hidden set of options that allows users to configure sharing behavior in Windows 10.
It may seem a little strange for those settings to exist and not be exposed by default, but Microsoft clearly has a reason why that’s the case. Here we’re going to take you through the process of accessing the Windows 10 Registry to ensure that the hidden Share settings are exposed in the settings app. Ready? Lets go!
Step 1: This process is going to involve tinkering about in the Registry Editor of Windows, so you need to be comfortable with that level of interactivity. To begin, use the Windows key + R to open up the Run command in Windows 10.
Step 2: In the provided command box, type in regedit. This is shorthand and commands the machine to load the Registry Editor. Click OK to continue and execute the command.
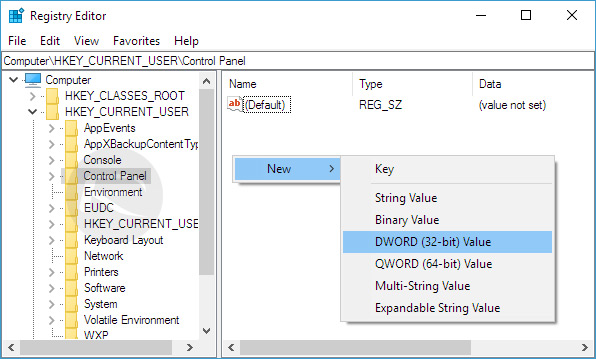
Step 3: This is where a small level of knowledge and technical competence will come into play. You now need to browse through the registry file structure to find the following path: HKEY_CURRENT_USER\Control Panel. Here right-click using the mouse or trackpad and select New > DWORD (32-bit) Value.
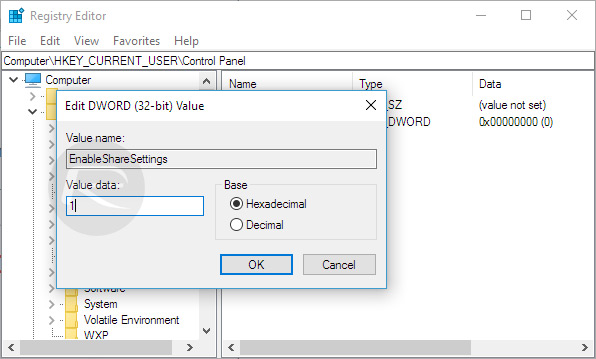
Step 4: Name this this new DWORD EnableShareSettings before pressing the Enter key to continue.

Step 5: Double click on the new EnableShareSettings DWORD entry and change the Value data from 0 to 1. Select OK to continue.
Step 6: Phew. Registry manipulation is over. You’ve survived. Exit out of the Registry Editor and restart your PC.
Step 7: Once the PC has restarted, it’s time to test that the changes were accepted and that they have worked. Open the Settings app by pressing the Windows key + I, navigating to System. Scroll down below, and you will see the Share option at the bottom.
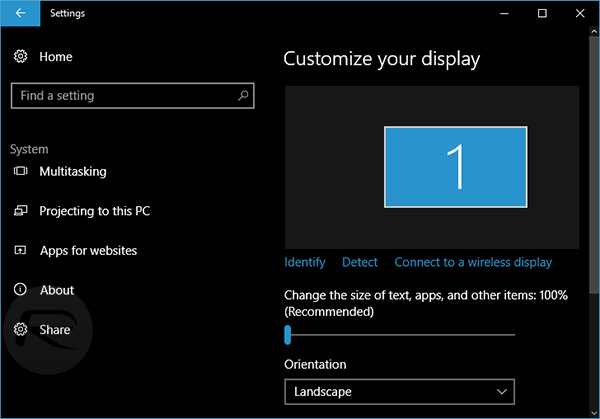
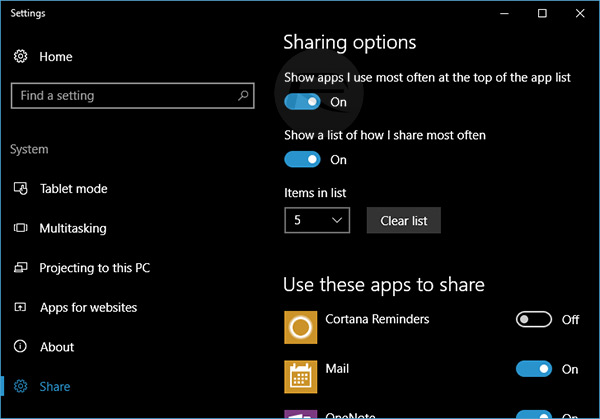
Step 8: Select Share and you will now see options that control which apps are actually allowed to share content and other settings that weren’t previously available, including the number of items that show up in the list, and more.
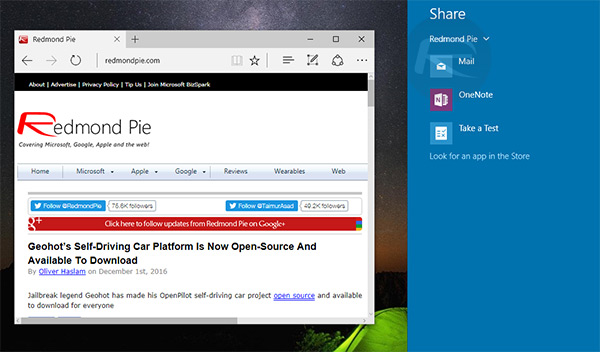
Once the changes have been made, simply head over to Windows Store, Edge Browser or launch the File Explorer and hit the Share button to check out the changes that have been made. In our instance, having disabled Cortana Reminders was reflected in the system Share menu as seen in the image below.
You may also like to check out:
- Download Windows 10 Pro ISO File Without Product Key From Microsoft
- Windows 10 Product Key And Activation: How To Find It And How It Works
- How To Create Bootable Windows 10 USB Flash Drive [Guide]
- How To Boot Into Windows 10 Safe Mode On Your PC [Tutorial]
You can follow us on Twitter, add us to your circle on Google+ or like our Facebook page to keep yourself updated on all the latest from Microsoft, Google, Apple and the Web.
