Sending emails notifications from a contact or a feedback page of a website has become a standard feature of most sites around the web.
Today, I am going to show you how to create an ASP.NET Silverlight application which sends email. The main objective of this tutorial is to achieve this goal using a ASP.NET web service which hosts a Silverlight client. I will assume that you have some background knowledge in C# and you are familiar with Visual Studio environment. You will need the following tools to be installed:
-
Microsoft Expression Blend 2 (Optional)
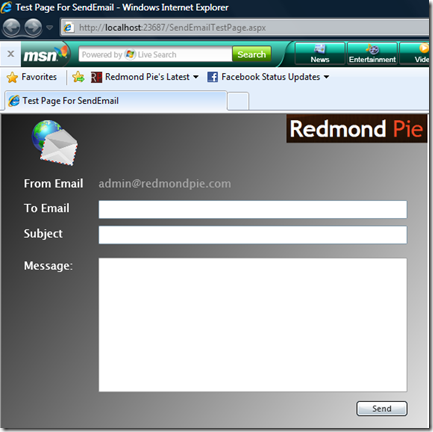
First you will have to create a interface on how you want your application to look like. Since our objective today is more towards developing(coding aspect) and not on designing so you will have to design an interface for your application yourself. You can design your interface in either Expression Blend or you can simply use the designer in Visual Studio 2008. The designer in Visual Studio 2008 isn’t good at all so I’ll highly recommend you to design it using Blend. Create an interface which looks something similar to this:
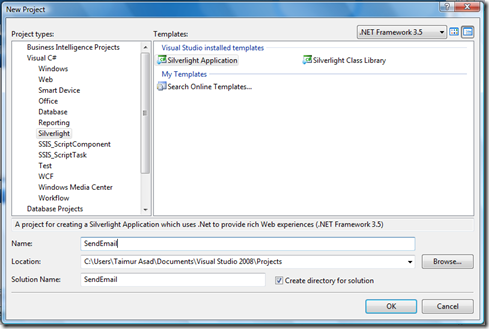
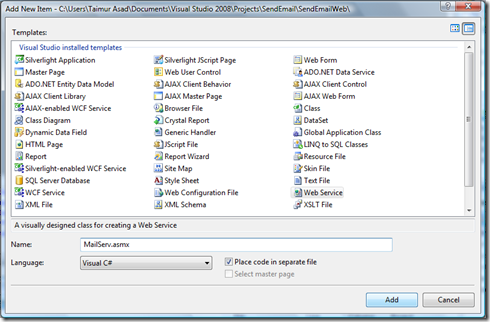
Now run ![]() Visual Studio 2008 to create a new Silverlight Application and name it "SendEmail". Select "Add a new Web to the solution for hosting" when asked for it. Now right click on ASP.NET project "SendEmailWeb" and click on "Add New Item". After that, just add a new web service and name it "MailServ.asmx"
Visual Studio 2008 to create a new Silverlight Application and name it "SendEmail". Select "Add a new Web to the solution for hosting" when asked for it. Now right click on ASP.NET project "SendEmailWeb" and click on "Add New Item". After that, just add a new web service and name it "MailServ.asmx"
Now, open MailServ.cs from App_Code folder included in ASP.NET project "SendEmailWeb" and write the following code in it.
1: [WebMethod]
2: public bool Send(string fromEmail, string toEmail, string subject,
string body)
3: {
4: try
5: {
6: MailMessage message = new MailMessage();
7: message.From = new MailAddress(fromEmail);
8: message.To.Add(new MailAddress(toEmail));
9: message.Subject = subject;
10: message.Body = body;
11: message.IsBodyHtml = false;
12:
13: SmtpClient smtp = new SmtpClient();
14: smtp.EnableSsl = true;
15: smtp.Send(message);
16: return true;
17: }
18: catch (Exception ex)
19: {
20: return false;
21: }
22: }
Note: Please include System.Net.Mail namespace and change the WebService Namespace according to your domain name.
After that, open up web.config and configure your SMTP server, port, username and password. I have created an "admin" account and configured it to "redmondpie" server, you may change this configuration according to your account.
1: <system.net>
2: <mailSettings>
3: <smtp>
4: <network host="smtp.redmondpie.com" port="587" userName="admin"
password="1234"/>
5: </smtp>
6: </mailSettings>
7: </system.net>
So when you’re done with it, add a service reference in a Silverlight project (SendEmail) by right clicking it.

Last but not the least, just write the following code in Page.xaml.cs in order to call the web service from Silverlight.
1: void sendButton_Click(object sender, RoutedEventArgs e)
2: {
3: BasicHttpBinding bind = new BasicHttpBinding();
4: EndpointAddress endpoint = new EndpointAddress(
"http://localhost:51639/SendEmailWeb/MailServ.asmx");
5:
6: Proxy.MailServSoapClient mailService = new
SendEmail.Proxy.MailServSoapClient(bind, endpoint);
7:
8: mailService.SendAsync(fromEmailTextBox.Text,
toEmailTextbox.Text, subjectTextbox.Text, bodyTextbox.Text);
   9:              mailService.SendCompleted += new EventHandler<SendEmail


                      .Proxy.SendCompletedEventArgs>(mailService_SendCompleted);
10:
11: }
12:
  13:          void mailService_SendCompleted(object sender, SendEmail.Proxy


                                                   .SendCompletedEventArgs e)
14: {
15: if (e.Result)
16: {
  17:                  resultTextBlock.Foreground = new SolidColorBrush(Colors


                                                                         .Blue);
  18:                  resultTextBlock.Text = "Your email has been sent


                                                                successfully!";
19: resultTextBlock.Visibility = Visibility.Visible;
20: }
21: else
22: {
23: resultTextBlock.Text = "Sending failed.";
24: resultTextBlock.Foreground = new SolidColorBrush(Colors.Red);
25: resultTextBlock.Visibility = Visibility.Visible;
26: }
27:
28: }
Thats it! you may now compile the application and run it in your browser to check out the results. Happy coding!!! 🙂
