Apple is pretty adamant that once a user opts to upgrade, they don’t want them to be able to roll-back the software on their device to a previous version of iOS. In a lot of circumstances, this wouldn’t be an issue, but there are a number of legitimate reasons for users wanting to downgrade to an older version, in this case, from iOS 6 to iOS 5.1.1.
Potential reasons for downgrading firmware could range from wanting the iPhone or iPod touch on a version of iOS that currently has an untethered jailbreak* available or could just be because updating to iOS 6 has brought with it some unexpected battery drain or caused other problems. Thankfully, it is entirely possible for owners of specific devices to downgrade with Redsn0w, and we have covered the complete process below.

There a few little things to note and take into account:
- This downgrade process only applies to iOS devices that are bundled with Apple’s A4 SoC or below. This includes iPhone 4, iPhone 3GS and iPod touch 4G. Later generation devices such as the iPhone 4S or iPad 3 are not susceptible to the limera1n exploit.
- The downgrade process relies on the SHSH and APTickets being saved for the relevant firmware version that the user is attempting to downgrade to. For those that may not know, the APTicket is something that Apple introduced in iOS 5 as part of the restore process with iTunes and their activation servers. So yes, you need to have SHSH blobs for iOS 5.1.1 firmware saved for the device you want to downgrade.
- If you don’t already have SHSH blobs saved for iOS 5.1.1, you are out of luck for now as Apple has stopped signing this firmware.
- Owners of an iPhone that requires a software unlock by using Ultrasn0w must first create a custom built firmware that doesn’t contain the upgraded baseband. The custom created firmware will be the one to which Redsn0w is pointed to in step 5 below.
Step 2: Download Redsn0w 0.9.14b2 version of the iPhone Dev Team’s Redsn0w tool that is relevant to the operating system of your computer (Windows/Mac). You will also need to download iOS 5.1.1 firmware.
Step 3: Connect the device to your computer using the supplied USB cable. Extract the contents of the downloaded Redsn0w file from step 2 and run the application. Enter your device into DFU mode.
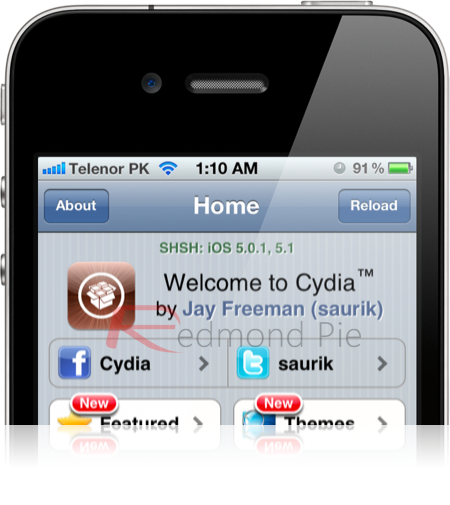
Step 4: From the main Redsn0w interface; select the Extras then select SHSH Blobs from the middle of the available buttons.

Step 5: The next stage of the process is to select the Stitch option. Redsn0w will now be split into two sections, one dedicated to the IPSW that the user is attempting to downgrade to and the other for the SHSH blobs for the firmware. Click on IPSW and select the relevant firmware file. If relying on a software unlock then this firmware file will be the custom file that was created at an earlier time using Redsn0w, as mentioned in the notes above.

Step 6: If the SHSH blobs for the firmware are saved locally then select Local and point Redsn0w to the place where they are saved. If the blobs are saved within Cydia, then place the device into DFU mode and click on the Cydia option.

Step 7: Redsn0w will create a new IPSW file that has the relevant and correct permissions stitched into it. Users now need to apply the Pwned DFU state to their device by selecting Extras and then Pwned DFU from the Redsn0w main interface.
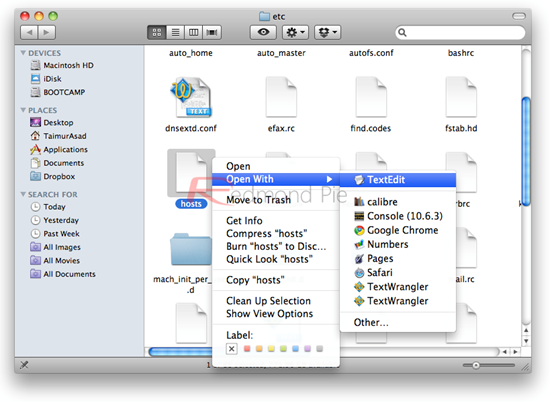
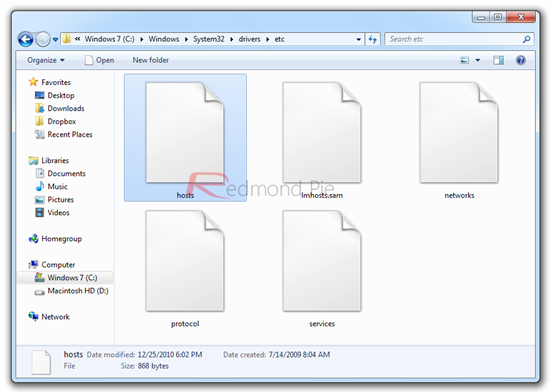
Step 8: As part of the process, the restore is verified with Apple so that it can be returned as genuine. For this to happen, some additional info needs to be added to the Hosts file stored on the computer. Windows users need to navigate to Windows > System 32 > drivers > etc and open up the Hosts file. Mac OS X users will simply need to open the etc folder.
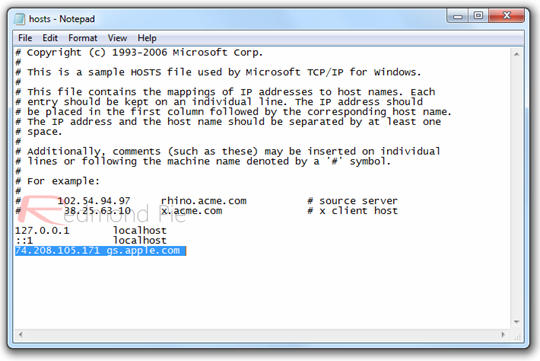
Step 9: Locate the Hosts file in the aforementioned directory and open it up using your favorite text editor on your computer. At the very bottom of the file add the following text: 74.208.105.171 gs.apple.com. Save the file to its original location.
Step 10: The final step in the process is to apply the newly stitched firmware to the A4 device through the restore process. Open up the iTunes application on the computer, select the connected device from the left-hand side and invoke a manual restore by pressing left Alt + Restore (OS X) or left Shift + Restore (Windows). When prompted, select the IPSW that Redsn0w has saved and allow the restore process to complete within iTunes.
iTunes may throw an error during restore. This is normal. The firmware should be restored on the device. To exit your device from Recovery mode, start Redsn0w again and navigate to: Extras->Recovery fix to exit your device from Recovery.
Once done, you can jailbreak 5.1.1 with either Redsn0w, or Absinthe 2.0.
The process may have a few additional steps that users have been used to in the past, but as Apple continue to attempt to stop users from downgrading, the Dev-teams have to come up with new processes and methods to trick the activation servers. It is also worth remembering that this process is only available on the supported A4 devices and not any Apple hardware that is powered by the A5 or A6 SoC.
*The jailbreak of iOS 6 is currently limited to tethered boot only, and that too for A4 based devices. You can follow our guide to jailbreak iOS 6 on the select devices.
You can follow us on Twitter, add to your circles on Google+, or join our Facebook fanpage to keep yourself updated on all the latest from Microsoft, Google and Apple.
