In iOS 10, Lock screen widgets are a simple rightward swipe away from the screen. Here’s how to disable or enable this feature.
Apple’s release of iOS 10 brought with it a redesigned Lock screen, and while the response to that change has been generally positive, some people just do not enjoy the fact that their widgets, and the data they contain, are just a swipe away on a locked iPhone. Widgets were available on the Lock screen during the iOS 9 days too, but the gesture of a swipe to the right is so ingrained into the mindset of iPhone owners, widgets are much more obviously available now than they ever were before.
There is a solution, of course, same as iOS 9 and its ability to prevent the widgets section (Today view) of the Notification Center from loading up on the Lock screen. iOS 10 users who want to make it impossible for a locked iPhone to display widgets can make that happen by flicking just two toggles within the Settings app, and as far as iOS settings go, things don’t get much more straightforward than that.
Here’s how to disable, or in fact enable widgets on an iPhone or iPad’s Lock screen.
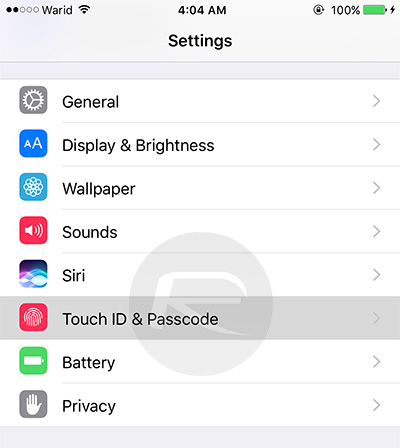
Step 1: Open the Settings app on your iPhone or iPad and then head on over to the Touch ID & Passcode section.
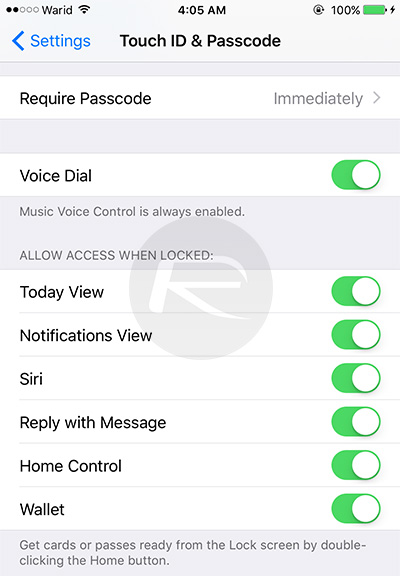
Step 2: Under the “Allow Access When Locked” section, toggle both of the switches alongside the Today View and Notifications View options to the OFF position. If you change your mind, simply return to this section and switch the toggles back to the ON position.
Step 3: Press the Home button to quit the Settings app and then lock your device in order to test out your handiwork.
It’s important to remember that even if someone can see an iPhone or iPad’s widgets, they will normally need to authenticate via Touch ID or a Passcode in order to interact with data. If that isn’t enough to make you sleep soundly at night, though, disabling widgets on the Lock screen altogether is simple enough to do. If you decide to revert the change, well, that’s just as easy too!
You might also like to check out:
- Disable iOS 10 Press Home To Unlock / Open On Lock Screen, Here’s How
- 100+ iOS 10 Hidden / Secret Features For iPhone And iPad [List]
- Jailbreak iOS 10 / 10.0.2 / 10.0.1 For iPhone, iPad, iPod touch [Latest Status Update]
- Download iOS 10, 10.1, 10.0.2 Links & Install On iPhone 7, 6s, 6, Plus, SE, 5s, 5c, 5, iPad, iPod [Tutorial]
You can follow us on Twitter, add us to your circle on Google+ or like our Facebook page to keep yourself updated on all the latest from Microsoft, Google, Apple and the Web.
