Here’s a tutorial on how to sideload and install Kodi on iOS 10 iPhone or iPad without the need for jailbreak. Yup, no jailbreak is required for this to work.
Apple managed to introduce a lot of smiling happy faces on non-developers out there when it introduced the ability to sideload apps onto iOS devices through Xcode. Granted, it’s not the most user-friendly of solutions, but it is still relatively straightforward and allows for excellent apps like Kodi to be installed onto a device without a jailbreak being required. If that wasn’t easy enough, one developer has managed to make installation of Kodi on a stock iOS device an even simpler task.
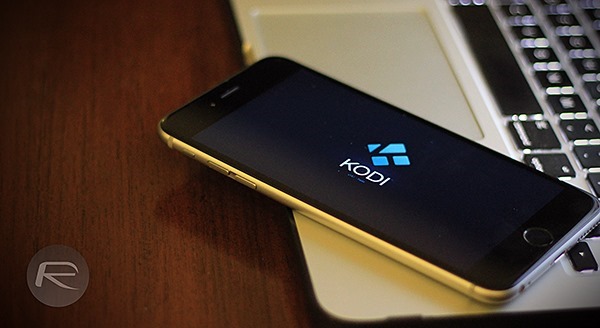
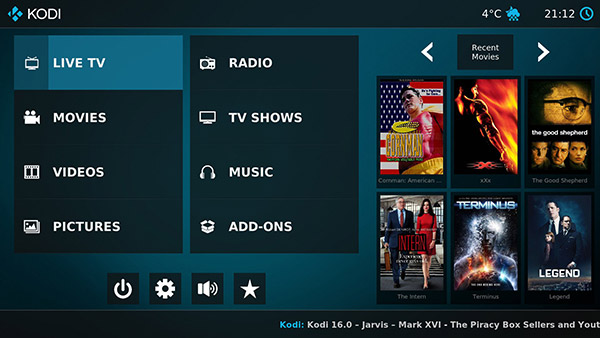
Called iOS App Signer utility, this tool has been around for a while and is responsible for making the process of installing the aforementioned Kodi app a walk in the park. For those unaware, Kodi was originally known as XBMC and has its fair share of fan following as a multi-platform media center. So strap yourself in as we walk you through the process of getting Kodi up and running on your iPhone, iPad or iPod touch device without needing jailbreak in this step-by-step guide below.
Requirements:
- A computer running OS X or macOS.
- Xcode 7 or newer installed. Xcode is Apple’s own development environment and is available to download for free from the Mac App Store.
- An active Apple Developer account. Free developer account will do the job but will require re-sideloading every seven days. Sideloaded apps with full Apple Developer Program membership lasts one year. To create free developer account, head to appleid.apple.com. For full Apple Developer Program membership, head to developer.apple.com.
- iOS App Signer utility which you can download from here.
- Kodi deb files which you can download from here.
Sideload-install Kodi on your iOS 10 device without jailbreak:
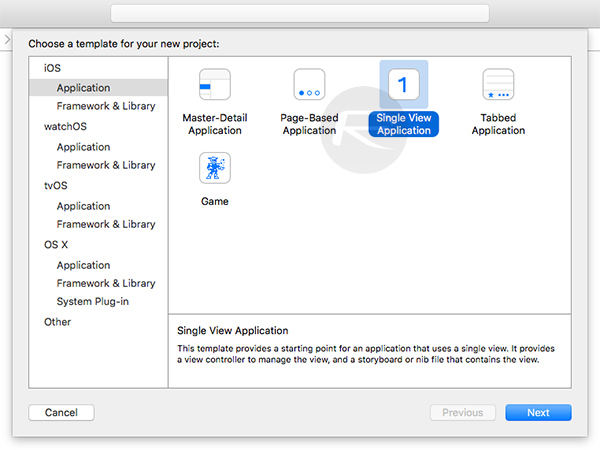
Step 1: First and foremost, launch Xcode on your Mac. From the main Xcode screen select the Create a new Xcode project option. When the main Xcode interface appears, make sure the Application option is highlighted under iOS on the left-hand panel. Select Single View Application from the main interface and select Next.
Step 2: In the Product Name and Organization Name field, type in a unique name for this new application. You’ll also need to provide an Organization Identifier, which is generally a reverse domain entry that is inherited from the name of the application. As an example, we can use com.rp.[App Name]. Once it’s all set, click Next.
Step 3: Next up, choose a location to save the project.
Step 4: Xcode will now complain about the provisioning profile. You don’t really need to understand the complexities about these profiles so just click hit the Fix Issue button.
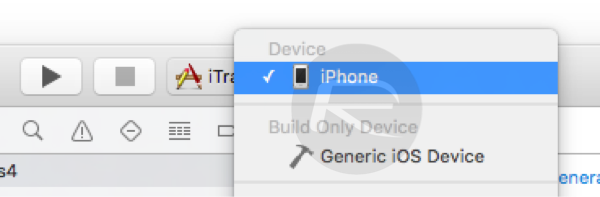
Note: Make sure that the iOS device you want to sideload the app is plugged into the Mac via USB and that the device itself is selected in the top navigation as the destination device in Xcode.
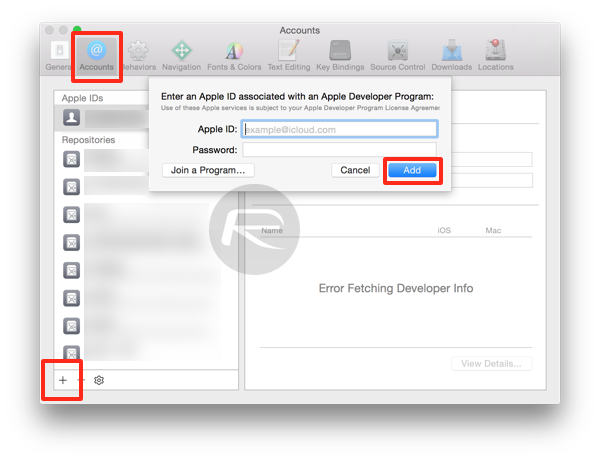
Step 5: In order to automatically fix the code signing issue, Xcode requires a signed in account. If prompted when clicking the Fix Issue button in Step 4 above, click the Add button and sign in with your Apple ID and password. Once again, if prompted, select your Apple ID from the drop-down box and click the Choose button.
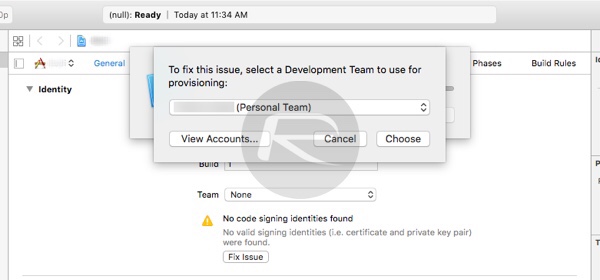
Xcode will automatically use the associated Apple ID and Developer account to resolve the issues that it was complaining about. When finished, it will no longer provide the Code Signing warning.
Step 6: Now, launch the iOS App Signer application that you downloaded earlier. In the app, click the Browse button located next to Input file to locate and select the deb file of the Kodi build you downloaded.
Step 7: Once the deb file is selected, select the Signing Certificate and Provisioning Profile from the relevant lists.
Step 8: Hit the Start button from the iOS App Signer app once the above information has been selected and highlighted.
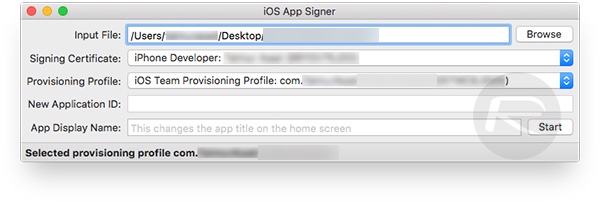
Step 9: When prompted, select a name and a destination for the output file. iOS App Signer will then do its magic and package together a Kodi IPA.
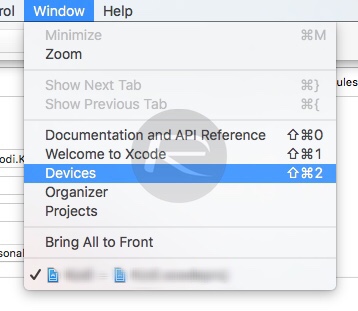
Step 10: Go back into Xcode and click the Window menu from top Xcode menu bar, and then Devices.
Step 11: Select your connected device from the Devices panel on the left, and then click the “+” button.
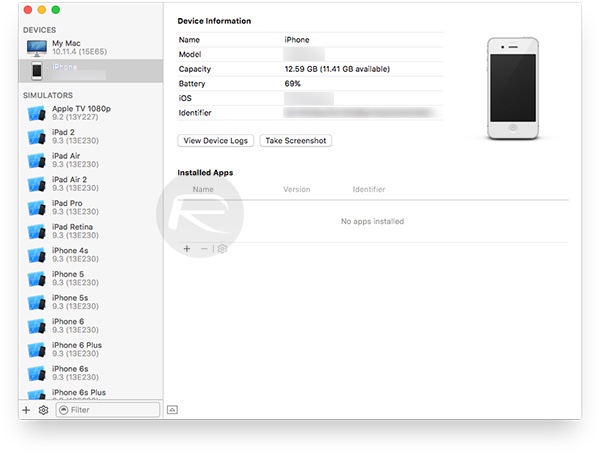
Step 12: Locate and select the IPA file that was compiled and saved to your chosen destination by iOS App Signer.
Xcode will now show as busy for a period of time while installing/sideloading the Kodi IPA to the connected device. If all is up and correct with the provisioning profiles and signing certificates then everything should progress perfectly.
You can now enjoy Kodi on your iPhone or iPad without needing to jailbreak it.
Alternatively, Cydia Impactor for Windows or Mac can also be used to sideload Kodi onto iOS devices. To do it via Cydia Impactor, download Kodi IPA file from here, and then follow the instructions here to sideload onto your non-jailbroken iOS device: Sideload iOS Apps On Windows, Mac With Cydia Impactor Without Jailbreak, Here’s How.
You may also like to check out:
- How To Sideload Apps On Apple TV 4 [Tutorial]
- How To Sideload / Install Kodi On Apple TV 4
- Sideload / Install Kodi On Amazon Fire TV Stick The Easy Way [How-To Tutorial]
- How To Sideload iOS Apps Without Jailbreak Using Xcode For Free
You can follow us on Twitter, add us to your circle on Google+ or like our Facebook page to keep yourself updated on all the latest from Microsoft, Google, Apple and the Web.
