Tomorrow is the big day when Apple will push the big red button after which the final release of iOS 8 will be available to all iPhone, iPad and iPod touch users around the globe. And in order to prepare our readers for the big update, we’ve outlined a handy guide which will ensure that the whole process will go smoothly for everyone.

OTA Route
If you plan on taking the simple OTA route, then follow the steps below to prepare yourself for the update tomorrow.
Check Compatibility
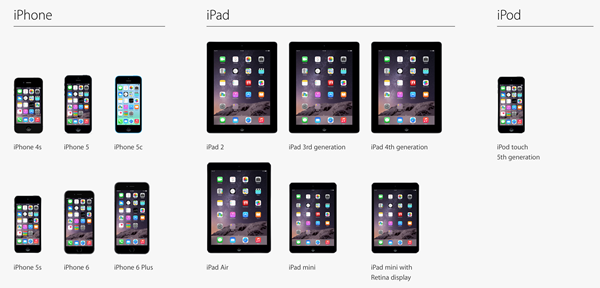
Though iOS 8 is available for a handful of devices, it’s best to know which one is supported by the final release. The list of supported devices are as follows:
- iPhone 4s
- iPhone 5
- iPhone 5c
- iPhone 5s
- iPad 2
- iPad 3
- iPad 4
- iPad Air
- iPad mini
- iPad mini with Retina display
- iPod touch 5th generation

If your device is not in the list, then your device is not supported by iOS 8. In short: it’s time to upgrade your device to something more recent.
Free Up Space
This is the most important thing to look after if you’re planning to take the OTA route; you must have at least 4GB of free space on your device for the process to go smoothly otherwise iOS will throw you a dreaded warning before the update process even begins. And in order to achieve this, it’s best to get rid of apps and content on your device which you rarely use.
If you believe that everything on your device is of importance to you, then move on to the next step.
Backup Using iTunes Or iCloud
A complete backup of your iPhone and iPad is highly recommended before you move on with the big update. There are two ways you can backup your device, either you can make a complete backup using iCloud or use the traditional method of using iTunes.
How To Backup Using iCloud
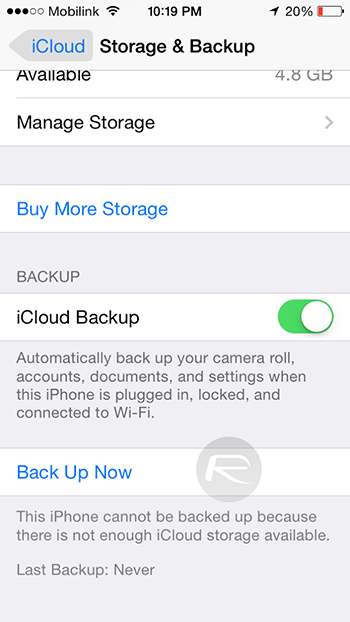
Step 1: On your iPhone or iPad, navigate to Settings > iCloud > Storage & Backup and flip the iCloud Backup button to on.
Step 2: When you turn on the iCloud Backup button, a new option will appear titled ‘Back Up Now’. Tap the button, and wait for the backup process to complete. It may take a while depending on the amount content you have stored on your device.

How To Backup Using iTunes
Step 1: Connect your iPhone or iPad to your PC or Mac using the supplied USB cable and launch iTunes.
Step 2: Under the Backups pane front and center on iTunes, click on This Computer.
Step 3: Click the Backup Now button, and wait for the process to complete.

Wait For OTA Update To Arrive
Once you’re done with all the steps outlined above, all that’s left now is for you to wait for the OTA update to knock on your device’s door. And if for some reason you are not getting a push notification for an available update, then you can manually check for one by navigating to Settings > General > Software Update.
Clean Install
Want to perform a clean install of iOS 8 on your device rather than going through the OTA route? Check out the steps outlined below.
Check Compatibility
This is the first and foremost step which you’ll be going through, and we’ve already mentioned this under the ‘OTA Route’ heading above.
Backup Using iTunes Or iCloud
Performing a backup using iTunes or iCloud also involves the same steps which we’ve outlined above. Go through them thoroughly to ensure that your data is backed up before going through a clean install.
Restore To iOS 8 When It Arrives Tomorrow
And that’s it, you’re all set. When the update is released tomorrow, simply connect your iPhone or iPad to iTunes on your PC or Mac. Download the IPSW file from Apple (we’ll link them here tomorrow) and Restore (NOT Update) your iOS device to this firmware version. This process might take some time depending on your Internet connection speed.
You can follow us on Twitter, add us to your circle on Google+ or like our Facebook page to keep yourself updated on all the latest from Microsoft, Google, Apple and the Web.

