Here’s a step by step tutorial on how to clean install macOS High Sierra 10.13 on your Mac the easy and the right way.
After several changes and improvements spread out over many beta releases, the final build of macOS High Sierra is ready for public consumption. If you opted to stay away from the betas and have been waiting for the latest iteration of Apple’s rebranded desktop OS to be pushed out since it was announced at this year’s WWDC, you’re probably itching to get your hands on it right now.
How quickly you can make that happen though depends on how you want to go about the update. If you want to give it the best possible start it deserves with a fresh, clean install on your iMac or MacBook, but are worried you might get something wrong, look no further. In what follows, we have for you an extremely simple-to-follow, step-by-step guide on the matter. Follow along and get up and running with macOS High Sierra right away.
Requirements
- Make sure that all important data and any files or documents are backed up so that they aren’t lost in the process. Important documents accumulate over time on our machines, so it would be disastrous to lose those through this installation. You can find how to backup your Mac with Time Machine in our post here (look under “Backup”).
- You’re obviously also going to need a Mac that supports the installation of macOS High Sierra. To find out if your Mac hardware is supported by this release, check here: macOS 10.13 High Sierra Compatibility: Full List Of Macs Compatible With Apple’s Latest Desktop OS.
How to Clean Install macOS High Sierra
Step 1: First up, download macOS High Sierra 10.13 final from the Mac App Store as it’s essentially the required part of the process.
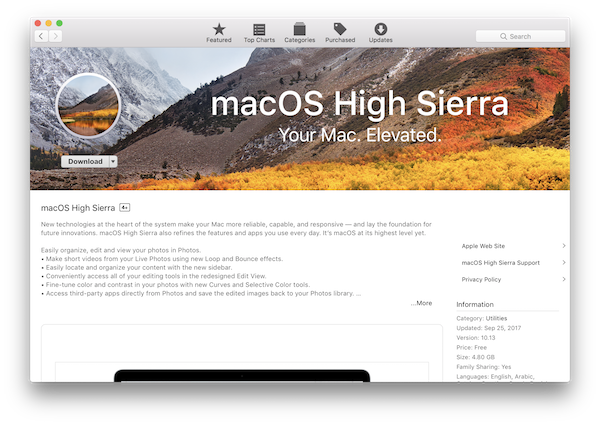
If you haven’t downloaded a version of OS X/macOS previously, then the Mac App Store will initially download an installer and then try to walk you through the process of installation. When the installer has finished downloading, make sure that you quit out of the install as we want to use the install for our own purposes.
Step 2: We mentioned above that we need the installer for our own purposes. When it has downloaded, we are going to use it to create our own bootable USB drive that allows us to fresh-install macOS High Sierra directly to our machines. This means that we don’t actually have to upgrade from another installation of something like Sierra or El Capitan, but rather lets us start afresh.
You can follow the guide on how to make a bootable macOS High Sierra flash drive here: Make macOS High Sierra 10.13 Bootable USB Flash Drive Installer, Here’s How [Tutorial].
Step 3: With the USB bootable drive in our possession, we need to boot the Mac in question up from a cold start with the drive actually plugged in. Go ahead and do just that. As the machine boots up, make sure that you keep the Option key pressed during the launch process. This will take you into an new menu, giving you the option of where to boot from. Make sure that you select the plugged in bootable USB drive and hit Enter to continue.
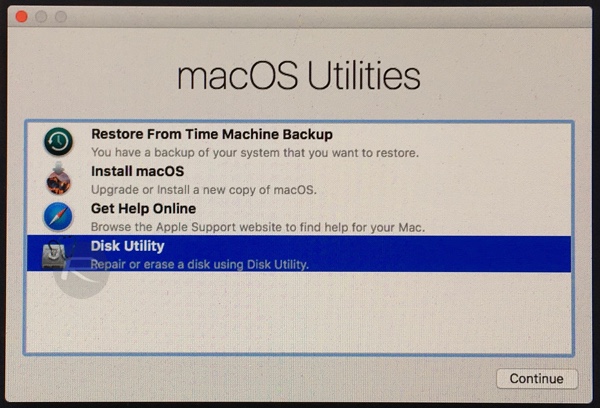
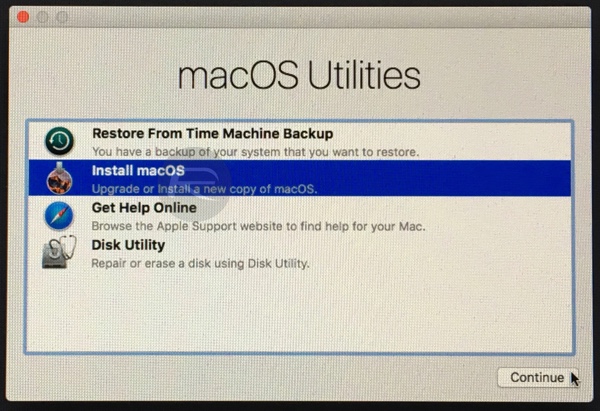
Step 4: After the machine has finished making its checks and running its processes, a macOS Utilities menu will appear. Make sure that you select Disk Utility from the available options and hit Continue to proceed to the next stage.
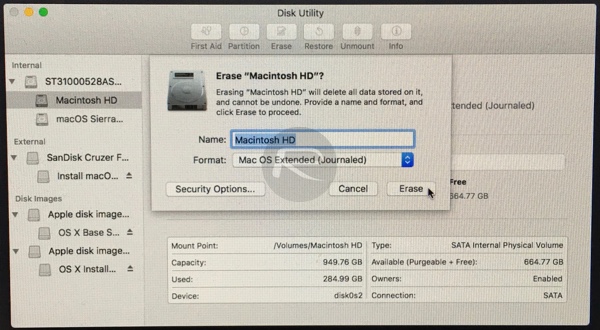
Step 5: When Disk Utility is loaded, make sure that the main Mac hard drive is selected from the left hand side, and then click on Erase button. Make sure the Name of the HDD remains “Macintosh HD”, and that Format selected is “Mac OS Extended (Journaled)”. Hit the Erase button, making sure that you fully understand the consequences and that all data will be erased.
Step 6: The current installation has now been erased, and as there is effectively no functioning operating system installed on the Mac, you will be presented with the macOS Utilities menu again. This time, you want to select Install macOS and hit Continue.
When presented with the new window, click Continue, then make sure that Macintosh HD is selected, which is basically the hard drive of the machine, and click Install.
There you have it, the process of installing a fresh clean version of macOS High Sierra should begin now. During install, High Sierra installer will automatically update file system to the new APFS provided your compatible Mac has a SSD instead of regular mechanical HDD or Fusion drive.
It’s likely that a lot of Mac owners will be perfectly happy to simply keep what they already have, but with the addition of macOS High Sierra installed as an update via the Mac App Store. Given that it comes with a new name, and loads of new features, we feel that it should definitely get its own fresh installation.
You can follow us on Twitter, add us to your circle on Google+ or like our Facebook page to keep yourself updated on all the latest from Microsoft, Google, Apple and the Web
