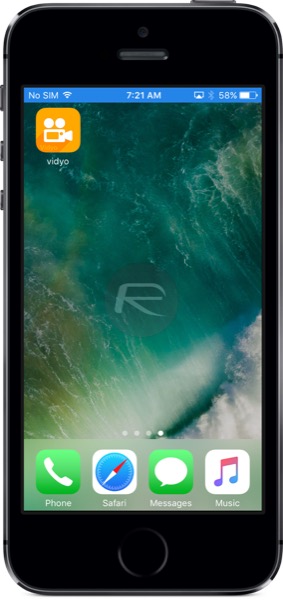
Here’s how to download and install iOS 10 screen recorder app Vidyo on your iPhone or iPad. No jailbreak is required for this to work.
If you keep abreast of the comings and goings on the App Store, and more specifically, the apps that clearly break Apple’s guidelines and Terms of Service, but still manage to make it onto the App Store, then you will probably be familiar with Vidyo. The powerful screen recording app for iPhone entered the App Store earlier this year, but was quickly pulled by Apple due to the fact that the Cupertino-based company frowns on apps that make use of private APIs.
Some had looked positively on Vidyo being accepted by Apple, hoping that internal policies had changed, but the prompt removal put an end to those dreams.
One of the disappointing things for users was that Vidyo actually appealed to many, and it actually worked as intended by offering a fluid and impressive screen recording service. Obviously, for one reason or another, Apple doesn’t want that type of app to exist on the App Store, meaning it was pulled as quickly as it was reviewed and mistakenly approved.
All is not lost though, as we will show you here how you can still install it on your iPhone or iPad. Best of all, we have tested and can confirm that it works on latest version of iOS 10, which is iOS 10.1.1, without requiring jailbreak.
Follow the steps below on how to install and start using it:
Step 1: Download the compiled IPA file of Vidyo from here.
Step 2: Now, follow any one of our detailed guides from below for instructions on how to sideload it onto your device:
- Xcode [official method]: How To Sideload iOS Apps Without Jailbreak Using Xcode
- Cydia Impactor: Sideload iOS Apps On Windows, Mac With Cydia Impactor Without Jailbreak, Here’s How
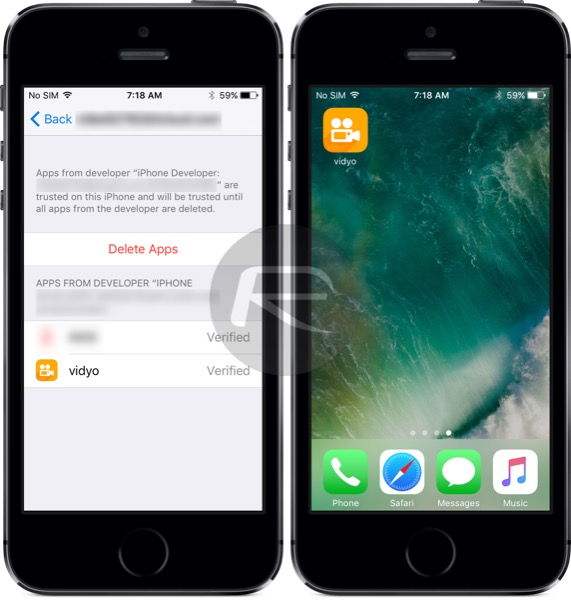
Step 3: Once sideloaded, head to General > Profile(s) > [name of the developer] and then tap on Trust and then Trust again on the certificate. On some iOS versions, this would be General > Profile(s) & Device Management or General > Device Management.
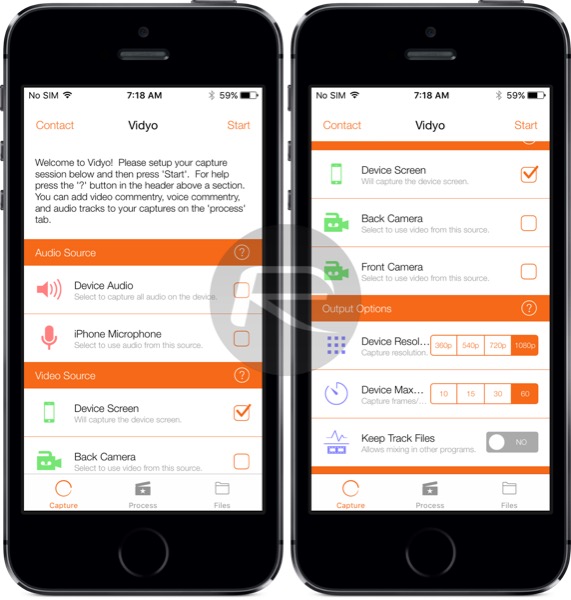
Step 4: Now launch the app. From the main ‘Capture’ tab at the bottom, select your desired settings. We’ll recommend checking ‘Device Screen’ option here as well as ‘Device Resolution’ to 1080p. You can also select ‘Device Audio’ and ‘iPhone Microphone’ if you desire. Once done, tap on the ‘Start’ button located on the top right corner of the display.
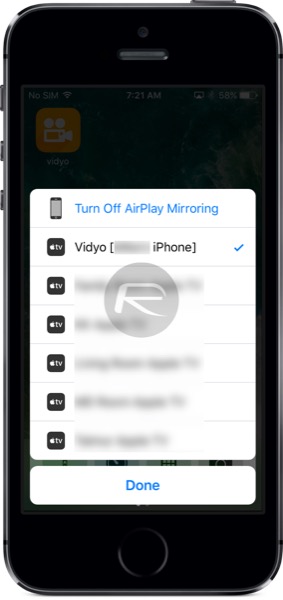
Step 5: Now go back to the Home screen of your iPhone. Swipe up from bottom of the screen to pull out Control Center. Tap on AirPlay Mirroring and then tap on Vidyo to begin recording.
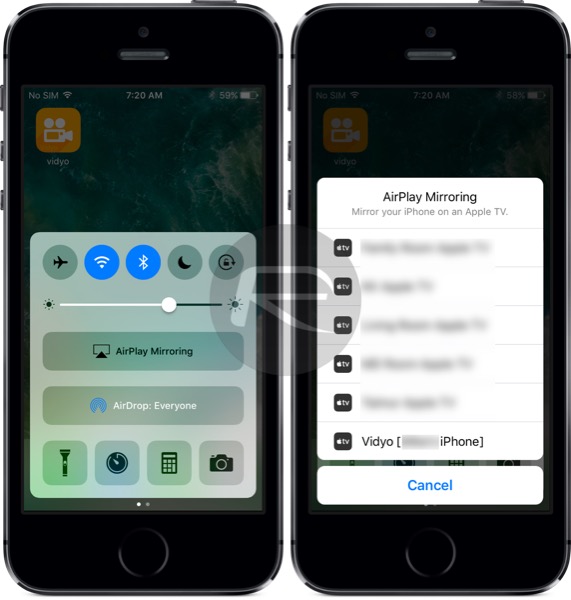
Step 6: Once you see the status bar turn to blue color, it means your screen is now being recorded. Launch any app or game you want and record it in full glory.
Step 7: Once you are done, to stop recording, pull the Control Center out again and then tap on AirPlay Mirroring > Turn Off AirPlay Mirroring to stop recording.
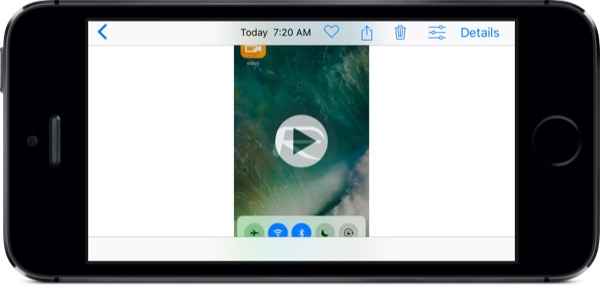
You will now be asked to allow access to Photos app in order save the recorded video to your Camera Roll. Once you do that, recording will be saved there and ready to be shared.
That’s it! Happy screen recording!
You may also like to check out:
- Run Multiple WhatsApp (2) Accounts On iPhone Without Jailbreak, Here’s How
- Download GBA4iOS 2.1 For iOS 10 [No Jailbreak Required]
- Jailbreak iOS 10 / 10.1.1 / 10.0.2 / 10.2 For iPhone, iPad, iPod touch [Latest Status Update]
- Download iOS 10, 10.1.1, 10.2, 10.0.2 Links & Install On iPhone 7, 6s, 6, Plus, SE, 5s, 5c, 5, iPad, iPod [Tutorial]
You can follow us on Twitter, add us to your circle on Google+ or like our Facebook page to keep yourself updated on all the latest from Microsoft, Google, Apple and the Web.
