The Google Now on Tap feature powered by Google app in Android 6.0 Marshmallow adds a little more clarity for Android users on how they interact with the system, and what content is offered up as being relevant to them based on the current app or service that they are using. With the latest update to the app having rolled out, we now see a new way to capture a screenshot and share it via the dedicated built-in “share” button that is now part of Google Now on Tap. We’re going to take a quick look at how to invoke Google Now on Tap and use the screenshot capture feature.
Before we begin, it is important to understand that this is now just a alternate way of capturing screenshots on Android. Google isn’t replacing the regular Volume Up+Power button combination for taking screenshots with this.
Requirements:
- An Android device, running Android 6.0 Marshmallow or above.
- Google app v5.7.13 or over installed on the device.
Instructions:
Step 1: To begin with, you’re going to need to turn on Google Now on Tap to use the feature if you’re running it for the first time. This is as simple as pressing and holding the Home button on the Android device.
Step 2: The newly displayed interface will provide a little more detail about Now on Tap, including a button and set of instructions on how to turn the feature on. Simply follow those instructions.
Step 3: In future, now that Now on Tap is enabled, invoking it is as simple as pressing and holding the Home button systemwide anywhere in the OS.
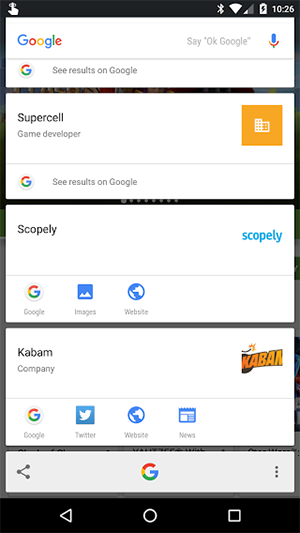
Note: Utilizing the Now on Tap feature allows card like interfaces to be provided that show additional information relevant to the content currently on the screen. Rather than delve into this in depth, we’re going to continue with how to capture a screenshot.
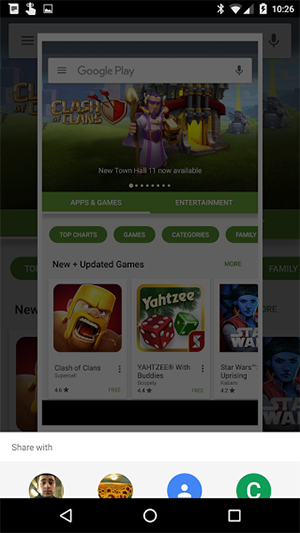
Step 4: You should now see a new share icon in the bottom left-hand corner (part of the update to the Google app). Tap that button to capture a screenshot of whatever is on the display and start the sharing process.
It is important to understand, that by default, Android won’t save the screenshot to the available storage on the device, but there is an option to save it to the Gallery if you wish to do so.
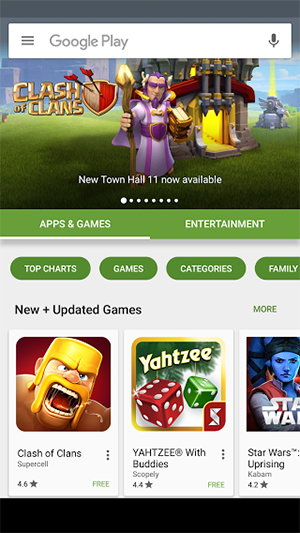
Also important to note here is that screenshots captured using this method will not contain the usual status bar icons on the top and the navigation buttons on the bottom, like it’s when screenshots are taken using the regular Volume Up+Power button combination. All in all, this is not exactly the most seamless method of capturing a screenshot, and it does actually require a little bit of patience in the first instance, but the results speak for themselves. The fact that it doesn’t immediately save the screenshot to the device means that the phone or tablet won’t get clogged up with those forgotten captures. But for those who have damaged volume and power physical buttons on the device, this is a handy little alternate to have to capture screenshots.
(Images via: Nick McManus [Google+])
You may also like to check out:
You can follow us on Twitter, add us to your circle on Google+ or like our Facebook page to keep yourself updated on all the latest from Microsoft, Google, Apple and the Web.
