It was recently discovered that Dell was shipping its computers with a Superfish-like serious security vulnerability called eDellRoot. The news spread like wildfire with an abundance of users reporting the existence of eDellRoot certificate on their computers. Dell later confirmed the existence of eDellRoot, apologized and provided official removal instructions.
So, if you own a Dell, fret not, there’s now a quick an easy solution to remove eDellRoot certificate from your computer in no time. We show you how in a step-by-step guide below.
There are two available methods to remove the eDellRoot certificate from your Dell computer: an automatic method, and a manual one. We would recommend you go for the easier automatic removal method, but if that doesn’t work for you, you can try the manual method as well. However, first you need to establish whether your computer is actually carrying the vulnerability or not.
How to check for eDellRoot certificate:
Step 1: Launch the Certificate Manager tool in Windows. To do this, simply hit the Windows key on your keyboard and type “certmgr.msc” in search, followed by hitting the Enter key.
Step 2: If prompted by Windows UAC to confirm that you want to make changes to your PC, click Yes.
Step 3: Navigate to Trusted Root Certification Authorities > Certificates.
Step 4: Here, look for eDellRoot certificate in the list on the right. If you see it, it means your computer has this security vulnerability.
Now follow the instructions below to remove it.
Automatic Removal
Step 1: To begin, download the official eDellRoot certificate removing tool eDellRootCertFix.exe from Dell here.
Step 2: Once it’s downloaded, simply launch it and allow the app to make changes to your PC when prompted by Windows UAC.
That’s it, the tool will quickly hunt down the certificate, and once removed, it will let you know. You may need to restart your computer after the removal is complete.
Manual Removal
Step 1: Launch the Task Manager. To do this, you can simply right-click on the Taskbar and then click on Task Manager.
Step 2: Here, select the Services tab to the right, and then click Open Services located at the bottom of the window.
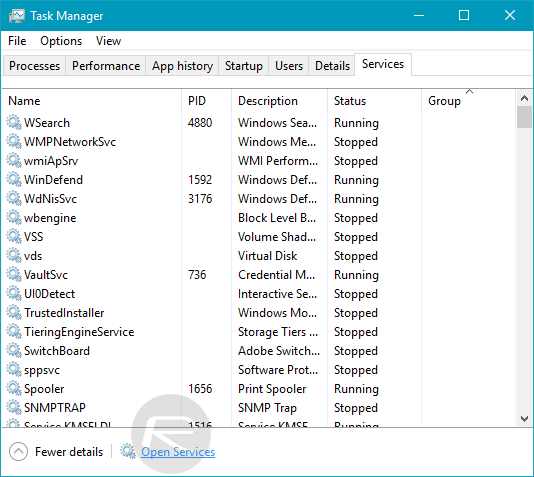
Step 3: You are now viewing the Services list. Look for “Dell Foundation Services” in the list and select it.
Step 4: Once the service has been selected, hit the “Stop the service” button in the left panel to stop this service.
Step 5: Now head over to File Explorer and navigate to C:\Program Files\Dell\Dell Foundation Services.
Step 6: Look for the file named “Dell.Foundation.Agent.Plugins.eDell.dll” and delete it. This will not be possible if you don’t stop the service as defined in Step 4 above.
Step 7: Given the critical nature of the file, you may be prompted to provide administrator privileges to delete the file. So, when asked, click the Continue button to delete the file.
Step 8: Now you need to run the Certificate Manager tool again by hitting the Windows key on your keyboard and typing “certmgr.msc” in search, followed by hitting the Enter key.
Step 9: Navigate to Trusted Root Certification Authorities > Certificates.
Step 10: Here, look for eDellRoot certificate in the list on the right, select it and hit the X button in the toolbar above to delete it. Take great caution when deleting the certificate, and make sure you do not delete anything else.
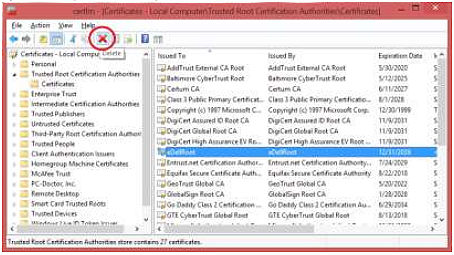
Step 11: Windows will now ask you to confirm the removal, click the Yes button to delete the certificate.
Step 12: Now that the certificate is deleted, it is time to restart the Dell Foundation Services that you stopped in Step 4. Head back to the Services panel via Task Manager, select the “Dell Foundation Service”, and click Start Service.
Step 13: Reboot your computer.
That’s it. You are done. Your Dell computer is now free of eDellRoot certificate vulnerability.
You may also like to check out:
- How To Remove Any Superfish Like Adware From Your PC
- How To Uninstall / Remove Lenovo Superfish Adware And Certificates From Your Computer
You can follow us on Twitter, add us to your circle on Google+ or like our Facebook page to keep yourself updated on all the latest from Microsoft, Google, Apple and the Web.
