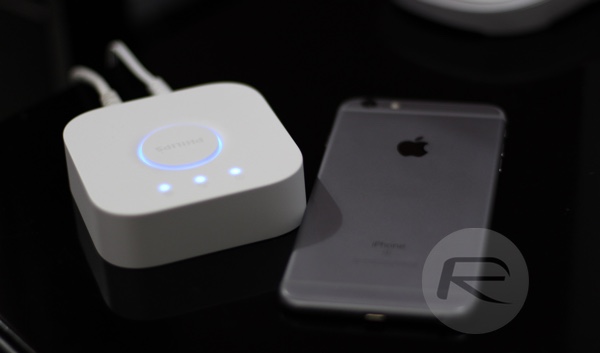
The introduction of the new Philips Hue Bridge 2.0 with Apple HomeKit compatibility will undoubtedly mean that there’ll be a heap of individuals with existing Hue setups wanting to move across to the new Bridge 2.0 device. Thankfully, the Hue app for iPhone, iPad, and iPod touch has a transfer wizard built into it that is fairly simplistic to use. We’re going to take a look at the steps needed to make sure that all existing Hue lights and bulbs are transferred across to the new hardware.
So without any further delay, lets get your Philips Hue accessories connected to the latest HomeKit-enabled Bridge so that you can control them using Siri on your iPhone, iPad, iPod touch and even your Apple Watch.
Step 1: The old Hue Bridge that you are replacing will need to remain active for this to work. Leave the device plugged into the wall and Ethernet outlets to ensure that it has continuous power and network access.
Step 2: Take the new HomeKit-enabled Bridge and plug that into a power outlet and Ethernet. You should now have both the original and the new Bridge connected fully.
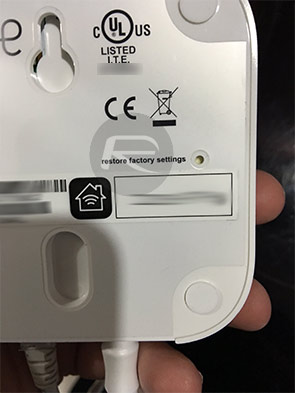
NOTE: If the new HomeKit-enabled Bridge 2.0 was purchased as part of a kit with accompanying Hue lights or bulbs, then you’ll need to reset it to clear those pre-paired lights. Press the reset button on the back of the new bridge for a few seconds. Wait for it to reset.
Step 3: Launch the Hue app on your iOS device. This could be on your iPhone, iPad, or iPod touch.
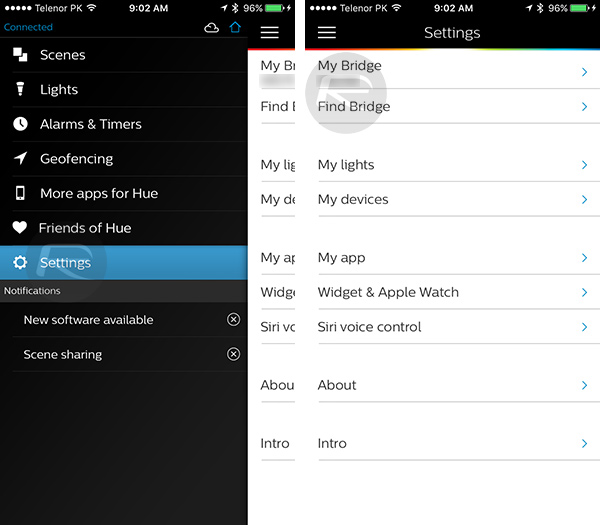
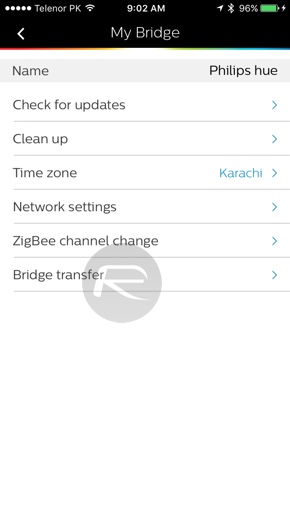
Step 4: Open the sidebar menu within the Hue app by tapping the hamburger button, and navigate to Settings > My Bridge > Bridge transfer.
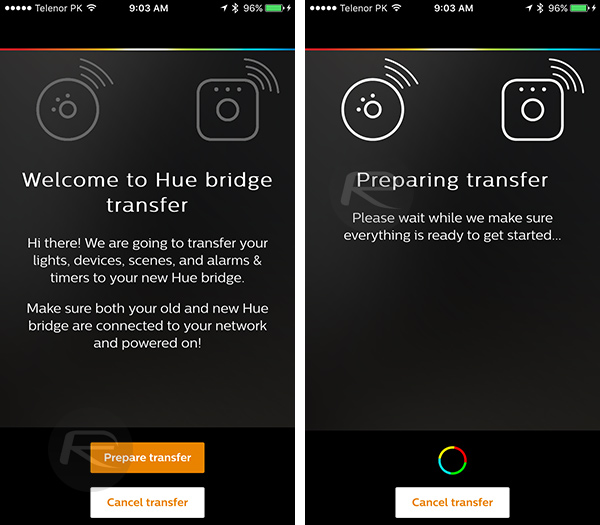
Step 5: The resulting interface will provide some information about the transfer. Once it’s been read, press the orange Prepare transfer button for the process to begin.
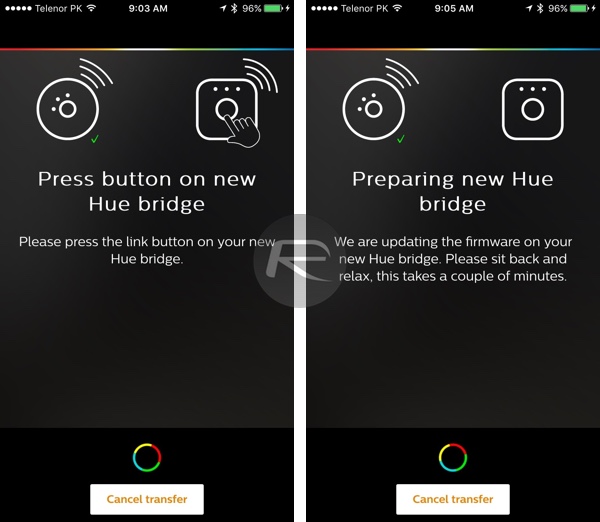
Step 6: Next up, press the physical button on your old Hue Bridge device, and then press the physical button on the new Bridge when instructed to do so by the app. Once you have done this, a firmware update will be installed on the new Bridge. Wait for the update to complete.
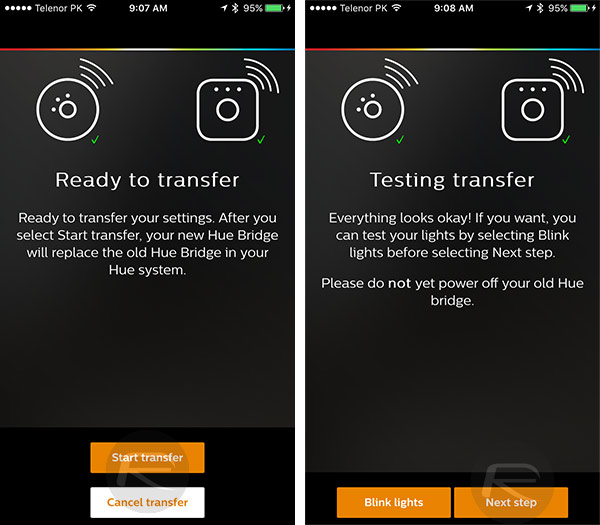
Step 7: You will now be greeted with a screen with a ‘Start transfer’ button, tapping which, will begin the transfer process, Once it completes, you will be shown a page telling you that the transfer has been completed. Tap the Blink lights button to test the transfer, and if all is well, tap the Next step button.
Step 8: Once the transfer is complete, it’s important to ensure that old Hue Bridge doesn’t interfere or provide any conflicts with the new setup. Use a SIM ejector tool or pin to tap the reset button on the rear of the old Bridge to delete pairing with any of the lights and reset it to factory default.
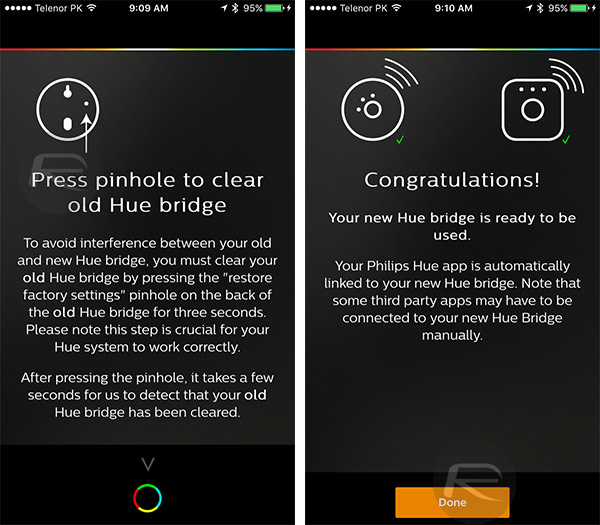
Step 9: Once the old Bridge has been reset, unplug it and tap Done in the app.
And that’s all. Your new HomeKit-enabled Bridge, which lets you control lights with Siri, should now have all of your settings from the old Bridge.
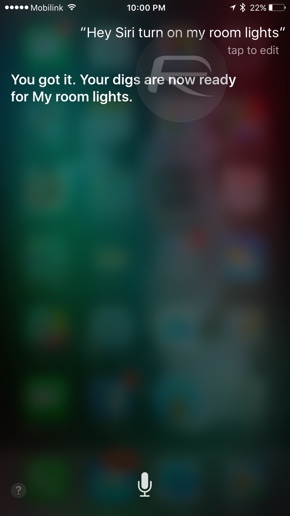
Enjoy controlling your lightbulbs with Siri!
If you don’t have the new HomeKit-enabled Philips Hue Bridge yet, you can get one from Amazon.
Buy: Philips Hue Bridge 2.0 HomeKit (2nd-gen) from Amazon: $59.99
You may also like to check out:
You can follow us on Twitter, add us to your circle on Google+ or like our Facebook page to keep yourself updated on all the latest from Microsoft, Google, Apple and the Web.
