Are you a Mac user but have the urge to give Windows 8 a try? Using some software, Windows 8 be installed on top of Mac OS X, with support for all of its newest features. If you’re already familiar with the concept of virtual machines, this won’t offer much to you, but if you’re not that sure, read on: you’ll have Windows 8 running in no time.
Note: The following tutorial was completed using VMware on Mac OS X. You can follow the similar steps for installing Windows 8 on any Windows 7/Vista powered PC as well.
You’ll Need:
- A full copy of any build of Windows 8. At the time of this writing, the newest build is 7989. We won’t provide a direct download link here since Windows 8 isn’t available officially to public yet. Google is your best friend.
- A good virtualization tool such as VMware Fusion (get a 30-day free trial from here). Windows users can use free VMware Player product from here. VirtualBox is a good freeware alternative, but since it doesn’t offer quite as good graphics acceleration support, we’re leaving this one out.
- About 1 hour of your time.
Once you’ve obtained everything mentioned above, it’s time to begin your installation. if you have an older Mac with less RAM and a slower processor consider exiting out of other applications before moving on.
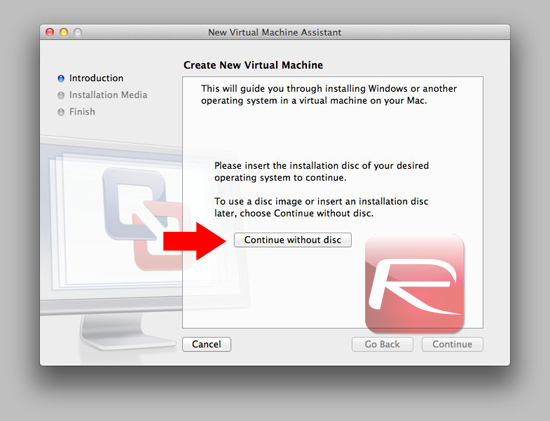
Step 1: Fire up VMware Fusion and click on "Install Windows or another operating system in a new virtual machine".
Step 2: Since this version of Windows 8 isn’t available on DVD yet (unless you decide to burn the image, which feel is a waste of time), we’re ignoring VMware’s almost exclusive reliance on physical discs and pointing it to our Windows 8 image instead. From the wizard that should pop up, select "Continue without a disc".
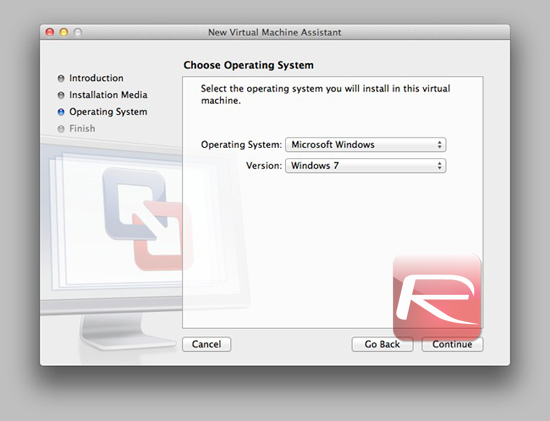
Step 3: On the operating system selection screen that should show up afterwards, just select "Windows 7", since no Windows 8 option is available at this time. Windows 7 VMware tools should work on Windows 8 just fine.
Once you finish going through this tutorial, you should now be ready to install Windows 8 in your virtual machine. If you’re familiar with installing Windows operating systems in the past, you’ll feel right at home in Windows 8’s installation system. Nonetheless, we’re going through it in some detail below.
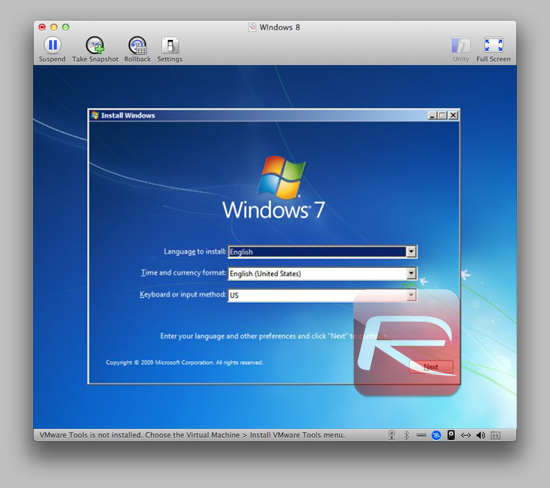
Step 4: Once you start booting from your Windows 8 image, you’ll see a "loading files" progress bar followed by the Windows 7 boot up screen. Users will then be able to change their regional preferences, such as keyboard layout. Once you’re done adjusting these settings, click "Next", then "Install" on the screen that should pop up afterwards.
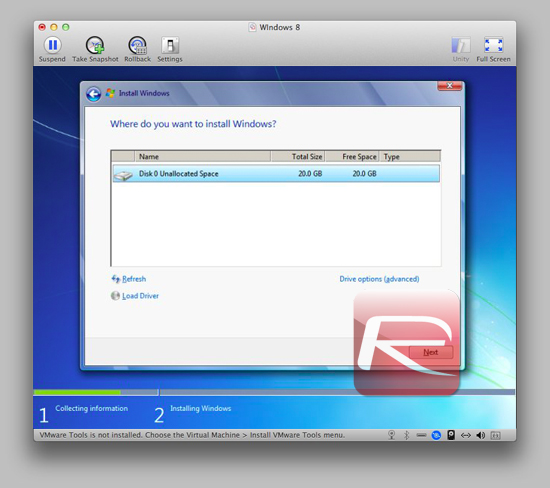
Step 5: after clicking through a few self-explanatory screens, you get to the disk partitioner. In a virtual machine, you should just select the main volume (could be market as "Free Space", just select it anyway). After hitting "Next" for the last time, the installation should start.
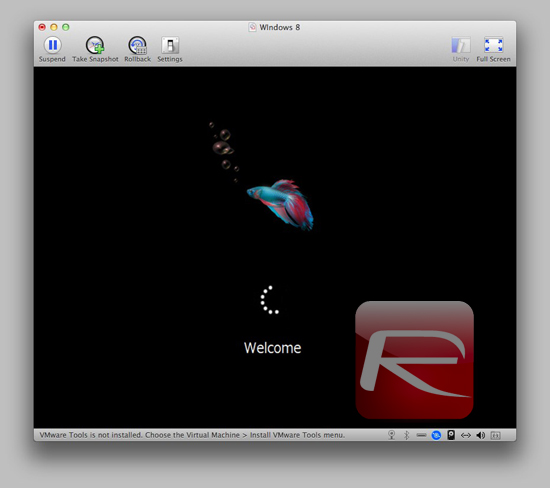
Step 6: kick back and relax, you won’t have much to do for the next 20 or so minutes, while Windows 8 installs. Once the installation is finished, you will finally be able to boot into Windows 8!
You can follow us on Twitter or join our Facebook fanpage to keep yourself updated on all the latest from Microsoft, Google and Apple.
