Perhaps one of the most popular, but simple tweaks in the last few months is Zeppelin modification which is available through the ModMyi repository in Cydia. The tweak provides a small aesthetic enhancement to a jailbroken iOS device by allowing a custom logo to be set in place of the default carrier logo. Zeppelin is similar in functionality to that of Fake Operator and MakeItMine, except it allows total customization over the logo as long as the set graphic is within the space confinements.
The tweak itself is fairly simple and works by setting a portable network graphics (png) file in place of the carrier text on the top left hand of the screen. Zeppelin looks for specific file names in its user directory, allowing it to see a specific file depending on which status bar is active at any given time. As an example of this, the user may wish to set a different carrier logo for when the Springboard is visible, when an application is active and a separate one when the Notification Center screen is invoked.
![]()
A number of logo packs are already beginning to pop up in Cydia which offer new images for use with the Zeppelin tweak, but how do you go about creating and activating your own logo? It is a lot simpler than some may think and involves the use of an image editing package such as Photoshop or GIMP and an SSH client to be able to get the logos into the correct directory on your device. The pre-requisites are as follows:
- A jailbroken iDevice with the Zeppelin tweak installed via Cydia.
- The use of image editing software such as Adobe Photoshop, GIMP or Paint.net.
- The ability to securely log into your device using FileZilla, CyberDuck, iFunBox, iFile or something similar.
In the example shown in this tutorial, we have created a text based Redmond Pie logo using the familiar styled ‘R’ that you seen on most of our branding. The creation of the images works in a similar way to how developers create graphics for iOS applications, and requires the use of the ‘@2x’ ending to tell the operating system that a high resolution version of the logo exists for use on Retina ready devices such as the iPhone 4 and 4S.

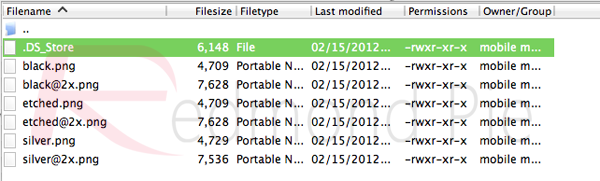
The Zeppelin tweak looks for specific file names in its directory so it knows which one to display depending on the status bar that is in view, these file names are below:
- black(@2x).png – This image is displayed when the status bar is black, generally on the Springboard.
- etched(@2x).png – This image is displayed by Zeppelin when Notification Center is active.
- silver(@2x).png – Displayed when the status bar is silver, generally meaning an application is active.
The file names refer to the status bar color, so when creating the graphics it is a good idea to bear in mind the different states and use colors and text which will stand out and look good on each status bar. The file pixel size is also important due to the fact the status bar is only 20 pixels in depth and therefore can only display a limited sized image.
- Non Retina devices – maximum logo size is 60 x 20 pixels.
- Retina devices – maximum logo size is 120 x 40 pixels and must be appended with @2x [ e.g. ImageName@2x.png].
Step 1: Open up your chosen image editor and create a blank canvas with a pixel size of 120 x 40 at 72dpi.
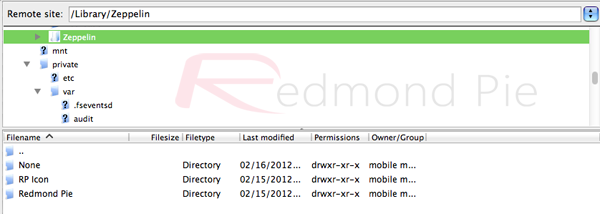
Step 2: Create a folder with your chosen logo name, in our case ‘Redmond Pie’. This will be where all of your logo files will live and what will be uploaded to the device.
Step 3: Import and alter your logo, or create your desired graphic from scratch. In our case we resized a Redmond Pie logo to 120 x 40 pixels.
Step 4: Once the logo is to your liking, save the 120 x 40 file with the correct file name as mentioned above. This will be either black@2x.png, silver@2x.png or etched@2x.png depending on which status bar state it is to be used on.
Step 5: Once you have created a logo for each status bar state, making sure that all text and images are visible, connect your chosen SSH client to your jailbroken device.
Step 6: Navigate to /Library/Zeppelin and transfer the folder which we created in step 2 into the tweaks system folder.
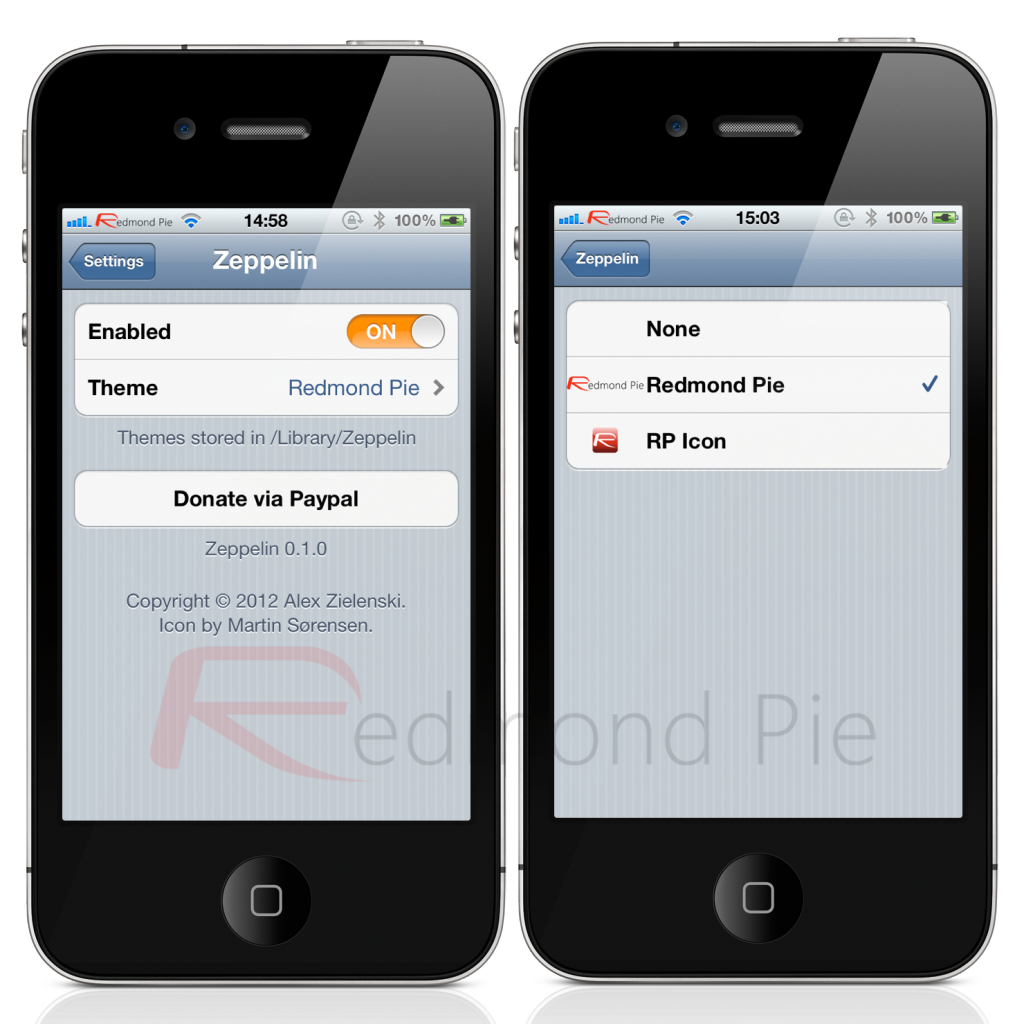
Step 7: Once all files have securely transferred across, use the device to navigate to Settings >> Zeppelin, and then find your personal logo entry and activate it. Voila, your own custom logo should now be adorning your device.
For anyone familiar with basic image creation and file transfer on an iDevice, the creation of a Zeppelin logo is fairly straight forward, being limited only by imagination. Try it out and see what you can come up with and make sure you keep watching Cydia for the official Redmond Pie Zeppelin logos.
You can follow us on Twitter, add us to your circle on Google+ or like our Facebook page to keep yourself updated on all the latest from Microsoft, Google, Apple and the web.
