Modern day computer systems are far too complex to be explained through one key process. They contain a mx of hardware and software working together with several other components to deliver us the smoothest possible computing experience. Even if we look at just the software part of such an environment, there are so many inner lines of code topped by a graphical user interface, that there is a potential of so much going wrong without us noticing. At times, it does happen that a feature that was implemented to help smoothen the user experience, becomes the cause to disrupt it.
In Microsoft Windows, caches are present to speed up the retrieval of data. Your browser’s history, your application data, your file explorer activities, your previous searches, your network adapter information and more, all are stored in the form of caches to make subsequent calls for this data faster. While this is generally very helpful, caches continue to build up over time, and if they’re not addressed every now and then, soon these caches will start bogging the machine down, resulting in a relatively poor user experience over all. Hence, it’s quite favorable to clean out your operating system’s caches from time to time. In Windows 8, this is even more important, since you have both the Desktop/Legacy and Modern environments running side by side, each with its own set of caches.

While the best approach is to use an all-in-one cleaner utility to address this matter in one go, you may also choose to do so manually. We’ll guide you on how you can clear individual caches under Windows 8.
Clear Desktop Cache Using Disk Cleanup
Windows has had the Disk Cleanup Utility for ages now, and it still serves the purpose. To launch it, right-click the partition of your choice under Computer, and select Properties. From the dialog box, click Disk Cleanup and wait for the tool to load. Alternatively, you may enter “cleanmgr” in search to locate the application through Start Screen.

Within the Cleanup utility, make sure you select everything for maximum effect. At a bare minimum, you need to clean out thumbnails and temporary files. Hit OK to implement the changes, and you’re good to go.
Flush DNS Cache Via Command Prompt
Within the Windows 8 Desktop environment, another area that you may want to clear the cache for can be your computer’s DNS. It may be so that you’ve been experiencing browsing issues without being able to nail the exact cause. Flushing DNS cache is always a safe bet and might actually work out in your favor, too.
To do this, open a command prompt window and enter the following:
ipconfig /flushdns
This will clear out the DNS Resolver Cache, resulting in better performance from your network adapter.
Delete Windows Store Cache
This one is rather interesting, primarily because there was no Windows Store prior to Windows 8. Deleting this one is probably the easiest, as all you need to do is launch a Run dialog (Win + R), and enter WSReset.exe. A confirmation page will let you know that Windows Store cache was indeed cleared, and that you may resume normal operation.

Delete The Live Tile Cache
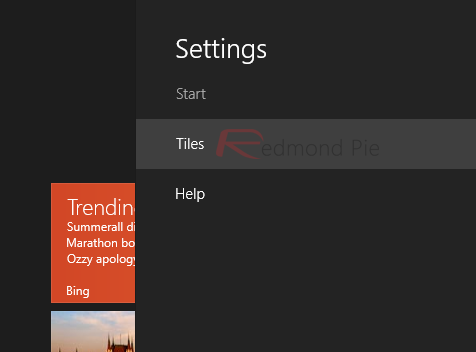
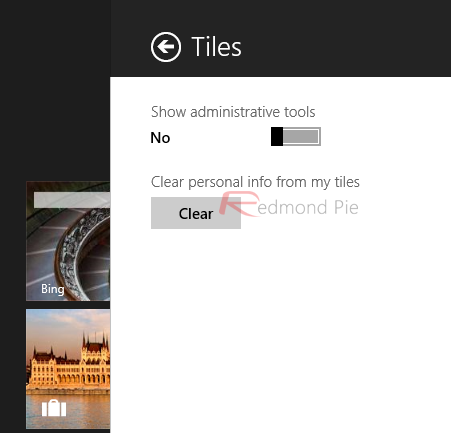
This one, too, is Windows 8 exclusive, and could come in quite handy if your live tiles start giving your troubles. To clear the Live Tile cache, pull up the Charms bar (Win + C) on the Start screen, go to Settings and then Tiles.

Within the next panel, click the Clear button under “Clear personal info from my tiles”, and that’s it.

Clearing The Modern Internet Explorer Cache
You would most likely already know that Windows 8 has two versions of Internet Explorer – the traditional desktop version, and a stripped down, Modern UI one (accessible only through the Start screen). While the latter may not be very useful for desktop and laptop users, it is bound to find much usage with tablets and Windows RT devices. Hence, clearing the cache here could help increase the overall speed and performance of the machine.
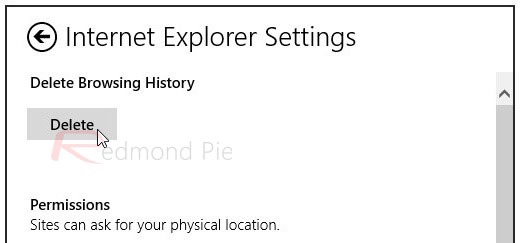
To do so, launch Internet Explorer from the Start Screen tile, go to Internet Options and Delete the Browsing History. It’s as simple as that.

While none of these tips may be miraculously increasing your PC’s speed and performance, it might surprise you to see the over all impact that such small changes may have on the user experience. So, the next time your Windows 8-based machine starts behaving funky, be sure to try some of these out, as they may save you a lot of frustration and time in troubleshooting the issue.
You can follow us on Twitter, add us to your circle on Google+ or like our Facebook page to keep yourself updated on all the latest from Microsoft, Google, Apple and the web.

