Here’s how you can set Windows 10 to turn on WiFi automatically on your PC after a specified number of hours.
It’s probably fair to suggest that a fairly high percentage of computer and tablet users opt to turn off WiFi on their devices for one reason or another. For some people this could be down to connectivity issues when in and out of different locations. For others, this could be a productivity concern, with some choosing to remove access to the Internet while they work through a workload or a to-do list.
Regardless of the reason, wouldn’t it be great if you could opt to turn WiFi off for a predetermined amount of time, and then have it automatically turn back on? Well, with Windows 10, you can as long as you’re running at least build number 14942 or later. Microsoft hasn’t exactly publicized this feature, but luckily hasn’t hidden it away out of reach either, so we’re going to take a look at two different methods and the steps needed to get it working.
Method 1
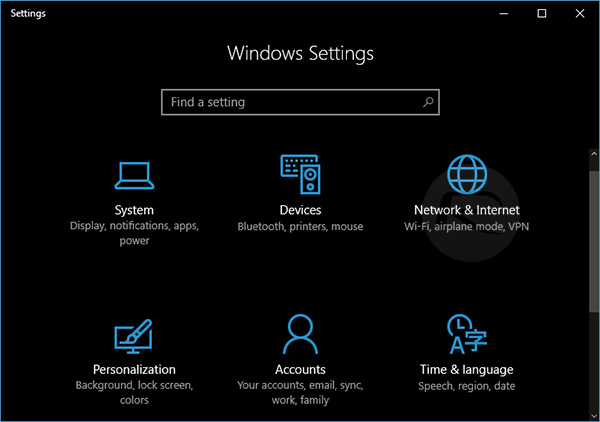
Step 1: First of all, you’re going to need to open the Settings app in Windows 10 by pressing the Windows key + I. As the name suggests, this will give you access to all configurable settings and preferences within Windows 10.
Step 2: Make sure to click on Network & Internet option to provide yourself with choices pertaining to connectivity on the installed machine.
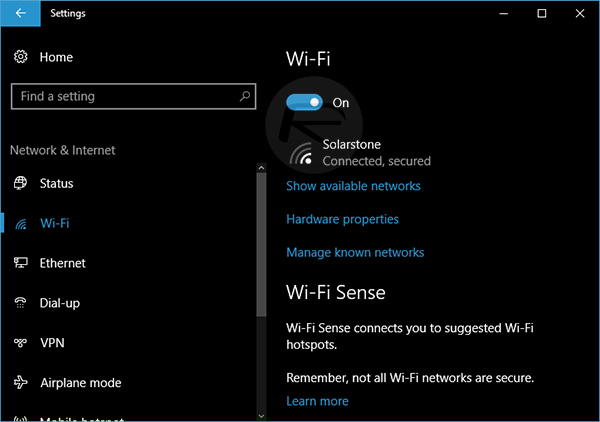
Step 3: On the left-hand side, under the Network & Internet heading, select the Wi-Fi option which is named and sits with the familiar looking Wi-Fi iconography. On the right-hand side of the Wi-Fi options, switch the toggle under Wi-Fi to the Off position.
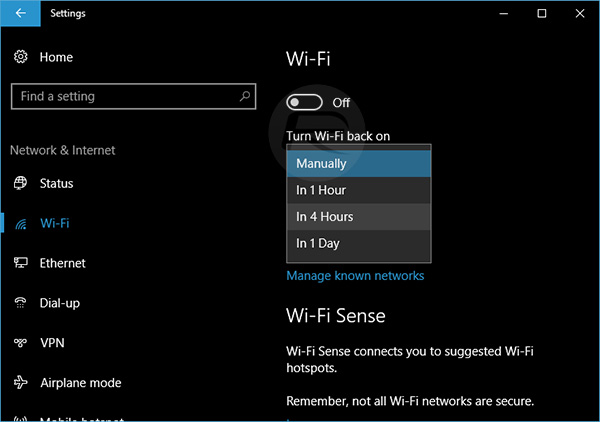
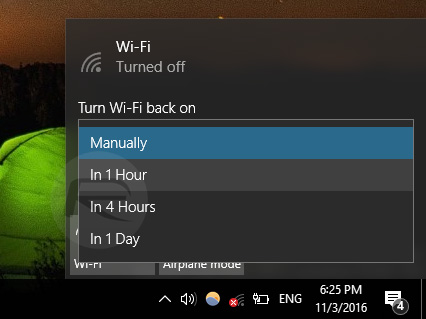
Step 4: Disabling WiFi will produce a new drop-down menu item titled Turn Wi-Fi back on. Click the drop-down box and select to turn Wi-Fi back on in either 1 Hour, 4 Hours or 1 Day. Making this choice automatically means that Windows 10 will invoke the WiFi setting again after the provided time period has elapsed.
Method 2
Step 1: Step 1: To begin, click the wireless icon in the taskbar, followed by clicking the Wi-Fi button which should disable the connection. You will now see the same option as seen in Method 1 above; a drop-down box titled “Turn Wi-Fi back on”.
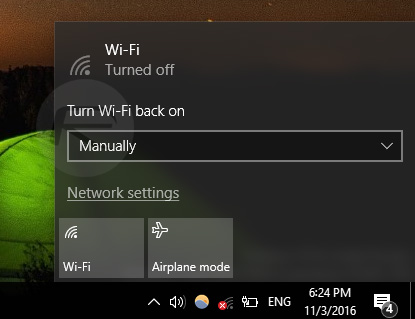
Step 2: Simply click the drop-down box and select the interval after which you want WiFi to automatically kick back in.
And there you have it. On previous versions of Windows, and most other operating systems for that matter, explicitly opting to turn WiFi off meant that the user would need to head back into those settings and opt to turn the functionality back on before the device would connect to an available network. This setting means that the process can now be automated without requiring the user’s input.
You may also like to check out:
- Windows 10 Creators Update Features And Release Date Announced
- Download Windows 10 Pro ISO File Without Product Key From Microsoft
- Windows 10 Product Key And Activation: How To Find It And How It Works
- Fix No Wi-Fi Available After Windows 10 Upgrade Issue, Here’s How
You can follow us on Twitter, add us to your circle on Google+ or like our Facebook page to keep yourself updated on all the latest from Microsoft, Google, Apple and the Web.
