Facebook today announced Timeline, a new feature which gives you the capacity to check back on everything that has ever happened in your Facebook lifespan.

Whilst it’s rather creepy that Facebook has essentially been your biographer during your time on the world’s largest social network, the common human trait of curiosity will undoubtedly take hold of many who will find themselves nostalgically trawling through old conversations, photos and statuses.
Although the feature has been announced, it is not yet available to the public – only developers. If you think you can entertain the idea of reading the most recent extract of your life story, well, at least your Facebook life story (the two don’t necessarily always correlate), then there is a way you can do so right now.
The process isn’t particularly painstaking, although it will require you to follow the instructions carefully. Before we get started, there are a few things that you should heed:
- It’s still in development (hence the developer-only access), so don’t expect this to necessarily run as smoothly as FarmVille.
- You will be the only person able to see your timeline (unless you adjust this rule), but it will automatically be available to the prying eyes on your Friends lists within a couple of days.
- If you login on a different machine, timeline is disabled, although it can be retrieved (once you have completed the steps in the guide below) by following this link: https://www.facebook.com/YOURUSERNAMEHERE?sk=timeline
- For one of the steps, you will need a “verified” Facebook account (linked to a credit card or phone number), so make sure you’re indeed verified before you decide to continue.
Right, now we’ve got the formalities out of the way, let’s get cracking with the method!
Step 1: Log in to Facebook.
Step 2: You will need to enable developer mode if you haven’t already. Simply type “Developer” in the search box and click on the top result.
Step 3: Go to the developer app, which can be found here should Facebook not automatically redirect you.
Step 4: Create a new app (don’t fret, nobody will be able to see it), and give it a name and namespace (no CAPS allowed with the namespace).
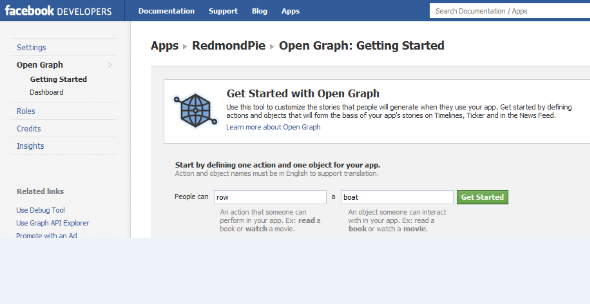
Step 5: Once that’s done, click on the “Get Started using open graph” under the “Open Graph” header.
Step 6: You will then be asked to create a test action for your app, like “read” a “book”, or as I personally opted for, “row” a “boat”.
Step 7: Next, you’ll be met with a config page of your selected action. Navigate through that page and the next three pages of settings.
Step 8: Once you have gone through the last page and hit “Save and Finish”, after a couple of minutes, an invite to try Timeline should appear at the top of your homescreen.
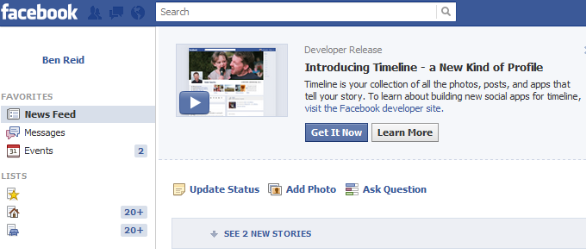
Click it, and you will be met with a page which seemingly covers every nook and cranny of your Facebook life since the day you joined. Enjoy!
(via TechCrunch)
You can follow us on Twitter or join our Facebook page to keep yourself updated on all the latest from Microsoft, Google, Apple and the web.
