Looking to upload and share Snapchat Spectacles videos on Facebook? Here’s a step-by-step guide detailing how you can do that.
Snapchat Spectacles instantly proved that you don’t need a hardware creation with insane specs and innovative advances to get the public wooing over your product. Take some plastic spectacles, insert a point-of-view camera, allow it to upload to a connected Snapchat account, and you have a smash hit on your hand. Oh, and artificially limit the distribution of the hardware to create more buzz.
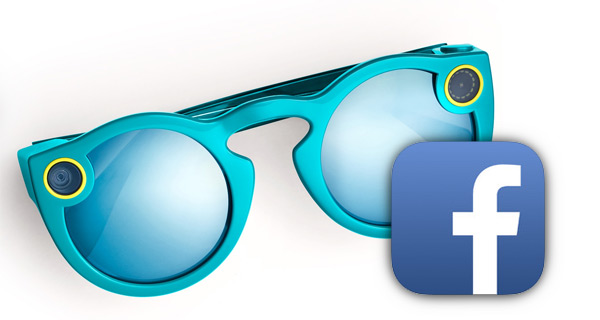
With Spectacles now getting into the hands of more users, wouldn’t it be great if you could share the videos captured to other networks, such as Facebook? Well, you can, and here’s how.
Step 1: Whilst wearing the wonderful Snapchat Spectacles, you’re going to need to press the physical record button on the hardware in order to start capturing video. This is exactly the same as how you would normally record video with the wearable.
Step 2: Once you are happy with the video recorded, launch the Snapchat app on your connected smartphone and make sure that you have switched to the Camera View. Ensure that you can actually see what’s going on through the view finder.
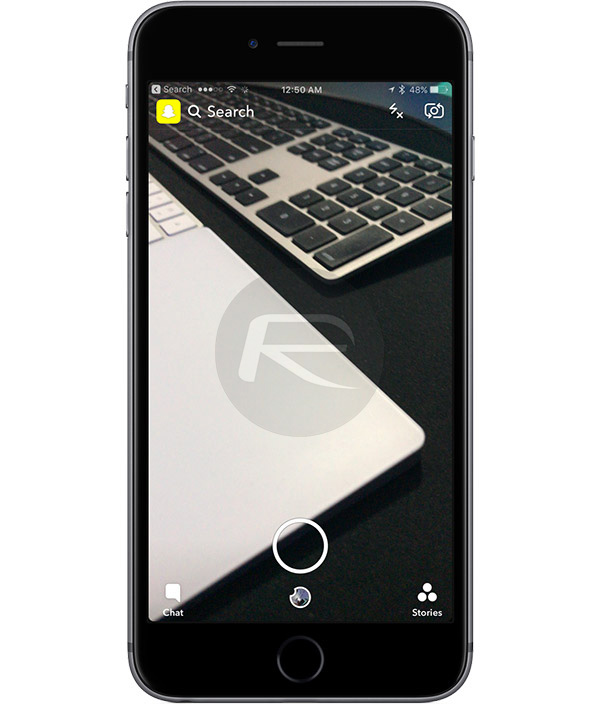
Step 3: Underneath the main Shutter button there is a small icon which you may typically know as the place for accessing Memories on Spectacles. Tap on that button to continue. This will take you to your saved videos captured via the connected Spectacles.
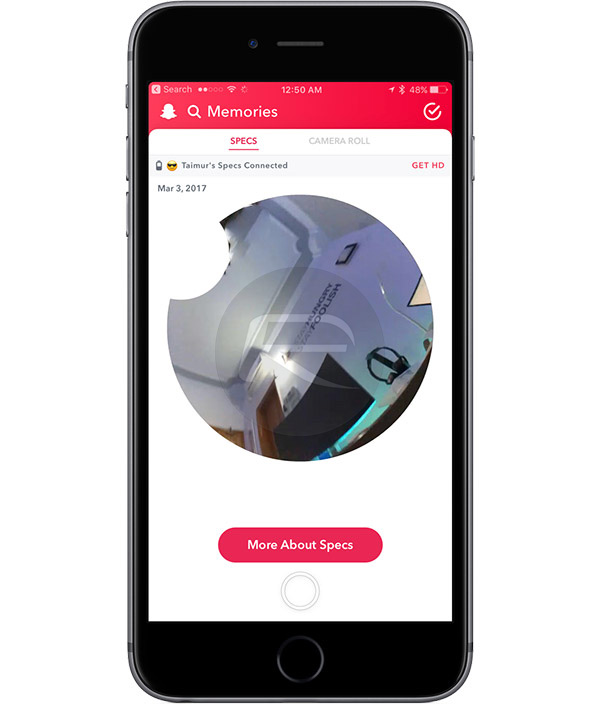
Step 4: When in Memories, make sure you have the Specs tab at the top selected, and not the Camera Roll option. Here, you will see all the captured videos from Spectacles. Tap on the ‘select’ button in the top-right corner and then choose the video you wish to share with all of your lovely Facebook connections.
Step 5: The video will be thrust into a new view, with an included Share button in the tool bar at the bottom. This should be second from the left. Tap on this button to call up the familiar looking iOS Share Sheet.
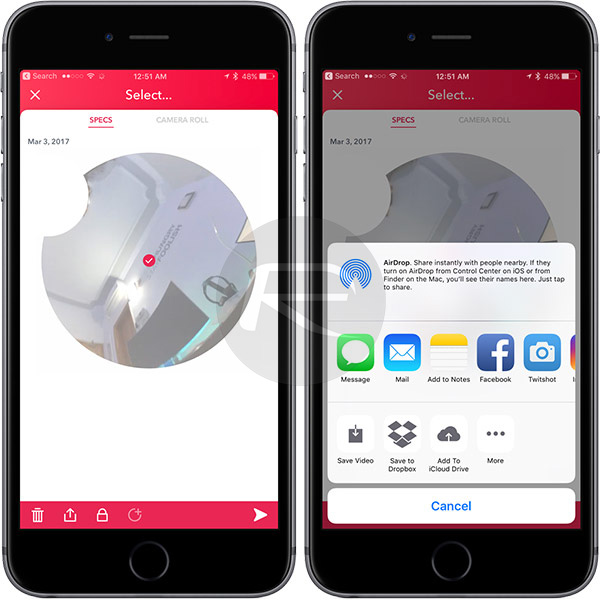
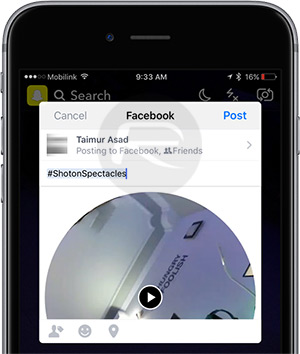
Step 6: From that Share Sheet, you can now simply select Facebook as the chosen sharing option. This will instantly catapult you through the process of sharing the captured Spectacles video to Facebook, allowing you to add a status or some text to that post. When happy, tap the Post option in the top-right corner and watch as your Facebook friends are delighted by your creation.
That wasn’t so complicated now was it? Now that you know how to share your Spectacles videos to the largest social networking site, and are wondering where does that leave Instagram users? We have that covered as well, you can check out our guide on that here: How To Use Snapchat Spectacles With Instagram.
You might also like to check out:
- Snap Starts Selling Spectacles Online, But There’s A Catch
- How To Sideload / Install Kodi On Apple TV 4
- WhatsApp / WhatsPad++ On iPad And iOS 10 Without Jailbreak, Here’s How To Install It
- Download MovieBox On iOS 10 / 10.2.1 / 10.3 Without Jailbreak
- Windows 10 Product Key And Activation: How To Find It And How It Works
You can follow us on Twitter, add us to your circle on Google+ or like our Facebook page to keep yourself updated on all the latest from Microsoft, Google, Apple and the Web.
