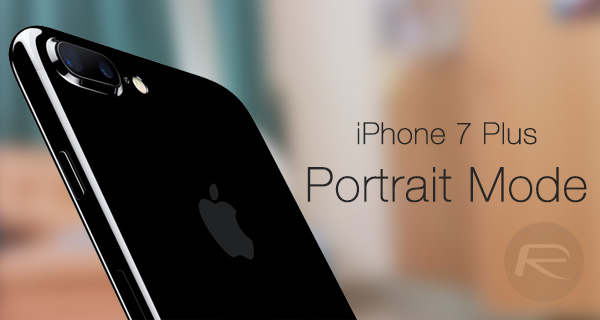
Here’s a guide on how to use iOS 10.1 Portrait mode with iPhone 7 Plus for taking bokeh depth effect photo shots.
If you’re lucky enough to have access to an iPhone 7 Plus with dual-lens camera system, as well as the latest iOS 10.1 firmware running on the said device, then you have all of the ingredients necessary to use and interact with the new Portrait mode that makes the iPhone 7 Plus such an appealing piece of hardware.
The technology behind what Apple is achieving from a software perspective may be extremely fascinating and complex, but thankfully that is predominantly abstracted away from the user. In order to let iPhone 7 Plus owners get up and running in as short a time as possible, we’re going to take a look at how to use the new Portrait mode feature in iOS 10.1 to get the best results with bokeh depth effects.
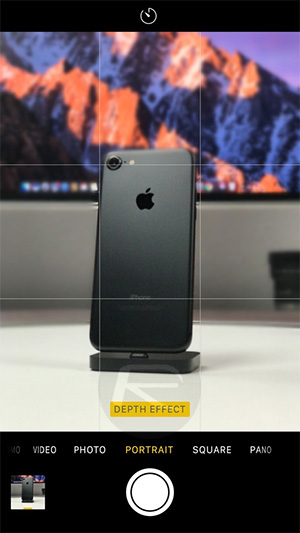
Step 1: It probably won’t surprise you that taking advantage of the new Portrait mode within iOS 10.1 starts in the stock Camera app. Launch the Camera app on the iPhone 7 Plus to begin.
Step 2: If you’re already familiar with iOS 10, and how the Camera app works, then you’ll know that you can access different camera modes by swiping left or right on the view finder. On the iPhone 7 Plus, iOS 10.1 introduces a new mode called Portrait, which is accessible just like the other modes, such as Square, Video and Pano. Swipe through the modes until you land on Portrait.
Step 3: You are now within the new Portrait camera mode, which is essentially what enables photos to be captured with the new depth-of-field or bokeh effects in place. The new mode actually makes use of the new telephoto lens in the dual-lens camera system on iPhone 7 Plus, so keep that in mind when trying to focus on the object that you want to be the main focus of the photograph as that object may appear closer than it actually is.
Step 4: Keeping the above in mind, move the camera away from the focus object until you hit what we would call the “sweet spot”, which will be indicated by the bokeh effect being shown in real-time in the view finder, as well as a new interface sign that shows “DEPTH EFFECT” meaning the new feature is in play.
Step 5: It’s then a case of capturing the image when you’re happy with what you actually see on the view finder, and then sitting back and enjoying the image with the stunning depth-of-field effect applied to it. That said, you may have to hold your phone slightly more stable than usual till the photo is captured.
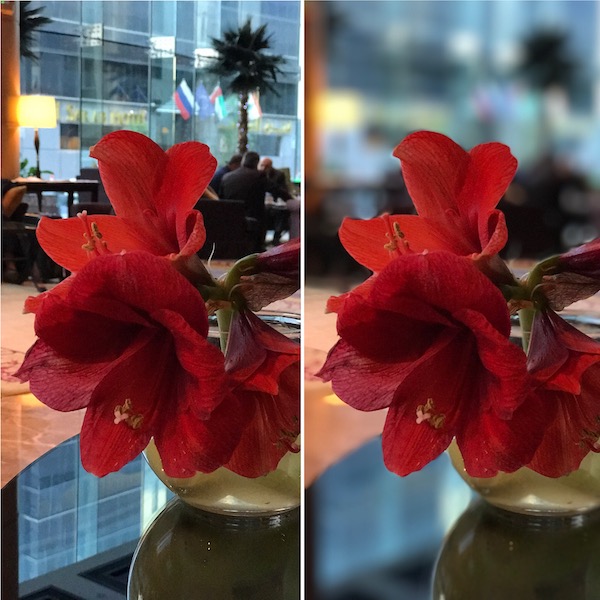
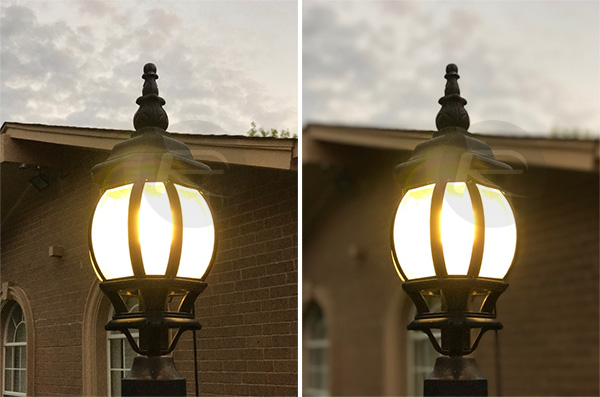
Non-Portrait mode (left) vs Portrait mode (right)
As with a lot of features, it’s even possible to play around a little bit with the positioning of the camera to create a deeper depth-of-field effect, as shown in some of the other examples below.
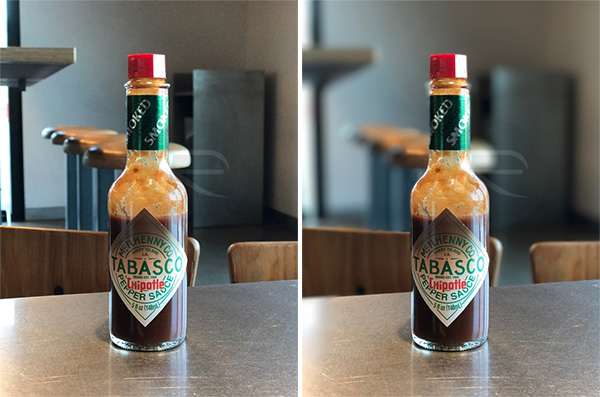
The more you close in on the subject, the more dramatic the background blur will be, but make sure that your subject is well lit, and that the backgrounds are not over exposed.
The feature is actually pretty easy to get to grips with once you take a few shots in different conditions.
You may also like to check out:
- Get iPhone 7 Plus Portrait Mode On iPhone 7 Or Older Devices, Here’s How
- Download iOS 10.1 IPSW Links For iPhone And iPad [Final Version]
- Jailbreak iOS 10 / 10.1 / 10.0.2 / 10.0.3 For iPhone, iPad, iPod touch [Latest Status Update]
- Download iOS 10, 10.1, 10.0.2, 10.0.3 Links & Install On iPhone 7, 6s, 6, Plus, SE, 5s, 5c, 5, iPad, iPod [Tutorial]
You can follow us on Twitter, add us to your circle on Google+ or like our Facebook page to keep yourself updated on all the latest from Microsoft, Google, Apple and the Web.
