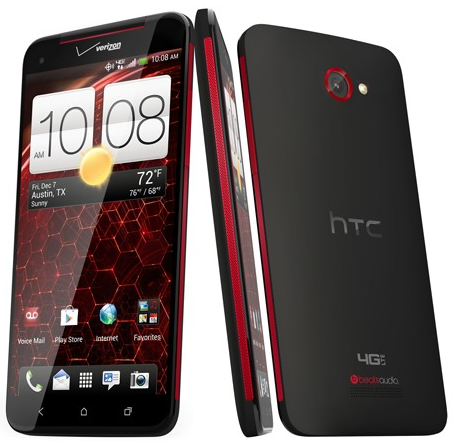
The Droid DNA is a monster of a phone that successfully raises the bar for manufacturers looking to release a new flagship device. When it comes to sheer horsepower, the mighty Android from HTC simply blows away a lot of competition – all the way from its mind blowing high-res screen, to the CPU that it employs, to the sensors and ergonomics that it carries.
The smartphone speaks class, and it was impossible that it won’t have piqued the interest of all the developers out there. Owing to that fact, the phone got root and custom recovery et al, all before the device was actually available. We even brought you a guide on how to gain root on HTC Droid DNA, but that’s not the point right now. As it turns out, the device’s bootloader, which is essential to all the modding that you want to apply, cannot be unlocked now through HTC’s official tool.

It came as a surprise of sorts that the phone, which was previously easily unlockable through HTCdev.com, was taken off the list of supported devices by Verizon just before retail availability. That, however, never put the developer community off, and famous Android developer Justin Case has released a softmod that will work around that for you, making your phone once again vulnerable to the same official tool that previously supported it.
Acknowledgement
The whole concept and set of instructions provided are credited to Justin Case, and Android Police, where the guide was initially published, and whose exclusive property it remains. With due credit to them, we lay down these instructions and related requirements for the benefit of our readers.
You should also remember that this process involves some serious modifications to your phone – ones that can render the device absolutely bricked (with no hope of recovery) if not followed to the letter. Do read through the whole guide first before doing anything. We will not take any responsibility if something goes wrong. You have been warned!
Requirements
- backup.ab
- DNA_TeamAndIRC.zip
- Windows/Linux PC with ABD for ICS or above configured.
- Minimum 1GB of free space in your Droid DNA’s internal memory.
- At least 50% charge on your phone’s battery (full is recommended).
- Patience and ability to follow instructions as they are given.
You can grab all the needed files from the source link at the footer of this post.
Procedure
Step 1: Download both the files mentioned above. Extract the contents of DNA_TeamAndIRC.zip, and place the runme.sh, CIDGen.apk and backup.ab files in the same directory where you have ADB installed.
Step 2: Launch a command prompt or terminal instance, and run the following command:
adb install CIDGen.apk
Step 3: Launch CIDGen on your phone, follow the instructions on screen, and verify the existence of CIDBLOCK.img in the root of your Droid DNA’s SD card/internal memory using this command:
adb shell ls -l /sdcard/CIDBLOCK.img
Step 4: Proceed only if CIDBLOCK.img exists; otherwise, just run the app again and try verification once more. Once the file has been verified, run these in terminal or CMD:
adb push runme.sh /data/local/tmp/

adb shell chmod 755 /data/local/tmp/runme.sh

adb shell /data/local/tmp/runme.sh
Step 5: Open a second terminal or command prompt instance, and restore the modified backup using the command below. Do note that the first window will enter into an infinite loop, and throw various error messages. Just leave them as they are for now, do not get alarmed.
adb restore backup.ab
Step 6: Allow the modified backup to restore on your phone. Once that is complete, stop the first command prompt by simply closing the window (this will kill the runme.sh script).
Step 7: In the second command prompt window that you had opened, run the following set of commands. Justin warns that any interruption at this point – reboot, disconnection from PC, power off et al – will permanently brick your device.
adb shell rm /data/data/com.htc.usage/files/exploit/*

adb shell mv /data/DxDrm /data/DxDrm_org

adb shell mkdir /data/DxDrm

adb shell ln -s /dev/block/mmcblk0p5 /data/DxDrm/DxSecureDB

adb reboot

adb wait-for-device
Step 8: At this point, you’ll need to run the runme.sh script again. Command is same as before, and will put it in an endless loop as well:
adb shell /data/local/tmp/runme.sh
Step 9: Again, launch another command prompt/terminal window, and restore the modified backup once again, just like we did in step 5:
adb restore backup.ab
Step 10: Once it’s restored again, terminate the runme.sh exploit by closing the previous window, and run these commands:
adb shell mv /data/DxDrm /data/DxDrm_trash

adb shell dd if=/sdcard/CIDBLOCK.img of=/dev/block/mmcblk0p5

adb reboot
There you have it. After this reboot, you have essentially changed your Droid DNA’s carrier information, and it can once again be unlocked through HTCDev.com.
A huge thanks to Justin Case and Android Police for these instructions. Do check out the source link below for details and any comments/concerns that you may have.
(source AndroidPolice)
You can follow us on Twitter, add us to your circle on Google+ or like our Facebook page to keep yourself updated on all the latest from Microsoft, Google, Apple and the web.

