As we all know by now, the iOS 9.3.3 jailbreak tool has been released to the public by the ever productive Pangu Team, meaning that all of 64-bit iPhone, iPad and iPod touch devices running iOS 9.3.3-9.2 firmwares can be jailbroken.
If you’ve already taken the decision to liberate the device from Apple’s walled garden, but for one reason or another have decided that the jailbreak really isn’t for you, then it is, of course, possible to remove it from the device altogether and get back to a clean stock version of iOS.
Saurik’s Cydia Eraser used to make this really simple to do, but its current lack of support for iOS 9.3.x means that we have to fall back to older, more rudimentary methods, and yes, that means going back to the Mac/PC and iTunes combination for restoring the firmware. Here we’ll detail on how to go about removing the Pangu/PP jailbreak from your iPhone, iPad or iPod touch device the right way. Make sure you have a backup saved to iCloud or iTunes before going ahead with this. Ready?
Step 1: Get iOS 9.3.3 firmware file for your device from here: Download iOS 9.3.3 IPSW For iPhone And iPad [Final Version].
Step 2: Next, disable Find My iPhone on your jailbroken iPhone, iPad or iPod touch device from Settings > iCloud > Find My iPhone and then connect the device to your PC or Mac via USB.
Step 3: The next stage in the process is to put your device into either Recovery Mode or DFU Mode. This is a key step, because for some reason, iTunes restore won’t work on the jailbroken device if you don’t put your device into either Recovery or DFU Mode first.
To put your device in the Recovery Mode, ensure that the latest version of iTunes installed on your computer is open, and the device is connected, before pressing and holding the Home button and Power buttons together until an Apple logo appears followed by an iTunes and Lightning cable logo.
For DFU Mode, when the device is connected to computer and iTunes is open, hold down both Power and Home/Touch ID buttons on the device for 10 seconds. Release the Power button but continue holding the Home/Touch ID button until the device enters DFU mode.
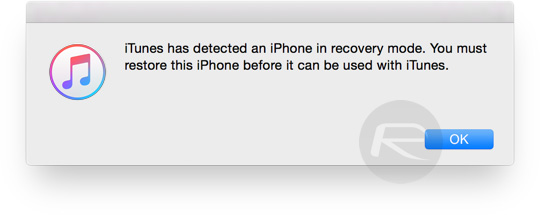
Step 4: iTunes prompt, as shown below, should confirm when the device has successfully entered Recovery Mode.
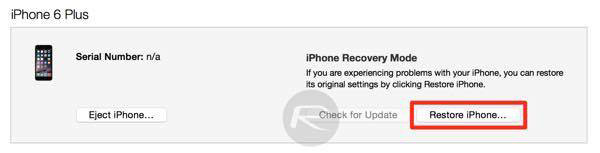
Step 5: Now from the iTunes interface, hold the Option key on the Mac, or the SHIFT key on a Windows machine, and then press the “Restore iPhone…” button, as shown in the screenshot below. This will result in a prompt asking you to select the firmware file to restore to. Select the firmware you downloaded in Step 1 and let iTunes restore that firmware onto the device to provide a fresh, clean install of iOS 9.3.3.
When completed, iTunes will show a new screen welcoming you to the newly restored iPhone or iPad.
And, as they say, that’s all she wrote. The iPhone, iPad or iPod touch in question will now be running a fresh, clean install of Apple’s latest firmware, with no sign of the previous jailbreak in sight. Of course, that means that there will be no ability to run Cydia or install packages that aren’t otherwise accessible via Apple’s official App Store. It does however mean that the device is still capable of being jailbroken once again if the urge takes over.
You may also like to check out:
- Jailbreak iOS 9.3.3, 9.3.2, More With Pangu On iPhone And iPad [Updated]
- Fix iOS 9.3.3 Jailbreak Errors: Cydia Crashes, FaceTime Not Working, More [FAQs And Guide]
- iOS 9.3.3 “PPJailbreak Could Not Be Installed At This Time” Error When Jailbreaking Via Safari
- You Can Downgrade iOS 9.3.3 Right Now While Apple Is Still Signing The Older Firmware
You can follow us on Twitter, add us to your circle on Google+ or like our Facebook page to keep yourself updated on all the latest from Microsoft, Google, Apple and the Web.
