If you have ever used a smartphone, a tablet, or a branded PC, you must be familiar with the term “bloatware”. Essentially, the term is used to denote those software and applications that the manufacturer of your hardware has deemed necessary to include with the native operating system, often packaged as free versions of various apps. Some people really find this helpful, as they get out-of-box solutions for a lot of scenarios, but most of the advanced users would advise you against that, because truth be told, these “free” apps are usually promotion-ware that the manufacturer has only included to market the work of its partners, thereby making money off of them. Why bloatware is specifically bad is that it slows your computer or phone down considerably, and in other instances, may take up valuable storage space (which is a real concern for most smartphones).
In Android, almost all stock configurations of all devices (other than the Nexus ones) come loaded with such apps. Usually, the manufacturer included bloatware is resident in system/app partition, thereby making it impossible to get rid of it with ease. One option might be to use an app like root uninstaller, but that has a catch; your device needs to be rooted first. If there’s no root available, or if you don’t want to go down that road, you’re pretty much out of luck there, too. For such cases, and the ease of many others, XDA member broadways has come up with a recovery-flashable ZIP that can remove any APK that you want from the system/app partition. What’s so special, you may ask? The mod works with stock recovery, without requiring root!
The ZIP file that you will use for this purpose was originally written for Samsung Galaxy Y, and for that reason, will work out-of-the-box only for stock ROMs of that phone. For all others, you will want to follow the steps highlighted below to tailor the ZIP according to your needs.
Before we begin, do remember that the system/app partition on Android houses all the critical components of your device, that are required for it to function properly. Before you decide to remove anything, make sure you know what you’re doing.
The process can be divided into two steps, for the sake of ease.
Modifying the Update Script
Step 1: Download the bloatkill.zip file from the source link below, and place it at a convenient location on your computer. Do not unzip the file.
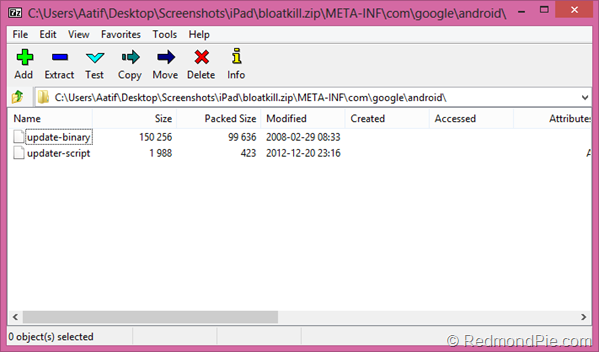
Step 2: Open the file with an archiving tool, like 7Zip or WinRAR. Within the archive, go to META-INF/com/google/android/

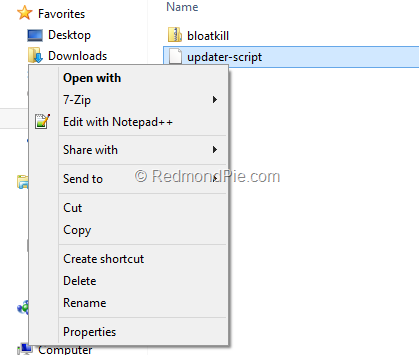
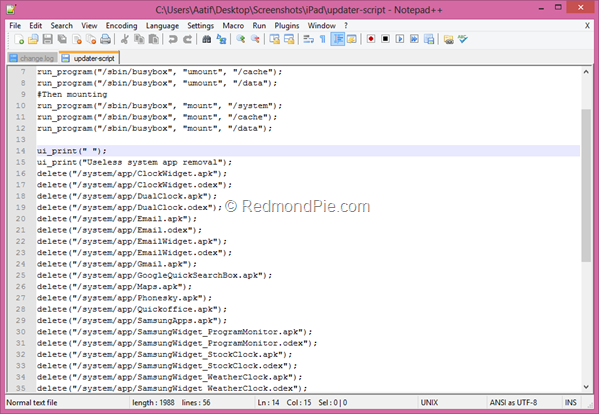
Step 3: Extract the file named “updater-script” to your system (only this file, and nothing else), and open it for editing with a text editor (I recommend Notepad++).

Step 4: The second block of commands contains a list of all the APKs that will be removed upon running the script. Simply modify this list to your liking and need, and save the file again using Notepad++.

Step 5: Put the file back in the bloatkill.zip archive, replacing the copy that’s already there. That’s it; you’re done tailoring the script to your need.
Using Bloatkill.zip to delete useless system apps
This is fairly standard. Place the ZIP file at the root of your device’s internal memory/SD card, and reboot the device in recovery. In stock recovery (or even in custom one), select “apply ZIP from SD card” and pick the bloatkill.zip file. Let the script run, and then reboot. That’s it – bloatware system apps have been deleted!
For more details, discussion and downloads, head on to the source link below.
(Source: XDA Developers forum thread)
You can follow us on Twitter, add us to your circle on Google+ or like our Facebook page to keep yourself updated on all the latest from Microsoft, Google, Apple and the web.

