Your iOS-powered iPhone or iPad device is showing wrong time and date? Wondering how to fix it? Well here’s what you need to do in order to fix the issue on affected iPhone, iPad or iPod touch device.
It’s probably not something that you give an awful lot of cognitive time to, or even think about at all, but it is actually very possible for your iPhone or iPad to display incorrect date and time, and therefore causing other problems with apps and services.
It’s not immediately evident, but certain iOS features actually use the system’s date and time to function properly. If the date or time are slightly off, then dependent features can start acting erratically. We’re going to walk you through making sure that you always have the correct date and time on your iOS device, as well as arming you with the knowledge to put it right going forward.
Set date and time automatically by location:
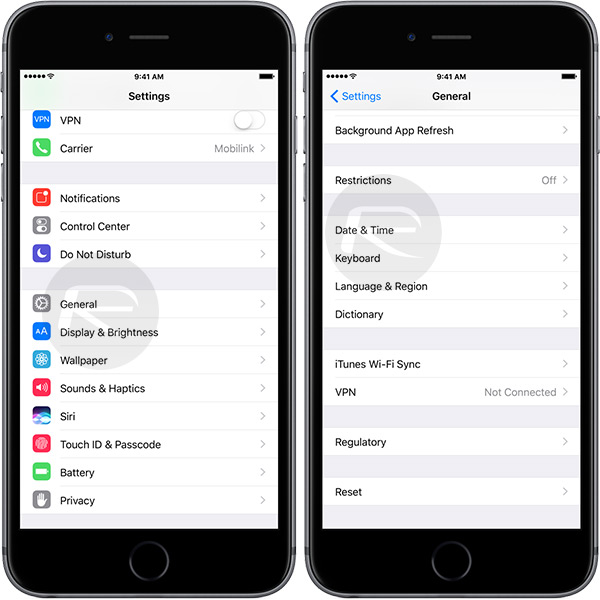
Step 1: On the iPhone or iPad, launch the Settings app and navigate to General. And yes, you guessed it, you now need to be in the Date & Time section. Makes sense really.
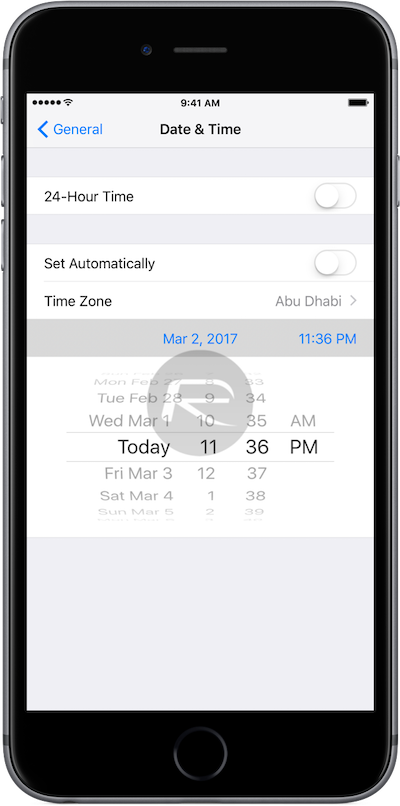
Step 2: You will instantly notice that there is an option called Set Automatically, with a toggle switch next to it. This sounds super easy, right? Well, actually it is. Make sure you toggle that switch to the On position.
If it is already On, but the time is still incorrect, turn the switch to the Off position for a small period of time, and then turn it right back On, as shown in the screenshot below:
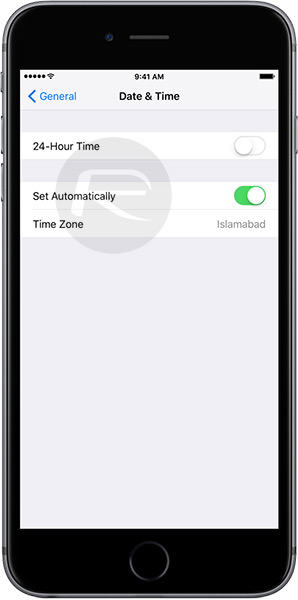
Step 3: Once done, underneath that option you will find is Time Zone, this will of course display the detected time zone where your device is located. This should be correct based on the device’s location, but just make sure that it’s showing the correct location.
Step 4: Now, speaking of automatic time setting and time zones, you really need to make sure that the device is properly configured to allow it to automatically detect where you are in the world and adjust itself accordingly. This of course requires activated Location Services. Back out to the root of the Settings app, navigate to Privacy. From there, make sure you head into the Location Services option.
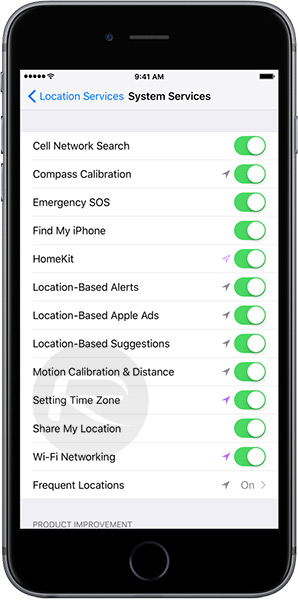
Step 5: You’re now going to need to drill down a little deeper and select System Services. Within this setting there is an option for Setting Time Zone. In order to properly determine location, which in turn allows time zone to be defined for accurate date and time settings, this needs to be toggled to the On position. It will of course also show the location identifier next to it to define when it has been accessed.
Set date and time manually:
Of course, if you simply do not trust automation, or if it’s just not working for you, or you simply prefer to turn off Location Services in order to protect your privacy where possible, then it is of course possible to go old school and set your time and date settings manually.
Step 1: To do this, launch Settings on the device and navigate to General and then Date & Time. Ensure that the Set Automatically toggle is in the Off position.
Step 2: Now, using the provided controls, manually specify the correct date and time.
You may also like to check out:
- Jailbreak iOS 10.2.1 / 10.3 For iPhone And iPad [Latest Status Update]
- Download MovieBox On iOS 10 / 10.2.1 / 10.3 Without Jailbreak
- Windows 10 Product Key And Activation: How To Find It And How It Works
You can follow us on Twitter, add us to your circle on Google+ or like our Facebook page to keep yourself updated on all the latest from Microsoft, Google, Apple and the Web.
