Here’s a step by step tutorial on how to downgrade iOS 10 / 10.0.1 to iOS 9.3.x firmware on your iPhone, iPad or iPod touch device.
If you got excited with the launch and took the opportunity to immediately get your hands on iOS 10, but have subsequently discovered that it is causing issues on your older hardware, such as battery drain or performance related, then you’ll be pleased to know that the problem can be rectified with a downgrade back to an older firmware release.
Since Apple is still digitally signing iOS 9.3.5, and we bet they might continue doing so for a while given iOS 10 is a major release, it means that anyone who has upgraded to iOS 10 still has the ability to roll that firmware back to iOS 9.
Here in this guide, we’re going to walk you through the complete steps involved in that, but take heed, next time don’t be so impatient installing an update of a major iOS release on the launch day. It’s always better to wait a few days to see if no major issues are reported and update only after it’s known to work well for others.
How To Downgrade iOS 10 to iOS 9:
Step 1: First of all, you’re going to make sure that you’ve upgraded to the latest version of iTunes on your Mac or Windows PC.
Step 2: Download iOS 9.3.5 IPSW file that has been readied by Apple for your specific iPhone, iPad or iPod touch model.
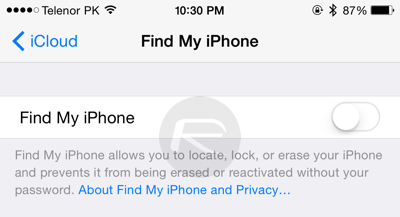
Step 3: Make sure to turn off the Find My iPhone feature on the device. Navigate to Settings > iCloud > Find My iPhone, and make sure that the toggle is moved to the Off position.
Step 4: Connect the iOS device in question to your Mac or PC via the provided cable. and then launch iTunes.
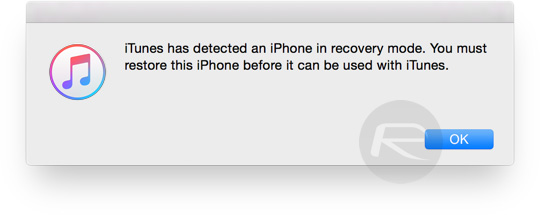
Step 5: The device will now need to be put into DFU mode. To do this, hold down both Power and Home/Touch ID buttons on the device for 10 seconds. Release the Power button but continue holding the Home/Touch ID button until the device enters DFU mode. iTunes will provide an alert informing you that it has discovered a device in Recovery Mode.
Step 6: In the iTunes interface, within the options for the connected device, hold the Option key on the Mac, or the SHIFT key on a Windows machine, and press the “Restore iPhone…” button.
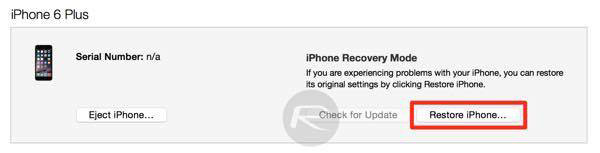
Step 7: When prompted, locate and select the iOS 9.3.5 firmware file that was downloaded as part of step 2 above. iTunes will then go about its business and go through the process of installing a fresh version of iOS 9.3.5 to your device.
Step 8: Do not unplug the device from the computer until iTunes has successfully confirmed the restore and the device has rebooted into the welcome screen.
Once the device has successfully restored back, you can restore your backup on it but beware that only backup made on iOS 9.3.5 or older will work on it. Backups made on iOS 10 will not be restorable on iOS 9.3.5. If you followed our guide for installing iOS 10, you’ll notice that we recommended making backup on iOS 9.3.5 before updating to iOS 10. If you followed our instructions there, you should be good to go now.
You may also like to check out:
- iOS 10 Compatibility For iPhone, iPad, iPod touch Devices
- How To Prepare For iOS 10 Release The Right Way
- Jailbreak iOS 10 / 10.0.1 For iPhone, iPad, iPod touch [Latest Status Update]
- Download iOS 10 / 10.0.1 Links & Install On iPhone 6s, 6, Plus, SE, 5s, 5c, 5, iPad, iPod [Tutorial]
You can follow us on Twitter, add us to your circle on Google+ or like our Facebook page to keep yourself updated on all the latest from Microsoft, Google, Apple and the Web.
