Mark Zuckerberg’s Facebook has been commended over the last twelve months for plying a lot of time and engineering resources into developing the social network experience and adding in some great features. Facebook is continually evolving and growing by adding in new additions that are tested with different demographics in different parts of the world. Most of those features are then adopted into the network full-time. But some features really need a little additional thought, such as the network’s ‘On This Day‘ inclusion that serves up memories from the past. We show you why, and how you can add more control to this feature in a step-by-step guide.
Granted, sometimes it can be extremely heartwarming to wake up in the morning, open up Facebook and be presented with a memory from a beautiful wedding you attended twelve months ago, or a memory allowing you to relive your graduation ceremony, and so on. Some real positive reinforcement right there no? However, memories can also be extremely disheartening and can invoke feelings of sadness if the ‘On This Day’ feature brings up something that was dripping in negativity such as a breakup or divorce that we’d rather forget. Thankfully, Facebook allows users to finely tune just what memories the feature serves up.

Before beginning, you need to have access to a computer with a working Internet connection, since this only works via the desktop web version of Facebook, not mobile.
Step 1: First and foremost, you’ll need to head over to the correct page in Facebook. You can simply point your web browser to facebook.com/onthisday or alternatively, from the News Feed, simply click the ‘On This Day’ link listed under Apps on the left pane.

Note: Facebook tests individual features with certain accounts in certain parts of the world before rolling them out to everyone. If your account is not yet set up for this particular feature, you’ll be presented with a “Sorry, this feature isn’t available” message when you visit the above link.
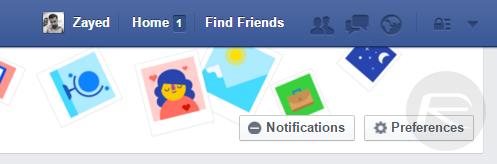
Step 2: If the feature is available to your account then click on the Preferences button to bring up the ‘On This Day Preferences‘ panel that allows the feature to be configured.
Facebook exposes two filter types for users to limit what is displayed by the feature; People and Dates, as can be seen in the screenshot below.
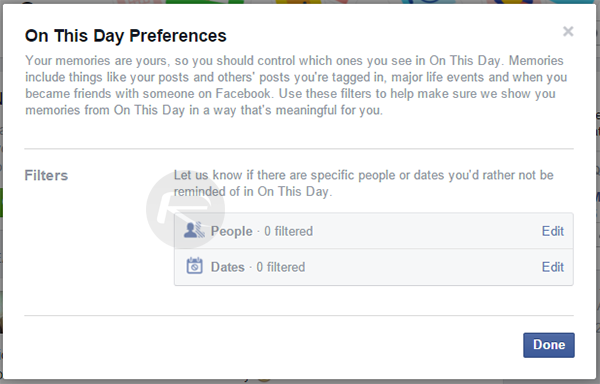
Step 3: To adjust these filters, simply hit the Edit button against the relative filter; People or Dates. Any names added to the People filter section will prevent the feature from displaying historical status updates and posts that include that specific person. So, if you’ve broken up with someone or had a particularly bad past with someone, then you can add them to this list. The same goes for dates. If you know that you were enduring a particularly bad period of your life during a specific set of dates, and you don’t wish to relive those memories, then you can add the dates in this filter.
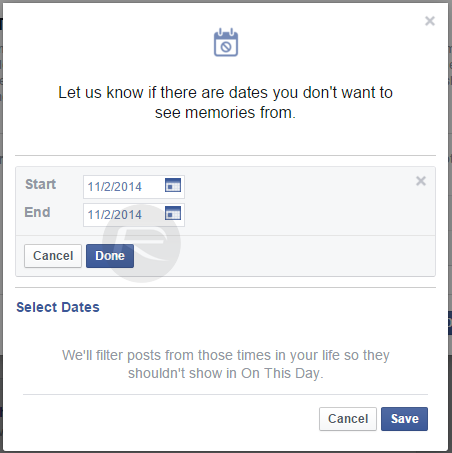
Step 4: Once a date range is selected, hit the Done button. To continue adding dates click ‘Select Dates’, and when all dates are added, simply hit the Save button.
You can follow us on Twitter, add us to your circle on Google+ or like our Facebook page to keep yourself updated on all the latest from Microsoft, Google, Apple and the Web.
