Here’s how to delete Windows.old folder after Windows 10 Anniversary Update and get around 20GB of disk space back on your PC.
You may not know it, but upgrading to Windows 10 Anniversary Update may have actually resulted in you inadvertently causing yourself to lose a fairly substantial amount of your hard disk capacity thanks to the storage of legacy files that are no longer really required by the system. Windows 10 Anniversary Update may be packed full of great new features and impressive improvements, but that doesn’t mean that you want to give up a chunk of your disk space.
Few users actually know that Windows has what is known as the Windows.old folder that essentially saves a copy of the previous version of the operating system when a major update is put in place. This copy, which is stored directly in the Windows.old folder in the primary hard disk partition, is a safeguarding mechanism that is basically there in case something goes catastrophically wrong during the update. The system can then use the files located in Windows.old to automatically roll back to a previously functioning version of Windows 10. Windows 10 also allows users to roll back to an earlier version within a month in case they’re not happy with an updated version of Windows 10, and yes you guessed it, the required files to roll back are kept in the Windows.old folder.
Safeguards are great, but not so great when they end up costing you upward of 15GB-20GB in space on your machine. If everything went okay during the installation, and you have no intention of manually reverting back to pre-Anniversary Update install, then it makes perfect sense to delete the Windows.old folder and reclaim what’s rightfully yours. We’re going to take a look at how to do that the right way.
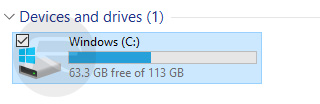
Step 1: First of all, you’re going to need to open up This PC to view information pertaining to the particular machine that you are on.
Step 2: When opened, right-click on the primary hard disk partition where Windows 10 is installed.
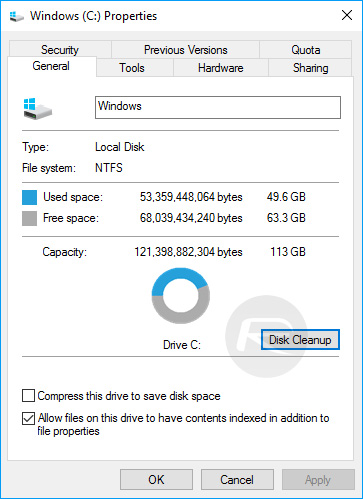
Step 3: Next, click on the Properties option.

Step 4: Select Disk Cleanup from within Properties.
Step 5: Now select Clean up system files.
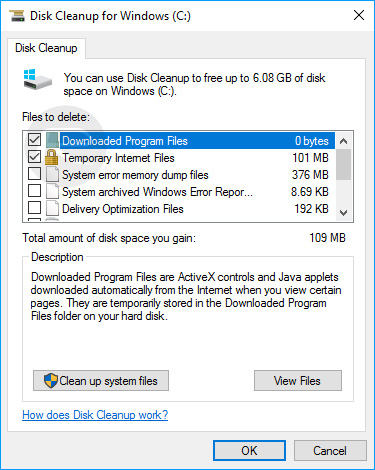
Step 6: When in that section, make sure that Previous Windows installation(s), Temporary Windows installation files, and System error memory dump files are all checked. Click OK to proceed with the process.
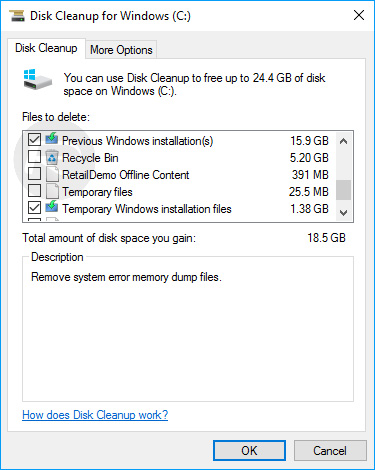
While we have the various options above checked, we are predominantly concerned with the Previous Windows installation(s) option. This is where the “Windows.old” folder actually lives, and that is what will set about the deletion of that entity to free up the required space. However, when combined with the other two options, the whole process should be good for freeing up approximately 20GB of extremely valuable disk space on the computer in question.
You may also like to check out:
- Windows 10 Product Key And Activation: How To Find It And How It Works
- Download Windows 10 Pro ISO File Without Product Key From Microsoft
- Force Upgrade Windows 10 Anniversary Update, Here’s How
- Windows 10 Anniversary Update Install Stuck? Here’s How To Fix It
You can follow us on Twitter, add us to your circle on Google+ or like our Facebook page to keep yourself updated on all the latest from Microsoft, Google, Apple and the Web.
